Tag Archives: Barry M Shocking Pink

OMG Japanese LED Nail Decal Review!

*PRESS SAMPLE*

Hello! I have a really fun product to show you today! 😀

These Japanese LED Nail Decals that have been kindly been sent to me from www.omgnailstrips.com.

omg led nail decal

omg led nail decal

From the OMG website – “The LED light chip is powered by NFC fields given off by most Android phones, Point of Sale Machines, Apple Pay and many other electronics, meaning when in the presence of these NFC fields your nail will light up and blink.”

And OMG are also in the process of designing an App for Android that would allow the nail to light up when you get different types of notifications on your phone. How amazing is that!?

OMG supply two types of led stickers, one specifically for Gel polish which is the chip on it’s own and the set with stickers is for use with regular nail polish.

omg led nail decal

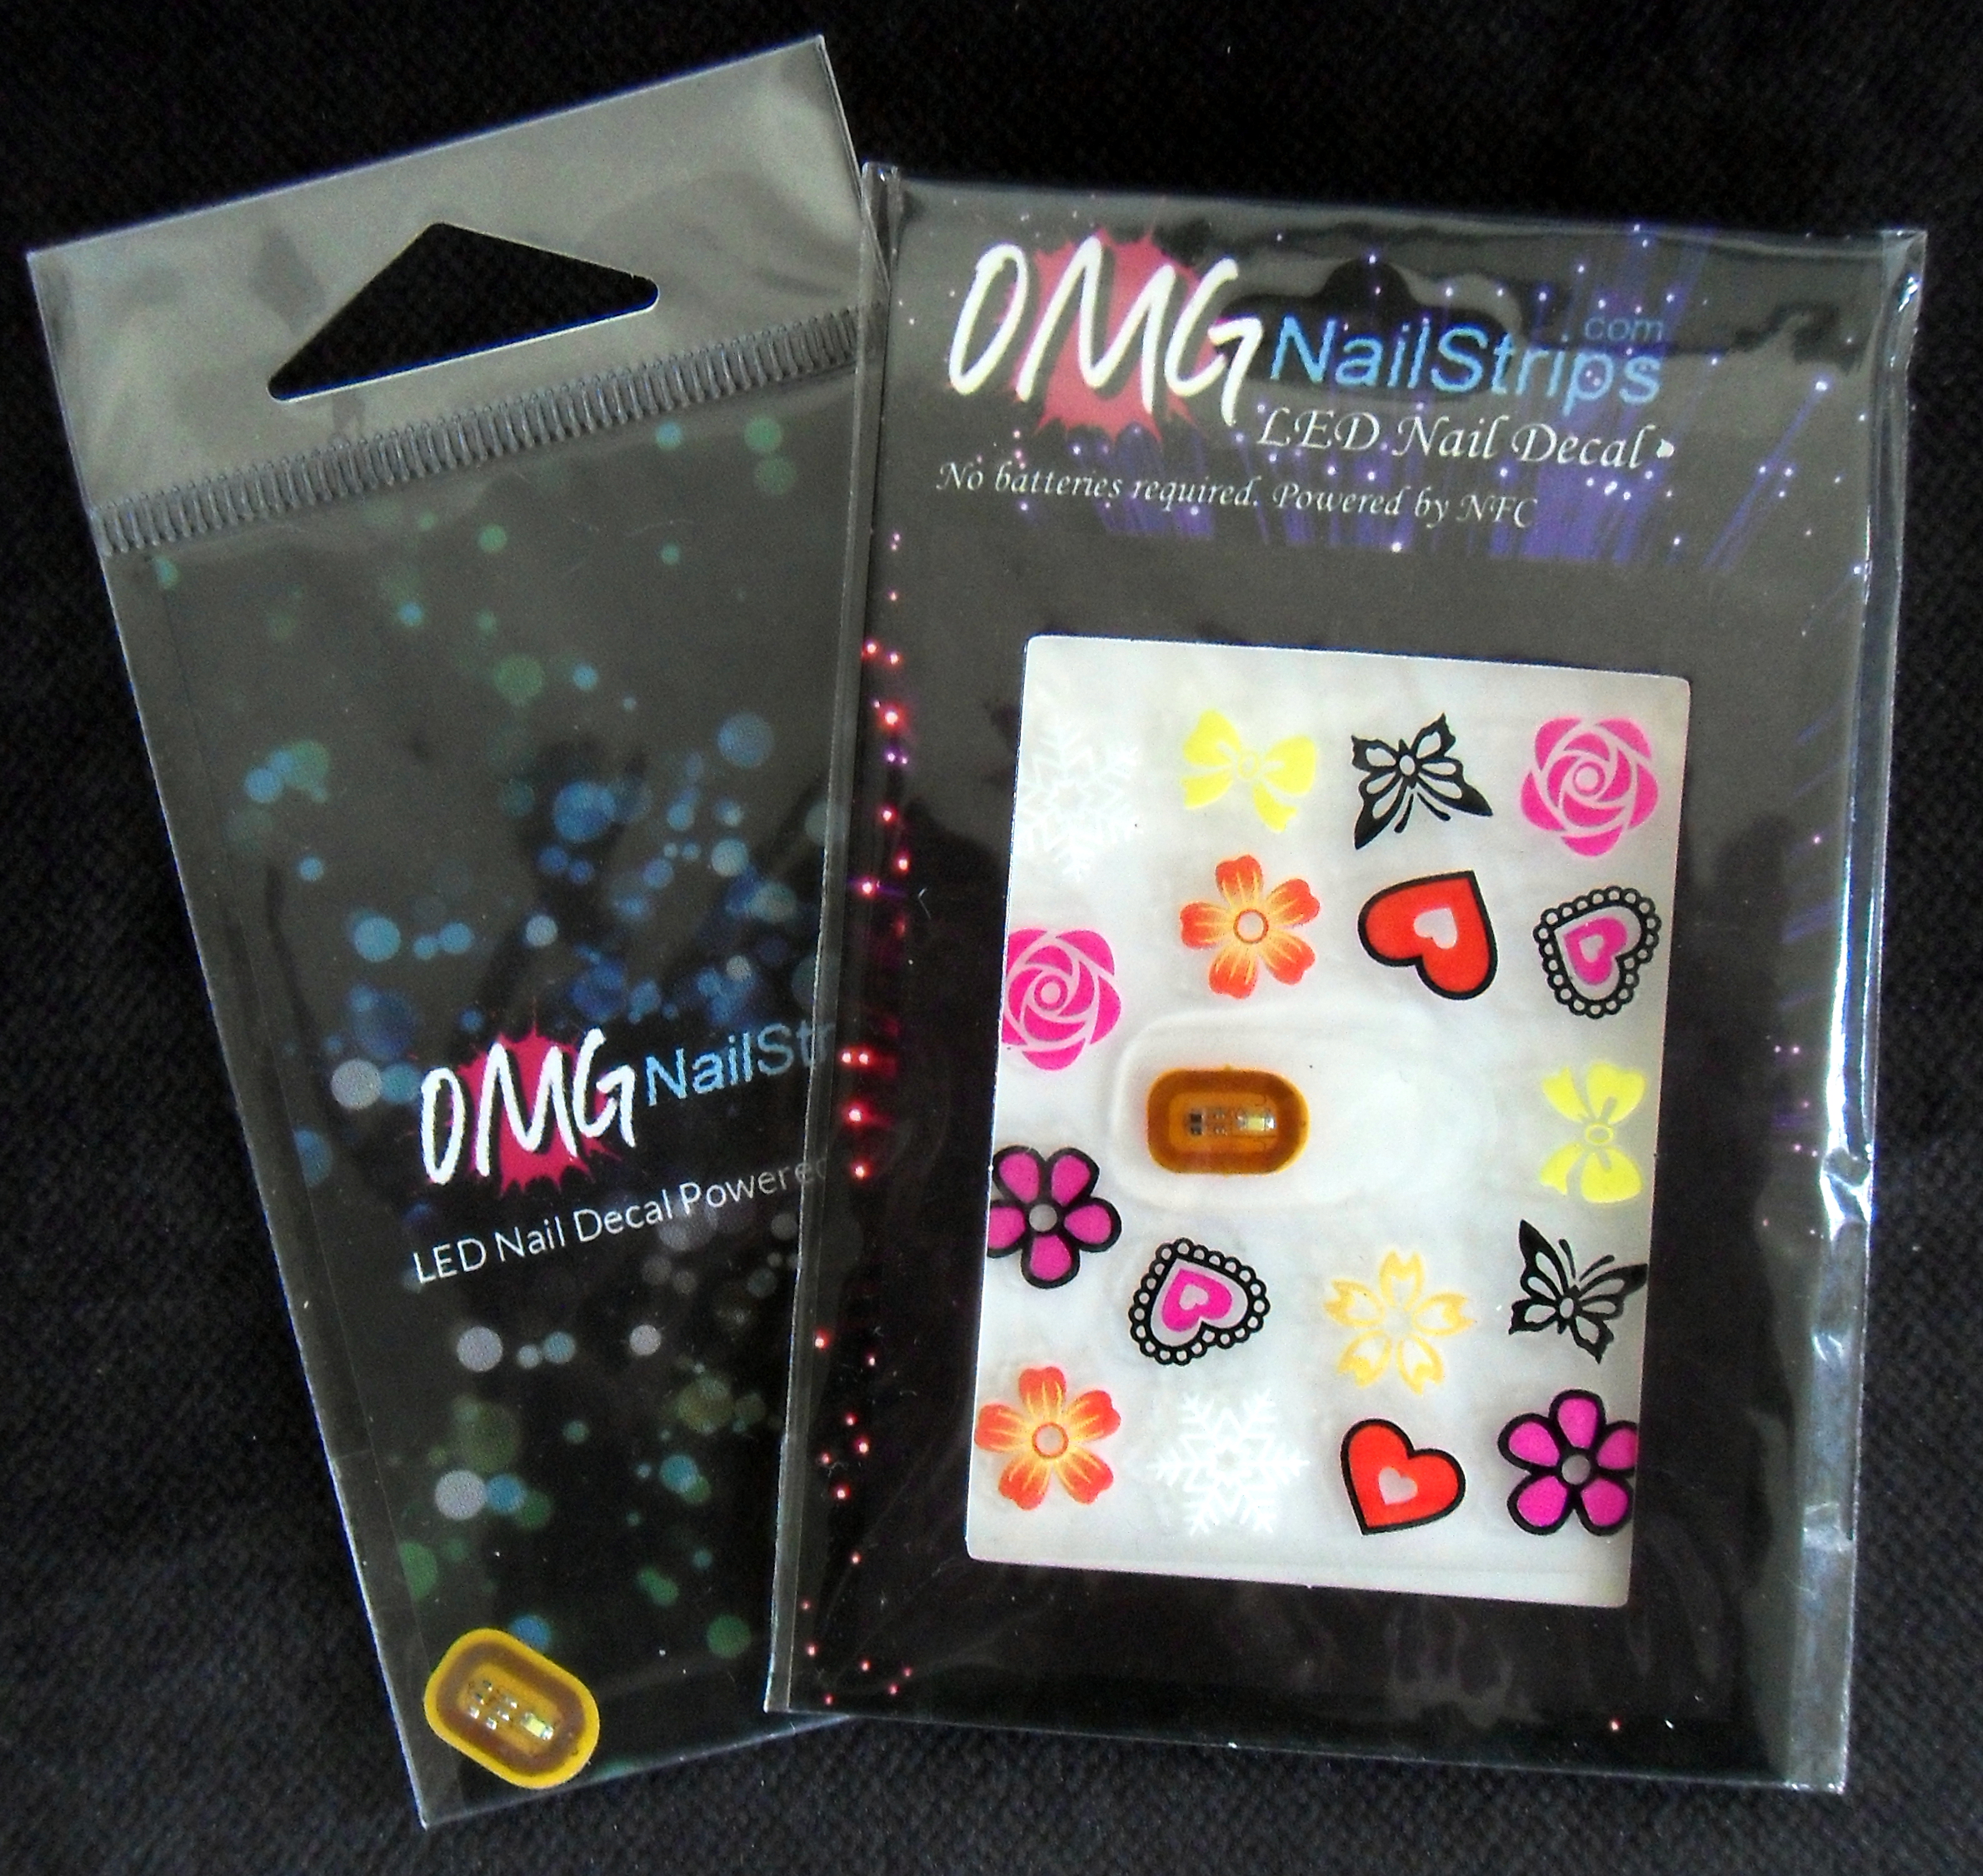
The Decals are $5.99 per pack with free international shipping and are available in White, Green and Blue, for Gel and White, Red and Blue for regular polish!

Both chips I have to show you today are white ones!

Here is a little video (be nice, I don’t do videos often lol) of the chip for Gel polish directly on the back of my phone.

The LEDs for Acrylic and Gel are available Here
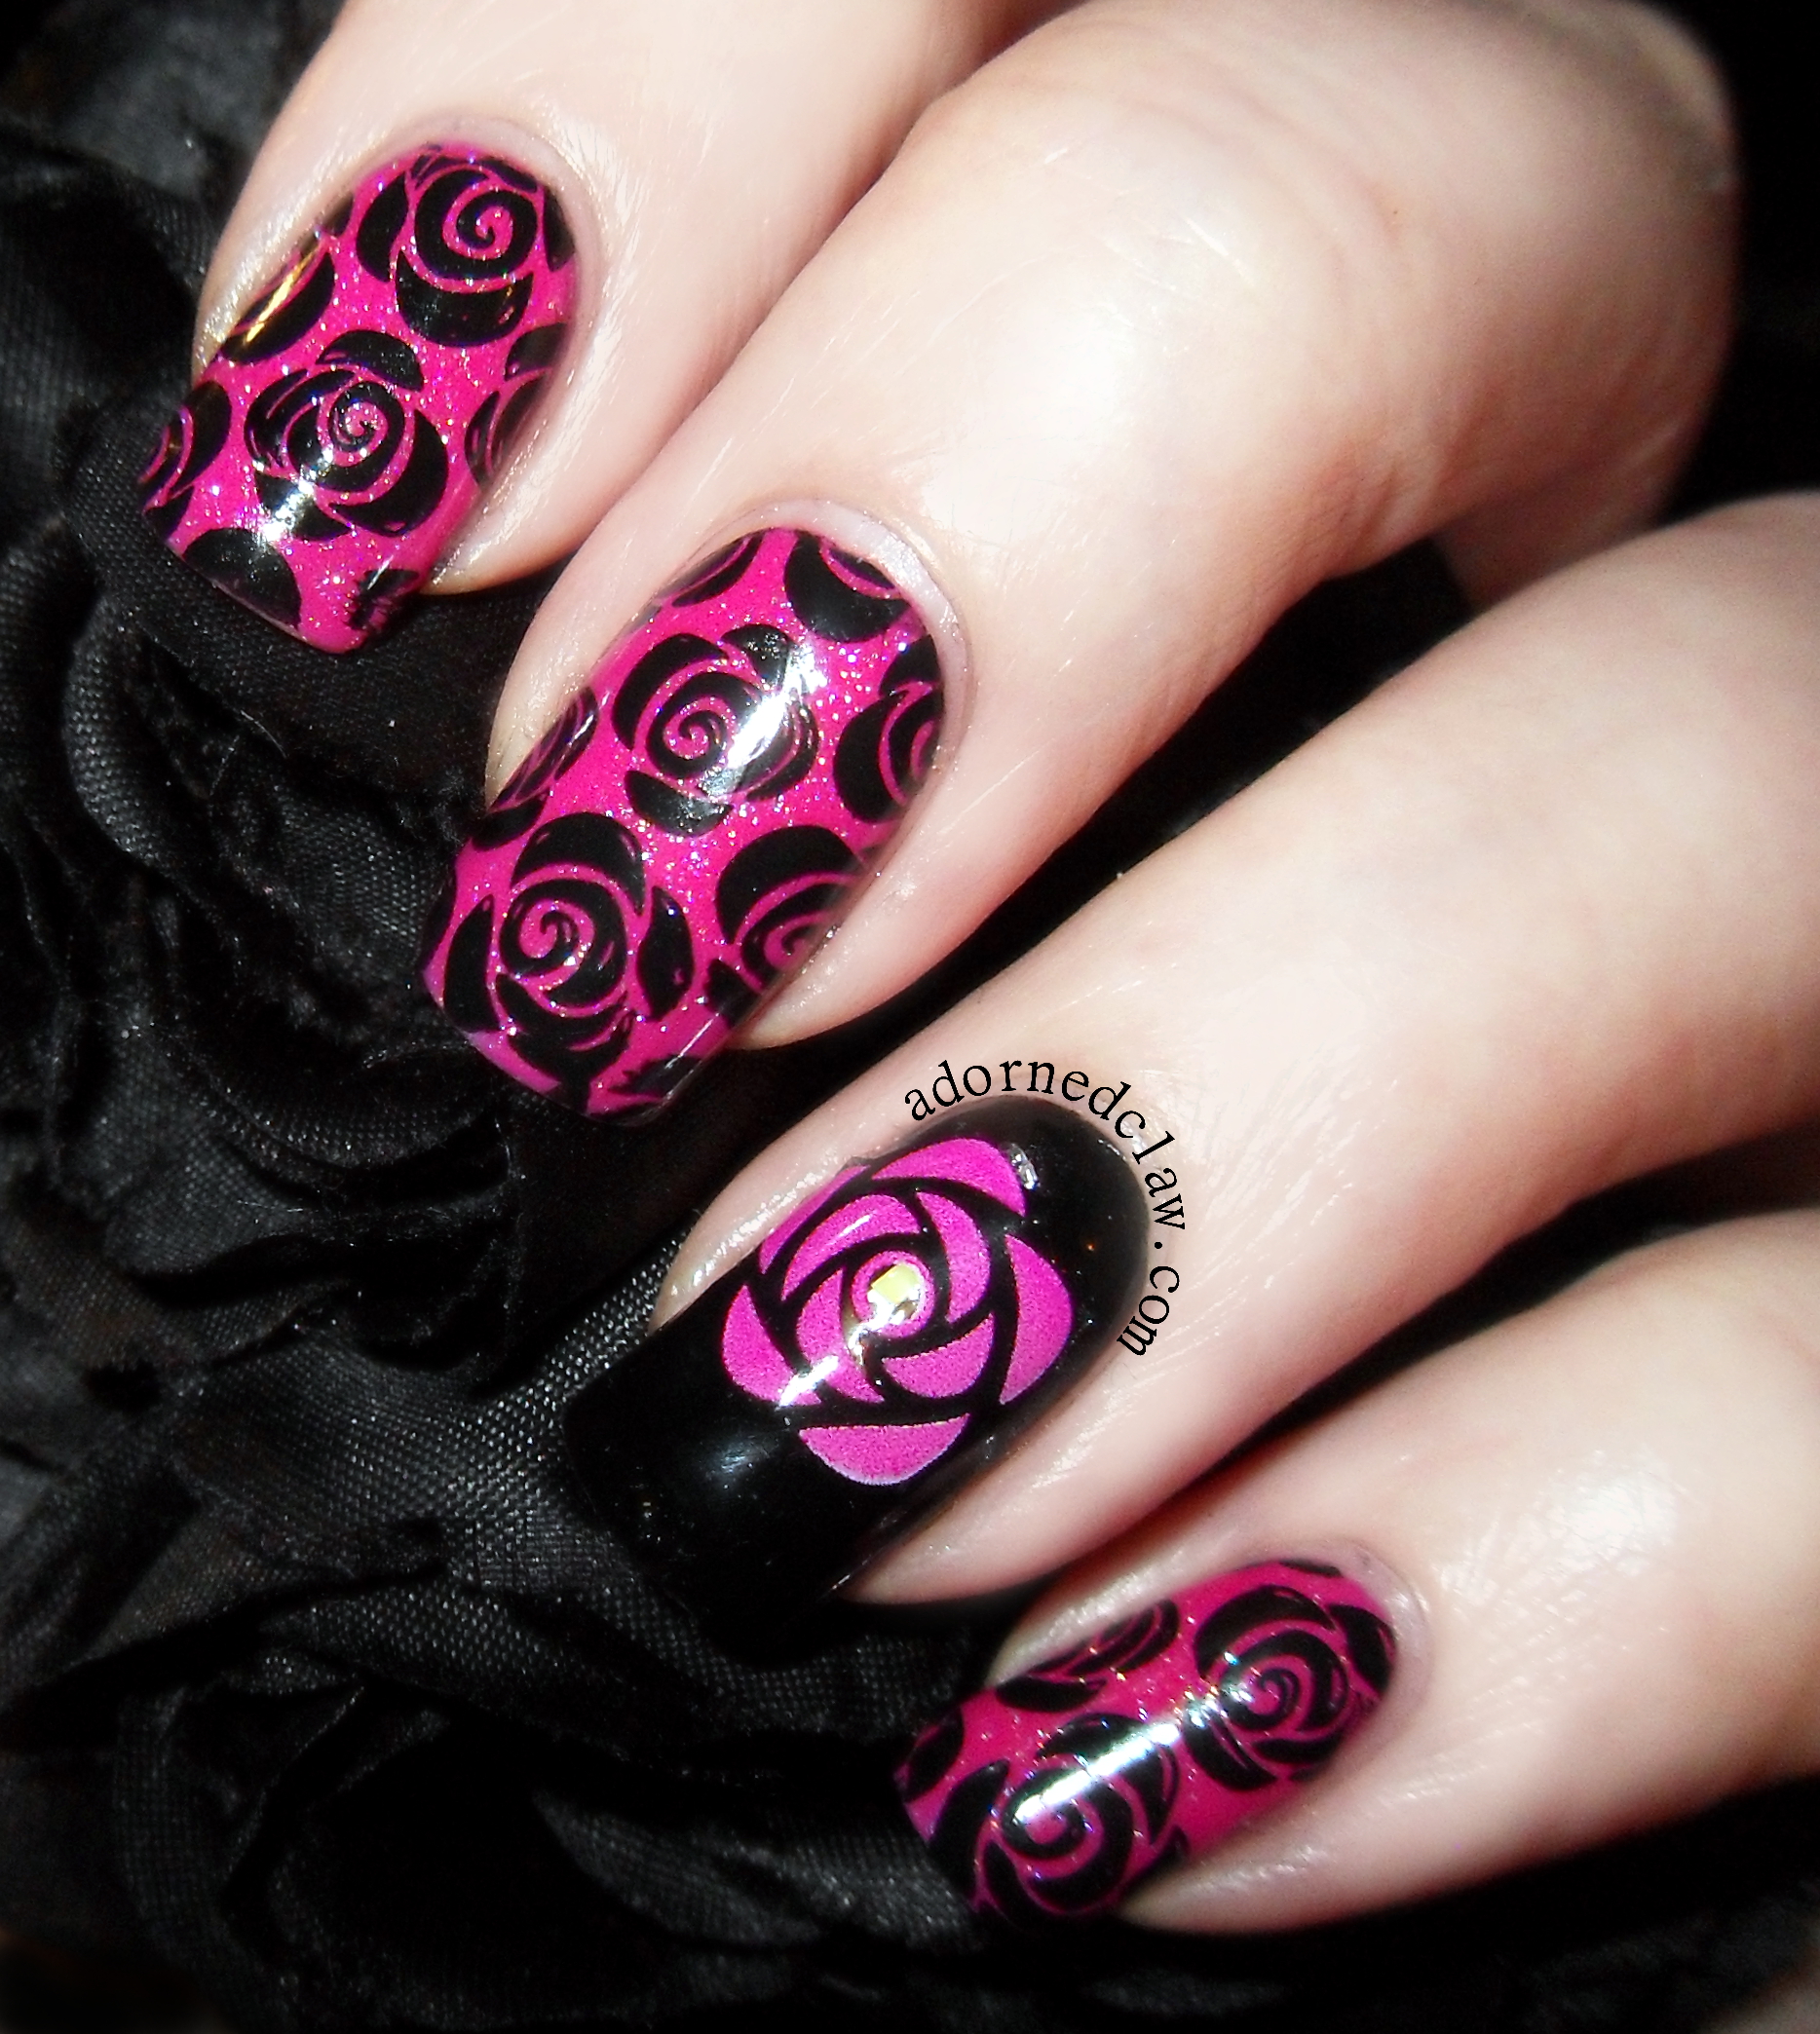
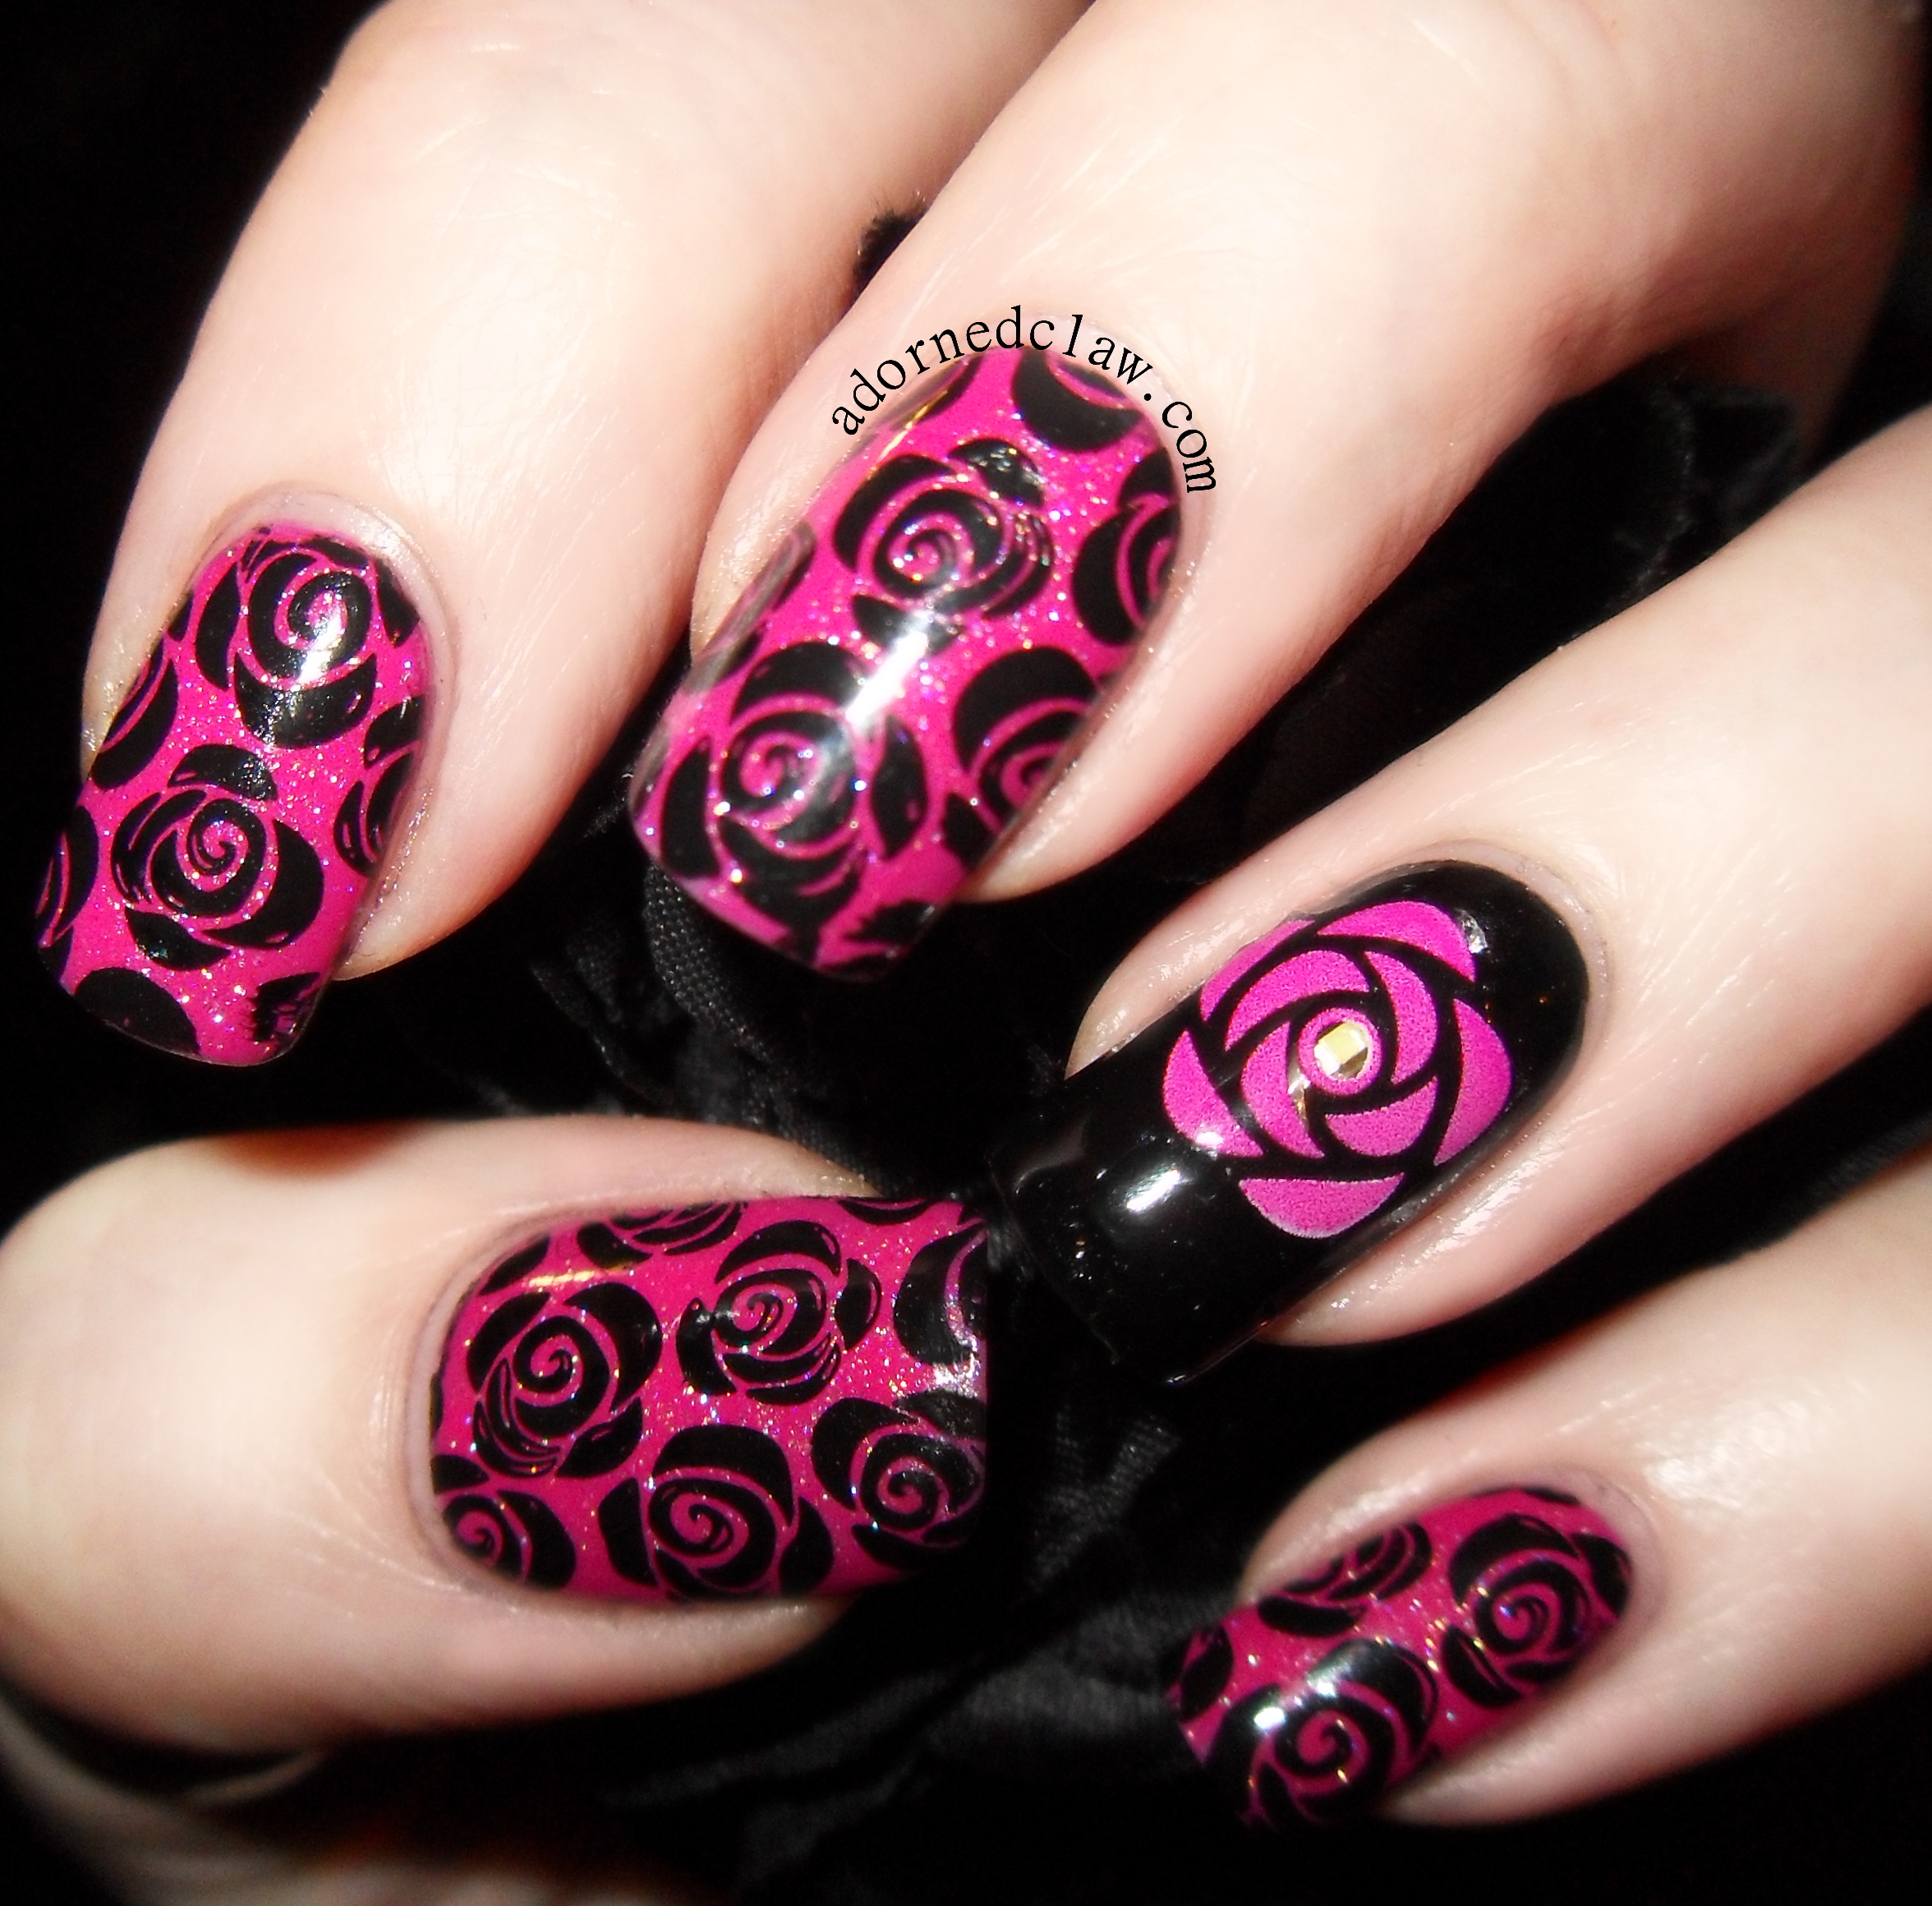
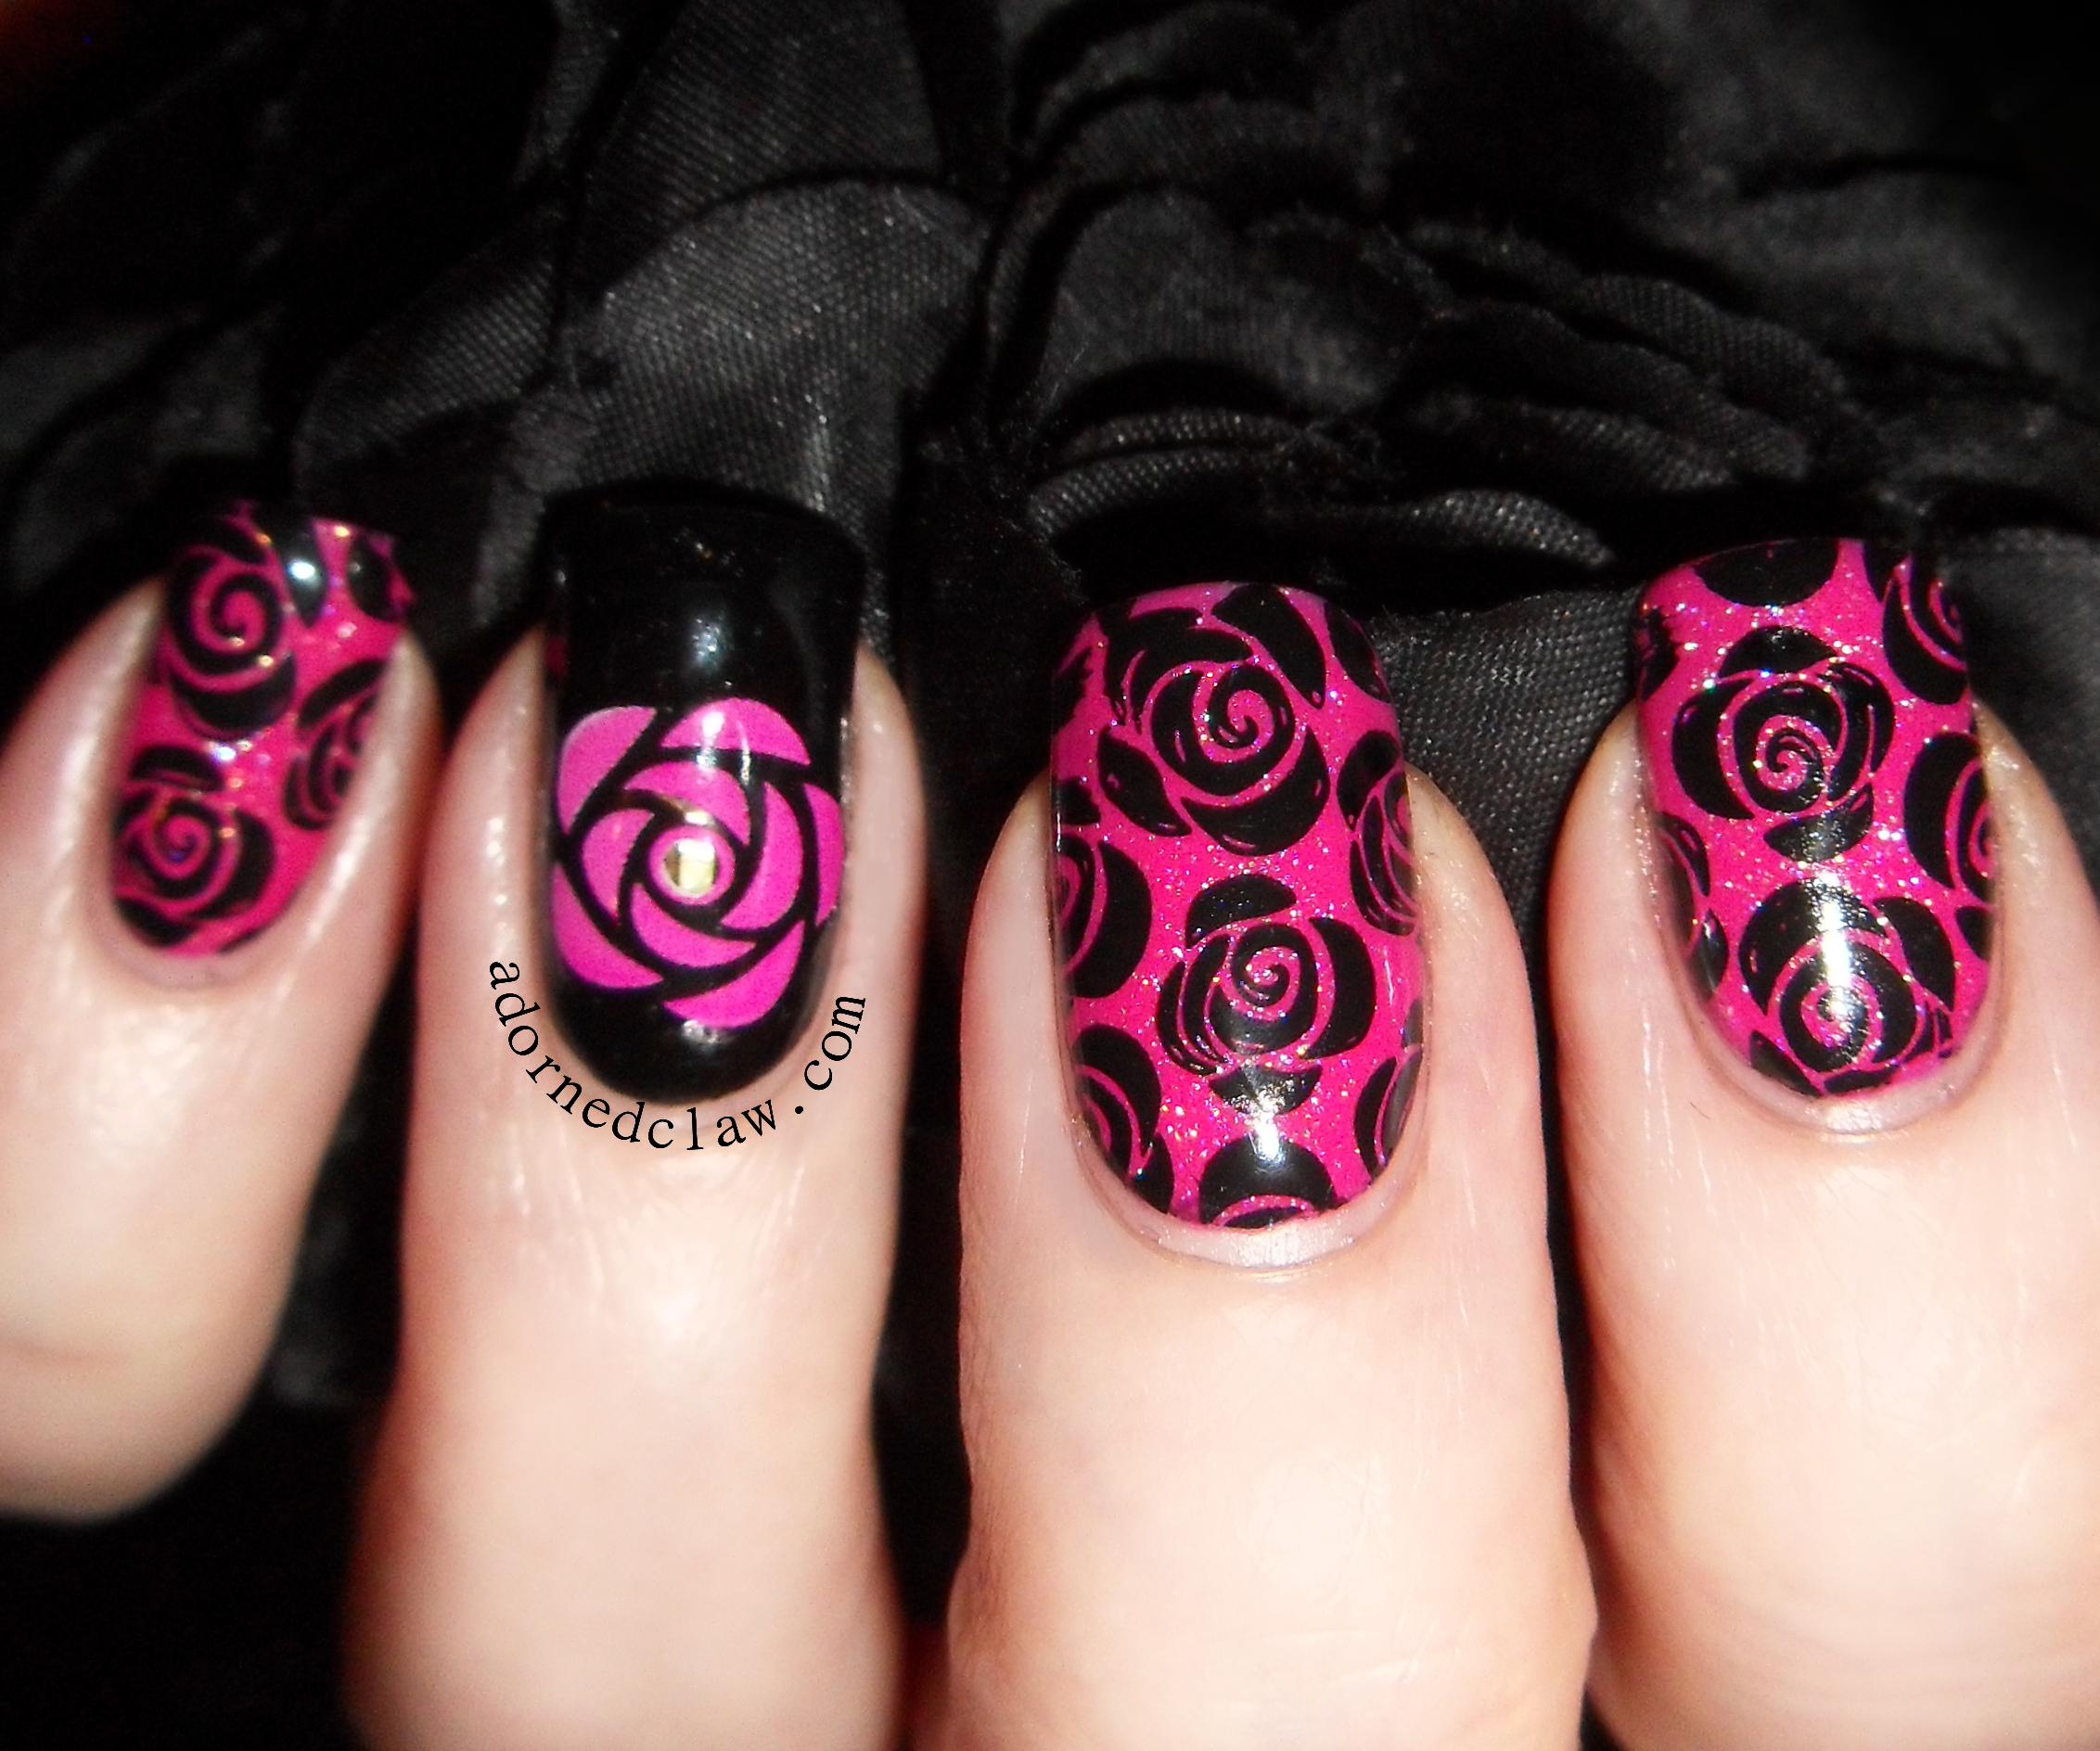
omg led nail decal

Pink Roses

Applying the chip was really simple, the clear part of the decal is really easy to trim to size, I used a couple of coats of black polish to hide the chip, being very careful not to cover the LED.
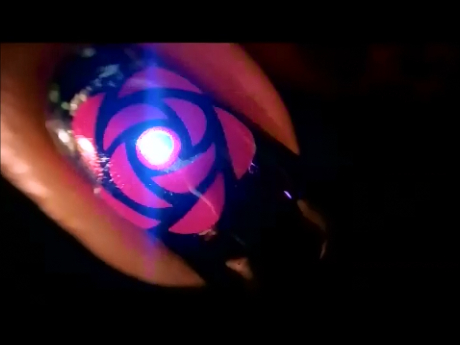
Flash!

Flash!

I decided to use the pink rose accent sticker from the set. I found that the adhesive on the stickers is very strong, so repositioning it is a bit of a challenge.

I used Seche Vite topcoat and I did find that the Accent sticker went a little bit crinkly as the polish dried. I don’t know if a non quick dry topcoat would have the same effect on the accent stickers, unfortunately I don’t have any on hand to try!

Here’s another little video of it in action. This time on my nail 🙂

The decals for using with regular polish are available Here

The other products I used for this look are

  • Barry M – Shocking Pink
  • Butter London – Frilly Knickers
  • Illamasqua – Scorn
  • Moyou – Pro collection XL 07
  • Konad – Special Polish Black
  • Seche Vite Topcoat
omg led decal review

omg led decal review

I found that to get the best and brightest flashes I had to be holding my phone close to where the NFC chip is located. Unfortunately these won’t work with iphones.

Make sure that NFC setting is turned on on your phone or the LED won’t work!

I really do like these LED decals, they are so fun to wear!


Spring Flowers

Hello everyone! 🙂

Spring Flowers Nail Art Using Illamasqua Omen, Barry M Shocking Pink, Color Club Hot Like Lava, Sinful Colors Snow Me White

Spring Flower Nail Art

Today I have some really easy Spring Flower Nails to show you all! I was going to post this cute mani on Friday, but I ended up not having the time!

The polishes I used are

  • Illamasqua – Omen
  • Barry M – Shocking Pink
  • Color Club – Hot Like Lava
  • Sinful Colors – Snow Me White
  • Barry M Nail Art Pen – Silver
Spring Flowers Nail Art Using Illamasqua Omen, Barry M Shocking Pink, Color Club Hot Like Lava, Sinful Colors Snow Me White

Omen, Shocking Pink, Hot Like Lava and Snow Me White

This is the first time I have tried Omen, it’s amazing! So green and sparkly! it dries really quickly to a lovely satin finish too!

For the flowers I used a medium and small dotting tool starting with Snow Me White, I used the medium size dotting tool and placed five dots in a circle, then with the small dotting tool i added the Shocking Pink and a final dot of Hot Like Lava in the middle.

Not that you can really see from the pictures, I added leaves and swirly patterns with a silver nail art pen… But as soon as I added the topcoat it all vanished! 😦

Spring Flowers Nail Art Using Illamasqua Omen, Barry M Shocking Pink, Color Club Hot Like Lava, Sinful Colors Snow Me White

So Green!

I don’t think I have ever experienced vanishing nail art before lol. But I still like this even without the silver!


Pastel Galaxy Ruffian Nails! (almost a disaster)

Purple Pastel Galaxy Ruffian Nail Art

Pastel Purple Galaxy Ruffian Nail Art

I decided to have a try at a pastel pink and purple galaxy mani, I thought it would be nice to try using some “spring time” colours than black lol!

So I sponge my galaxies add my stars and my glitter, tidy up my fingers and add my topcoat. It was quite late so I decided to go to bed and photograph my nails in the morning (hopefully with some sunshine)

The next day (after my second cup of coffee when I was feeling slightly more human) I noticed it…  Epic shrinking, I honestly haven’t seen anything like it! The polish had shrunk round the edge of my nail but not from the free edge oO

The base colour was still exactly where I had applied it and so was the topcoat! The only way I can think of to describe it is like a sandwich without enough filling! I really should have taken a picture!

After staring at it for a while I realized that I could try removing the flappy bits of topcoat and paint round the edges to make a (almost) ruffian mani.

Purple Ruffian Galaxy Nails

Purple Ruffian Galaxy Nails

The polishes I used:

  • Barry M – Blueberry.
  • Sally Hansen – Good To Grape.
  • Barielle Shades – Stardust.
  • Barry M – Shocking Pink.
  • Maybelline – Lilac Charm.
  • Seventeen – Pinking Shear.
  • Sinful Colors – Cinderella.
  • Sally Hansen – Lavender Envy.
  • Illamasqua – Baptiste.
  • Barry M – Pink Flamingo.

I started off with a couple of coats of Blueberry, which is a really pretty pale blue cream.

I added a few drops of Good To Grape, Shocking Pink, Lilac Charm, Pinking Shear and Pink Flamingo onto a plastic box lid (they are great for mixing polish)  I then used a small bit of sponge and some tweezers to dab the polish into my nails.

When that was dry I did the same with Cinderella and Lavender Envy, I applied three iridescent stars to each nail and painted on a little bit of stardust, when it was dry I applied Color Club topcoat.

Purple Ruffian Galaxy Nails

Purple Ruffian Galaxy Nails

Then the shrinky doom happened!

I used a nail art brush and pure acetone to remove the flappy edges of the nail polish, Then using a very tiny brush I used Baptiste to fill the gap! Cleaned up my cuticles and the rescue was complete!

Purple Ruffian Galaxy Nails

Purple Ruffian Galaxy Nails

I think I managed to rescue this reasonably well! I’m just wondering, has anything like this shrinking ever happened to your nails?


Crumpet’s Got Polish Challenge – Valentines Day

Here are my Valentines day nails for todays got polish challenge! I have to say I’m really not into the whole Valentines day thing, I find it all far to commercialized and a bit cheap… But enough of me grumbling lol!

GOT Polish - Valentine's Day

Valentine’s Day Nail Art

I started out by making the little stamped decals using Bundle monster BM-401, for the stamping I used Konad special polish in black.  Then color club ulterior motive for half of the hearts and Maybelline Flash Cosmic with a coat of Barry m shocking pink over the top for the rest.

GOT Polish - Valentine's Day

Valentine’s Day nail art

While I was waiting for my decals to dry I used Sinful Colors Bubbly and Barry m shocking pink to create a sponged gradient, Bubbly is a polish from my unused pile along with the Maybelline glitter polish. Then I stamped with China Glaze Cosmic Dust using Moyou Pro Collection XL plate 04 for the leopard print.  I used topcoat to stick on the decals, and added a few dots of Ulterior motive. then another layer of top coat to even it all out!

GOT polish - Valentine's Day

Valentine’s Day Nails

This didn’t turn out quite how I was expecting! But for pink and girly it’s not that bad….

Remember to have a look at the GOT polish Pinterest page for more Valentine’s Day nail art!


Pink and Purple Cherry Blossom! Moyou Stamped Decal Nail Art

I have been making stamped decals again! 😀 this time I used images from two of my Moyou plates, 01 and 02 from the Suki Collection.

The polishes I used!

  • Barielle Shades – Grape Escape
  • Color Club – Ulterior Motive
  • Revlon – Sweet Revenge (the pink one from the duo)
  • Barry M – Shocking Pink
  • Sally Hansen – Ivory Skull
  • Revlon – Calla Lily
  • Konad Special Polish – Black
  • Color Club – Topcoat
Pink and Purple Cherry Blossom

Pink and Purple Cherry Blossom

I started off by making the flowers, you can find how I made them here.

I used Grape Escape and sponged on a little Ulterior Motive on the tips as the base colour, when that was dry I applied the flowers using the Color Club Topcoat like glue! 😀

When that was all dry,  I applied a couple more coats of topcoat to seal all of my decals in! In some places on my nails there must be at least 6 layers of polish, it feels really thick like Gel! It took ages to dry, about half an hour :/

Cherry Blossom

Cherry Blossom

I really liked making the cherry blossom decals, even tho the tiny flowers where a bit fiddly to paint! The time it took to get them all on my nails was rather a lot longer than I would have liked, then getting them to stick was a pain! I think that it’s because I made them to thick, but I’m going to have to try out some other clear polishes to find the best one for decal making! 😀

This is still quite a new technique to me, practice makes perfect and all that! 😀


%d bloggers like this: