Tag Archives: Sally Hansen

Franken Polish!!!

Hello! I hope you are having a lovely start to the week! 🙂

While I was ill I made five Franken Polishes!

If you haven’t come across the term “Franken Polish” before, basically it’s mixing polishes you already own to make something new and unique!

Pile of nail polish

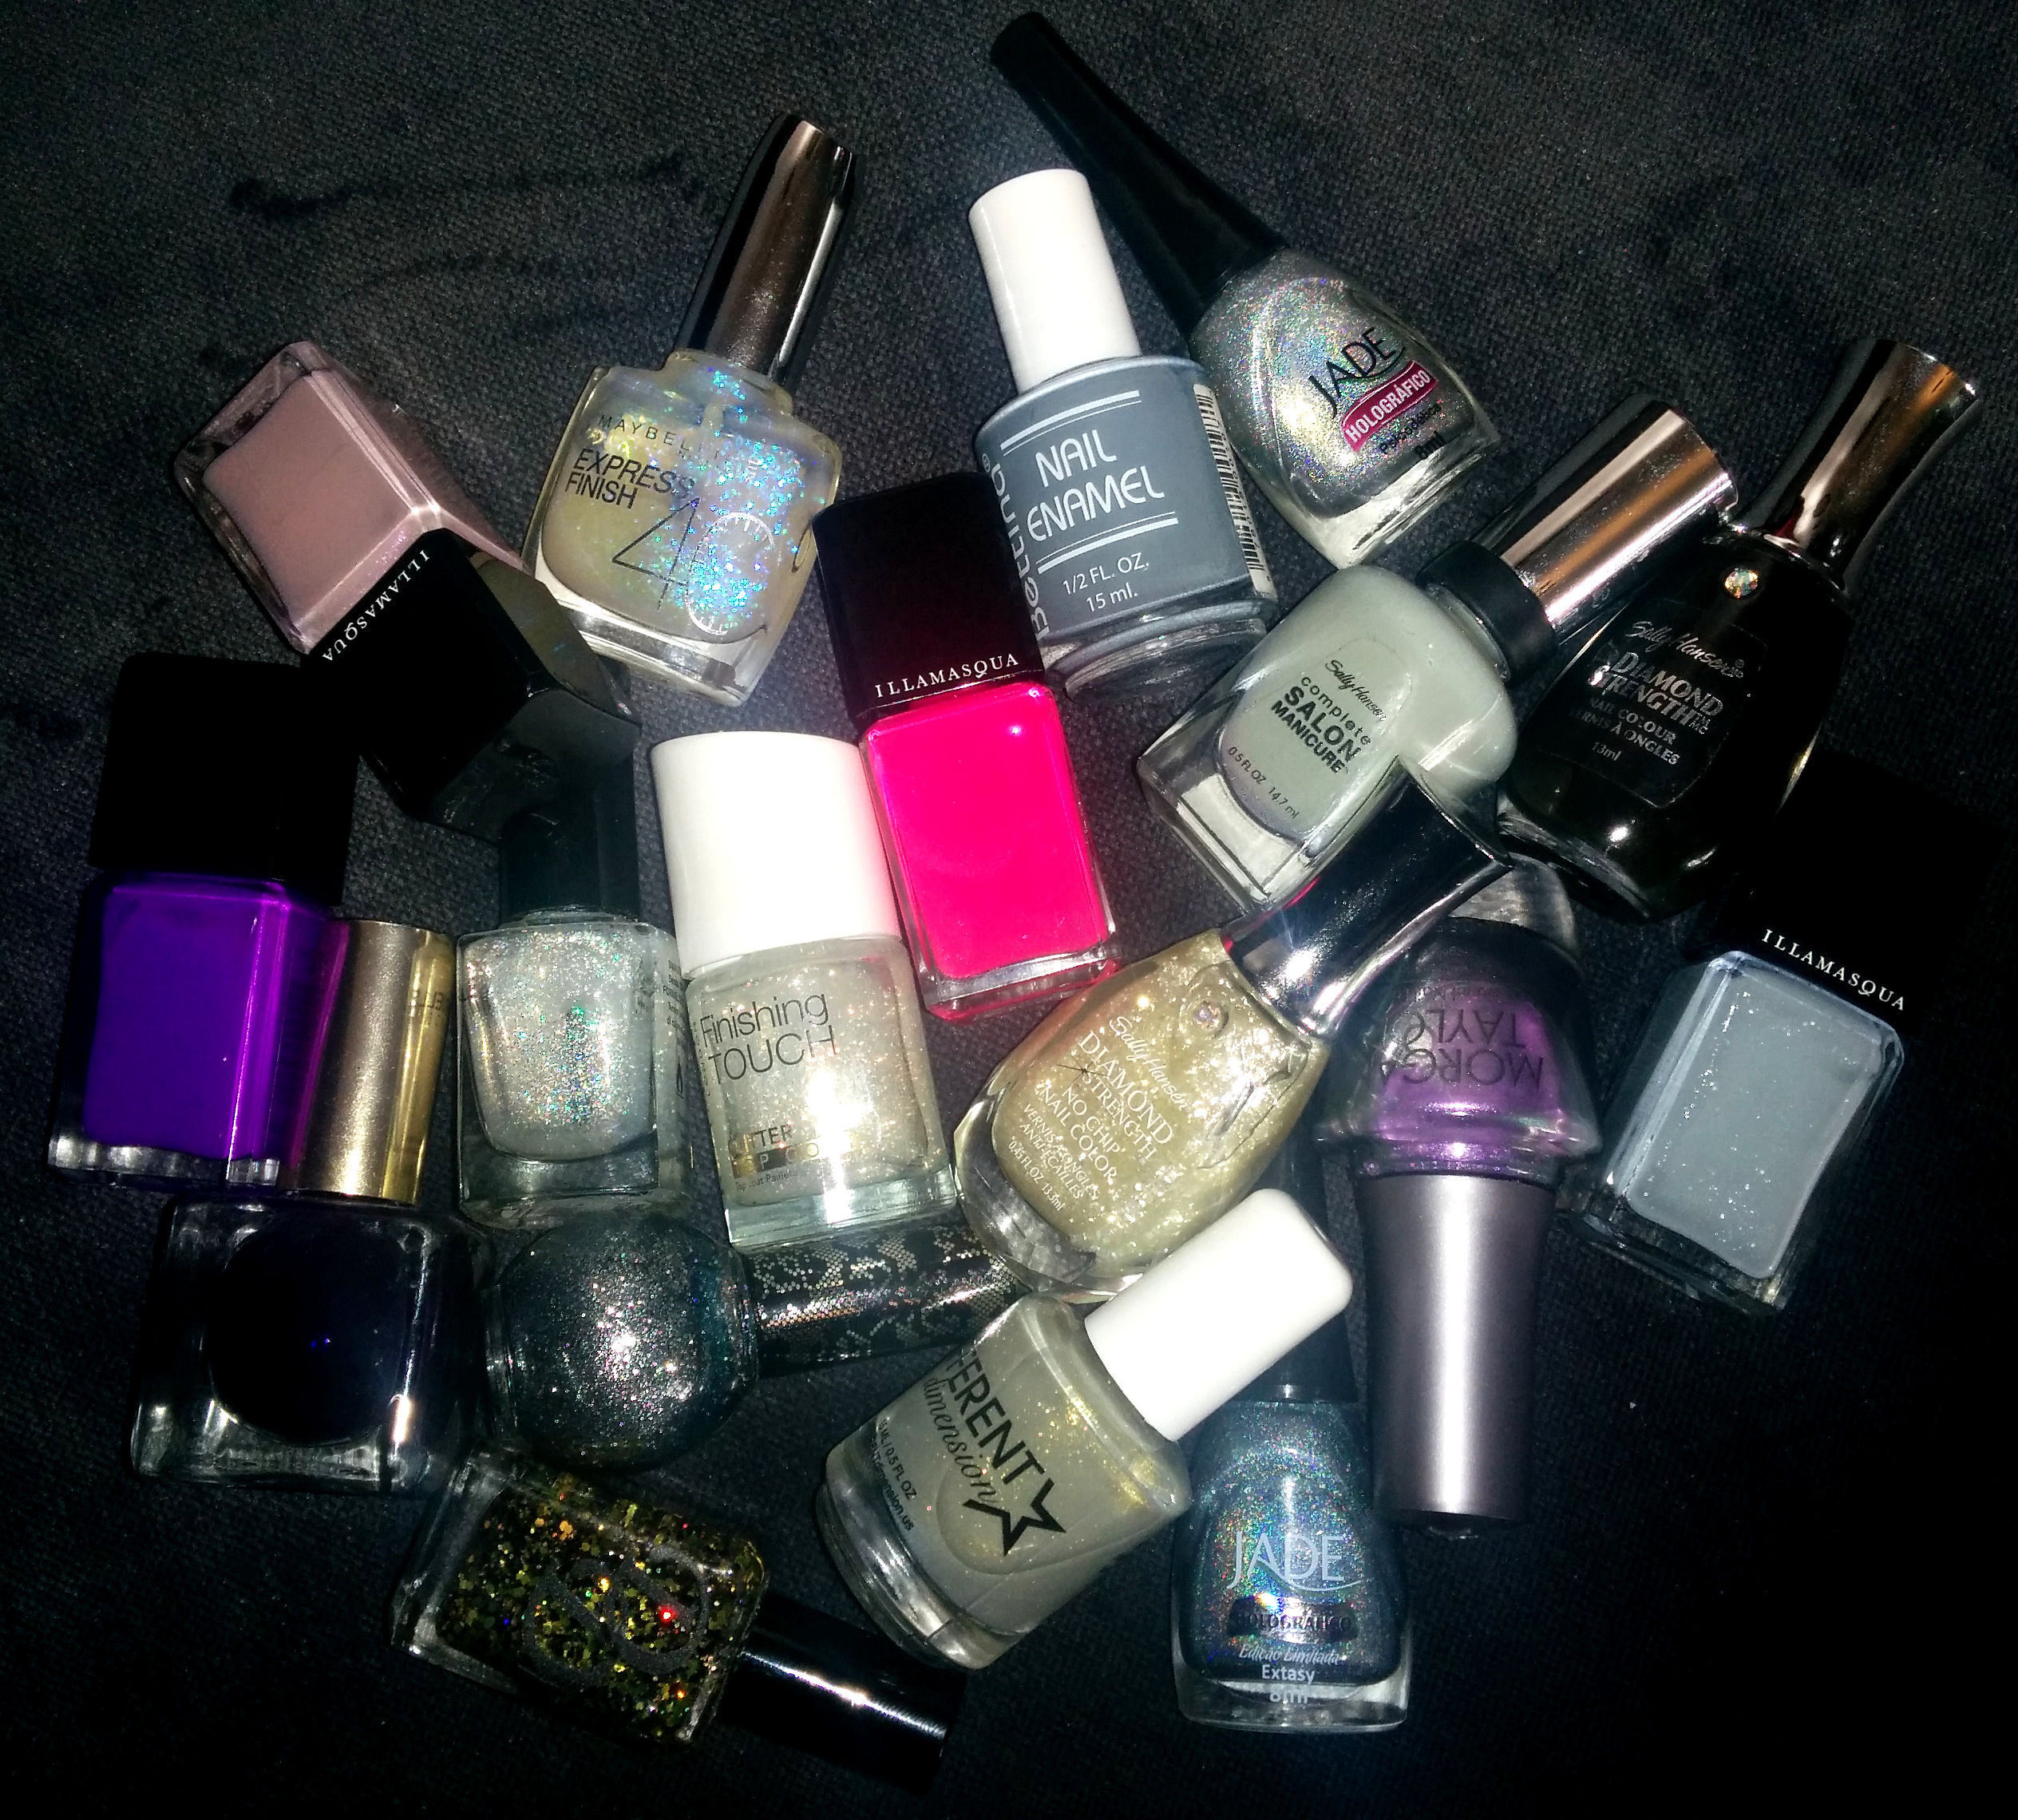
I’m hoping it was because I was ill and full of medication, (rather than being scatterbrained and disorganized) but I didn’t actually write down which polishes I used…  But I did leave them all in a box…

I’ve mostly worked out which ones I mixed together, but the ratio of polishes, I have no idea :/ It’s a mystery!

Purple shimmer franken polish

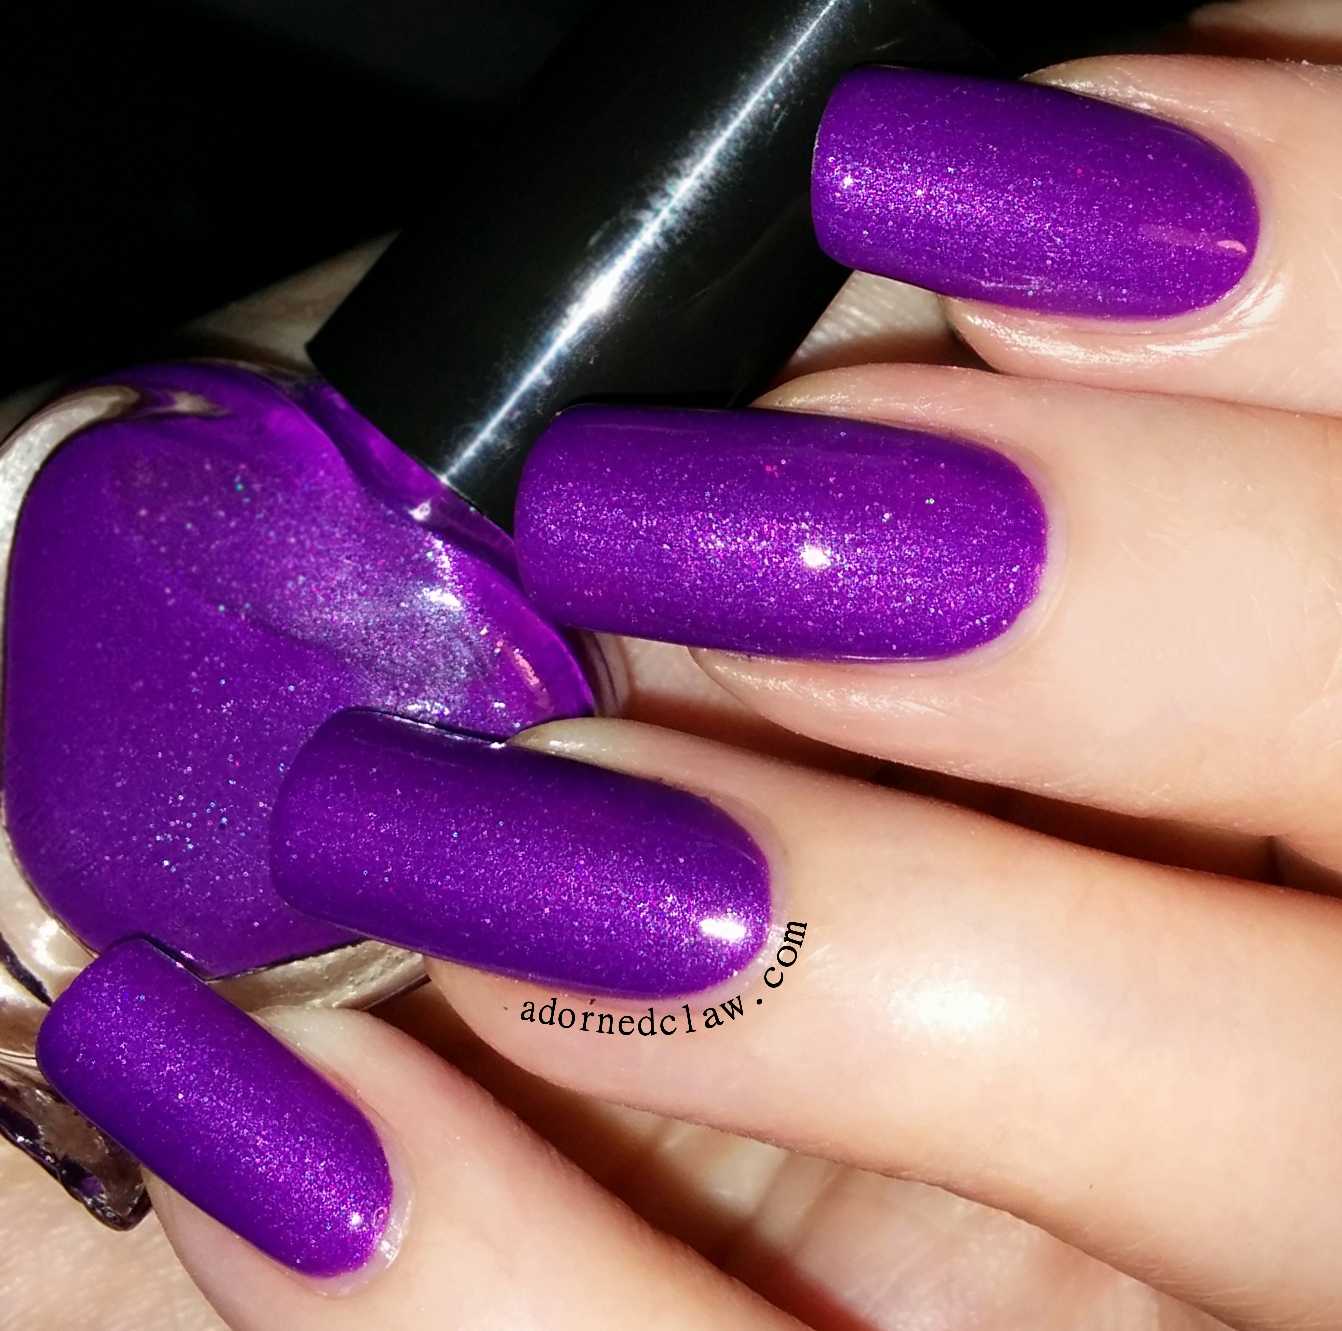
The first one is this purple shimmery polish, this one is definitely made from a mix of Prosperity from Illamasqua, Little Misfit from Morgan Taylor and a few drops of one of the Jade Holographic polishes.

I have been asking myself one question while I have been trying these. “If I had brought this polish, would I be happy with it?”

This one is definitely a yes! Purple is one of my favorite nail polish colours ever, it’s pretty much one coat, (I did use two for this swatch) and it dries to a satin finish, and the slight holographic sparkle stops it from looking flat and dull.

I’m really happy with this one 😀

The next polish is this glittery dark blue jelly.

blue jelly glitter franken polish

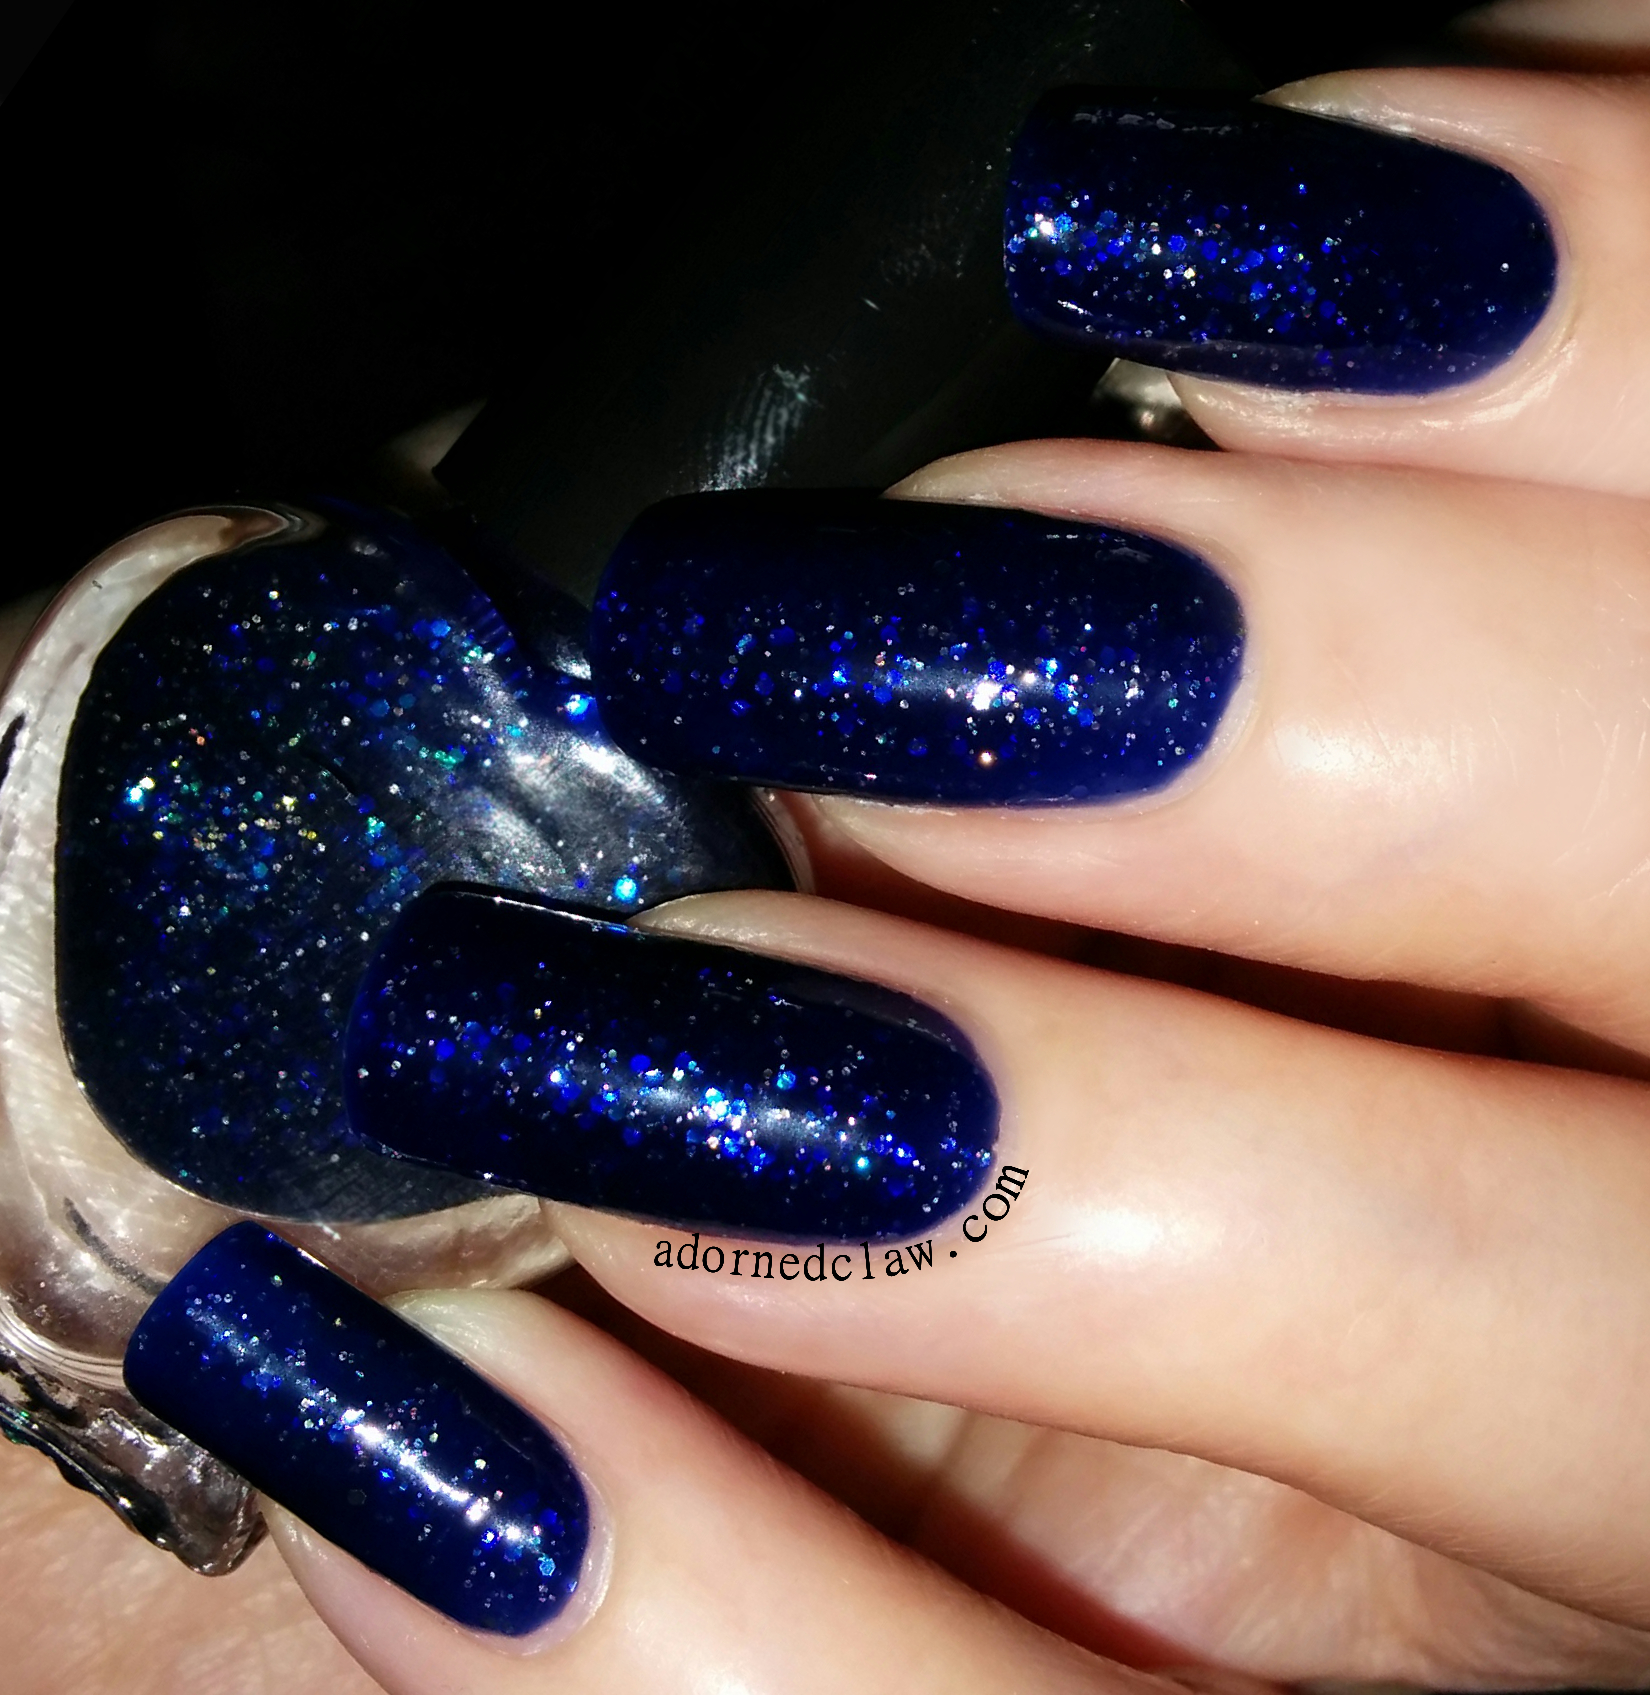
After a close inspection of the bottle, this polish looks to be a combination of Blue Dahlia from Estee Lauder, Rimmel London – Finishing Touch Glitter Topcoat, Barielle Shades – Stardust, Filthy Gorgeous – Rock Chick and Maybelline Express Finish – Flash Cosmic.

This is such a pretty blue polish! It’s a shame it doesn’t apply very well… Hopefully all it needs is a drop or two of thinner. As is is right now, I have to say it’s like trying to paint my nails with lumpy jam!

The colour and glitter are really pretty but if I had brought this, I would send it back!

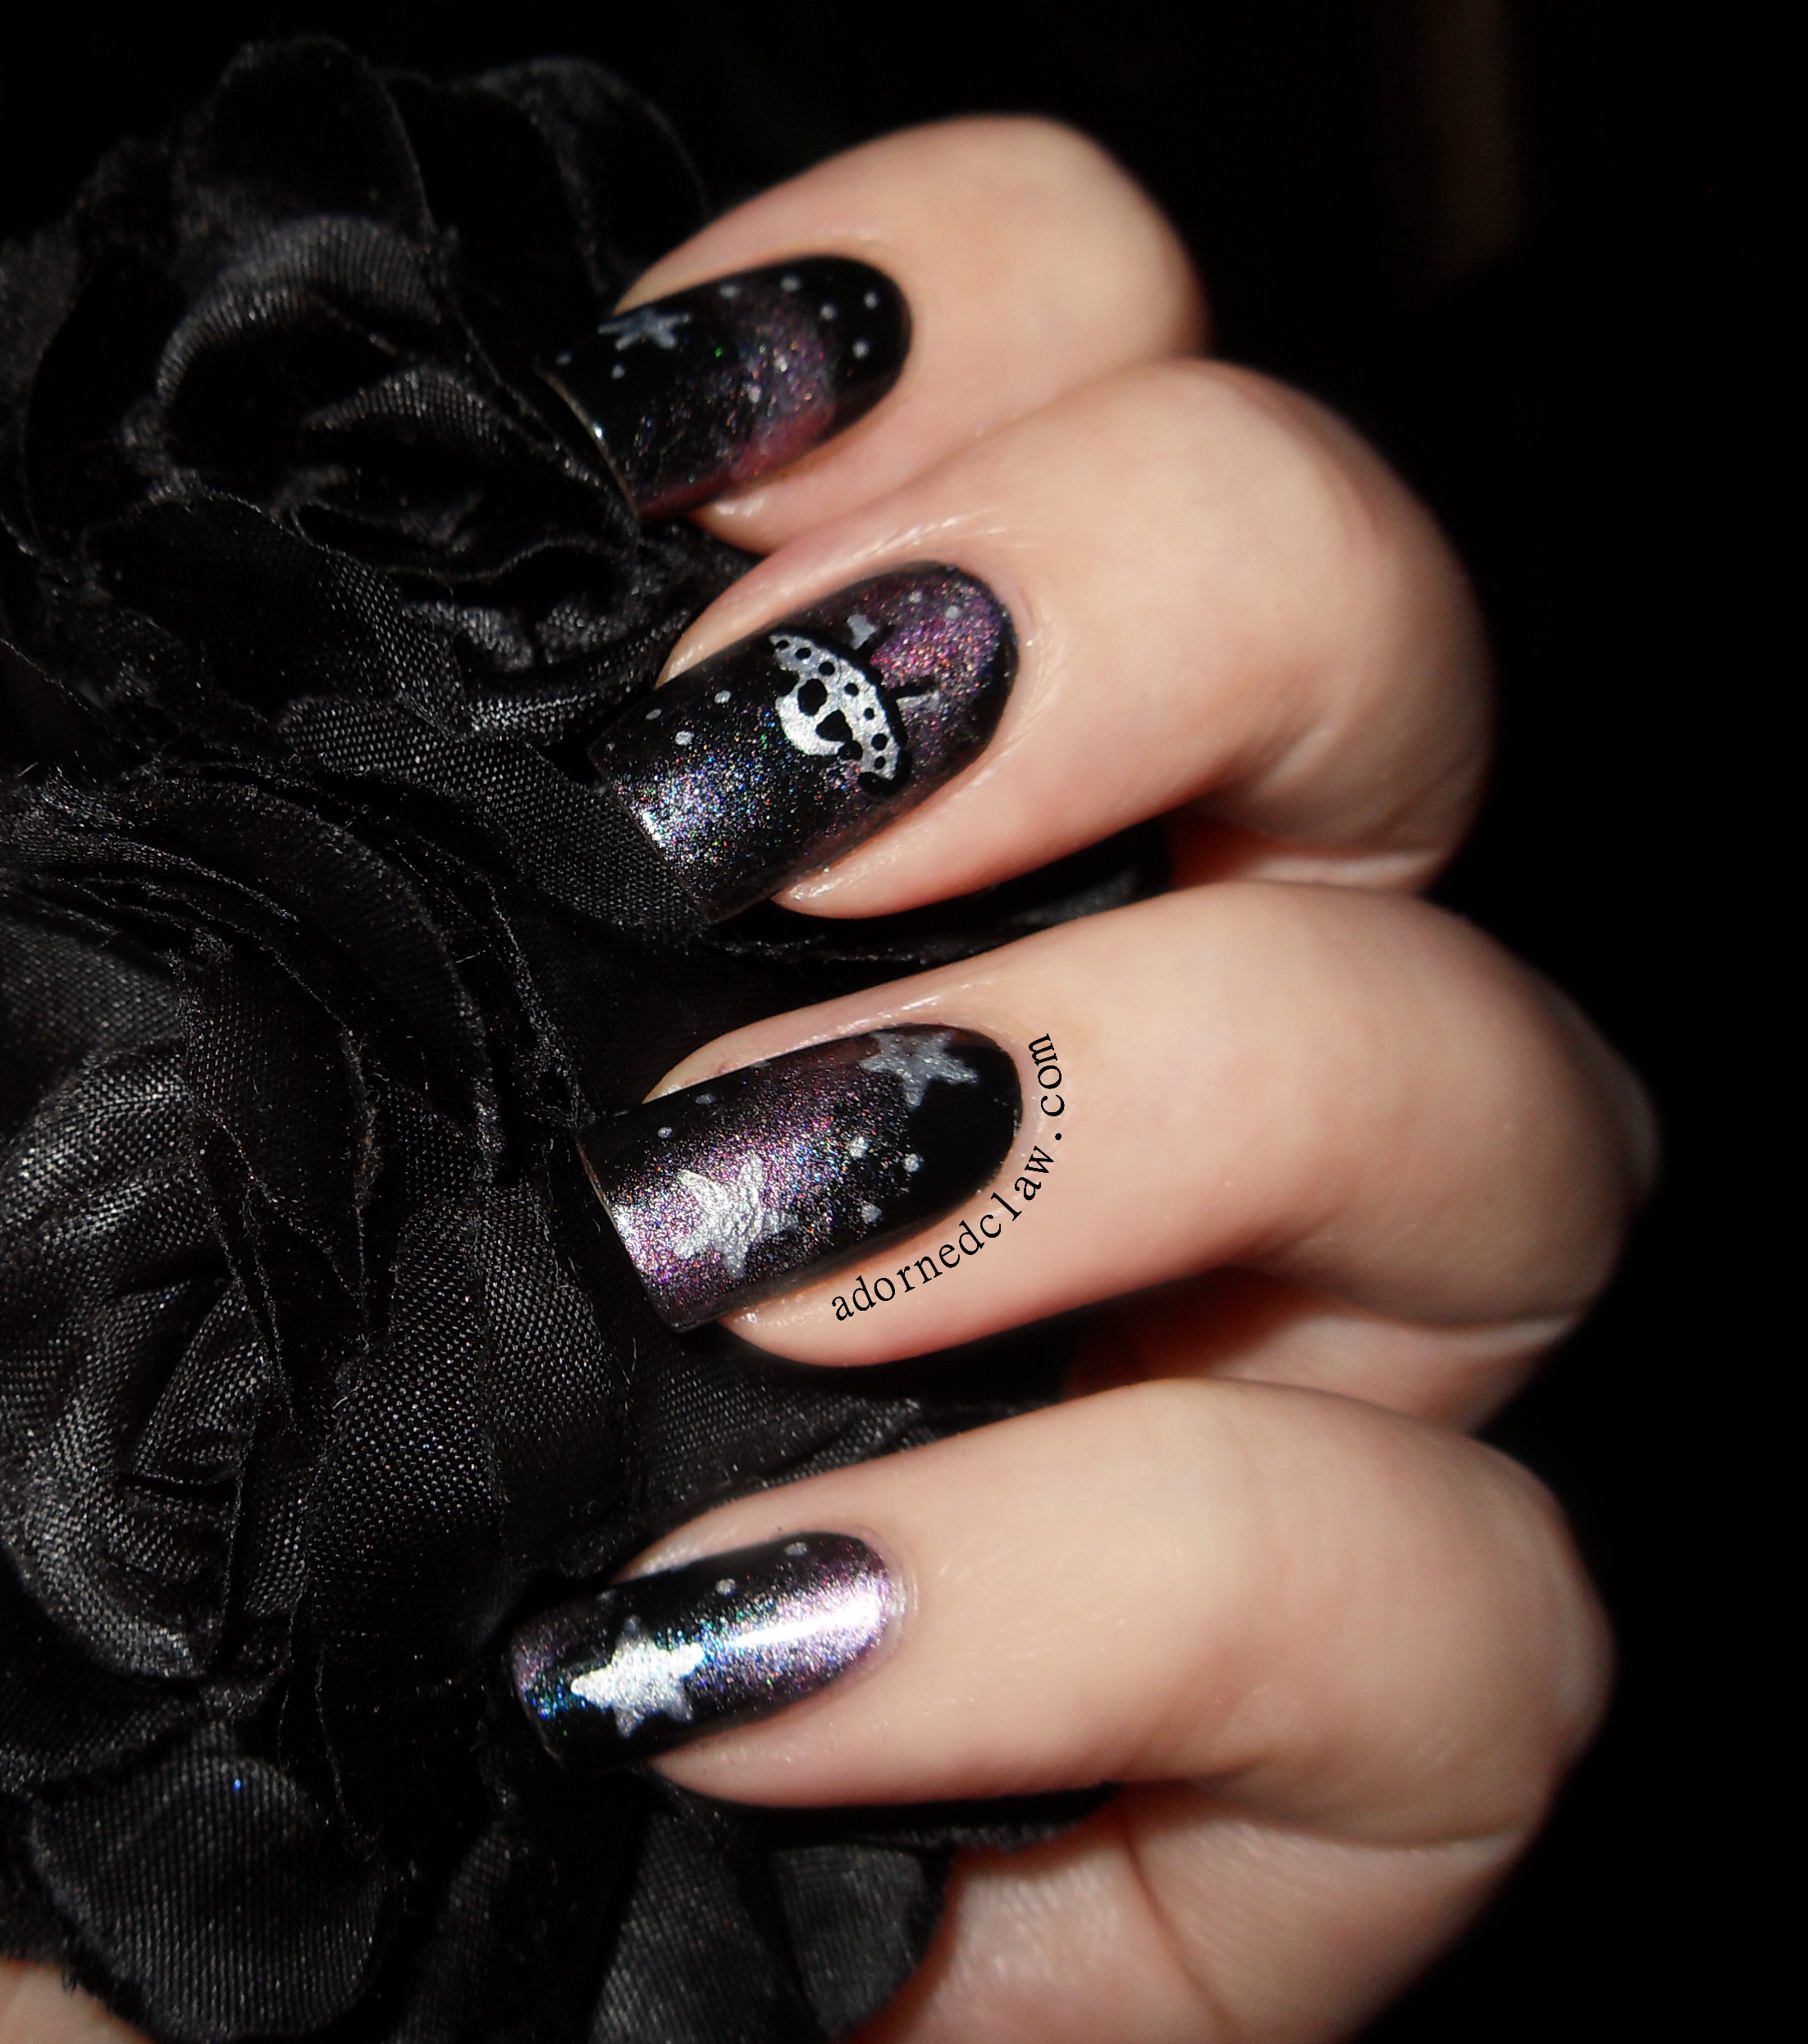
Next up is this dark silver/black holographic polish.

black silver holographic franken polish

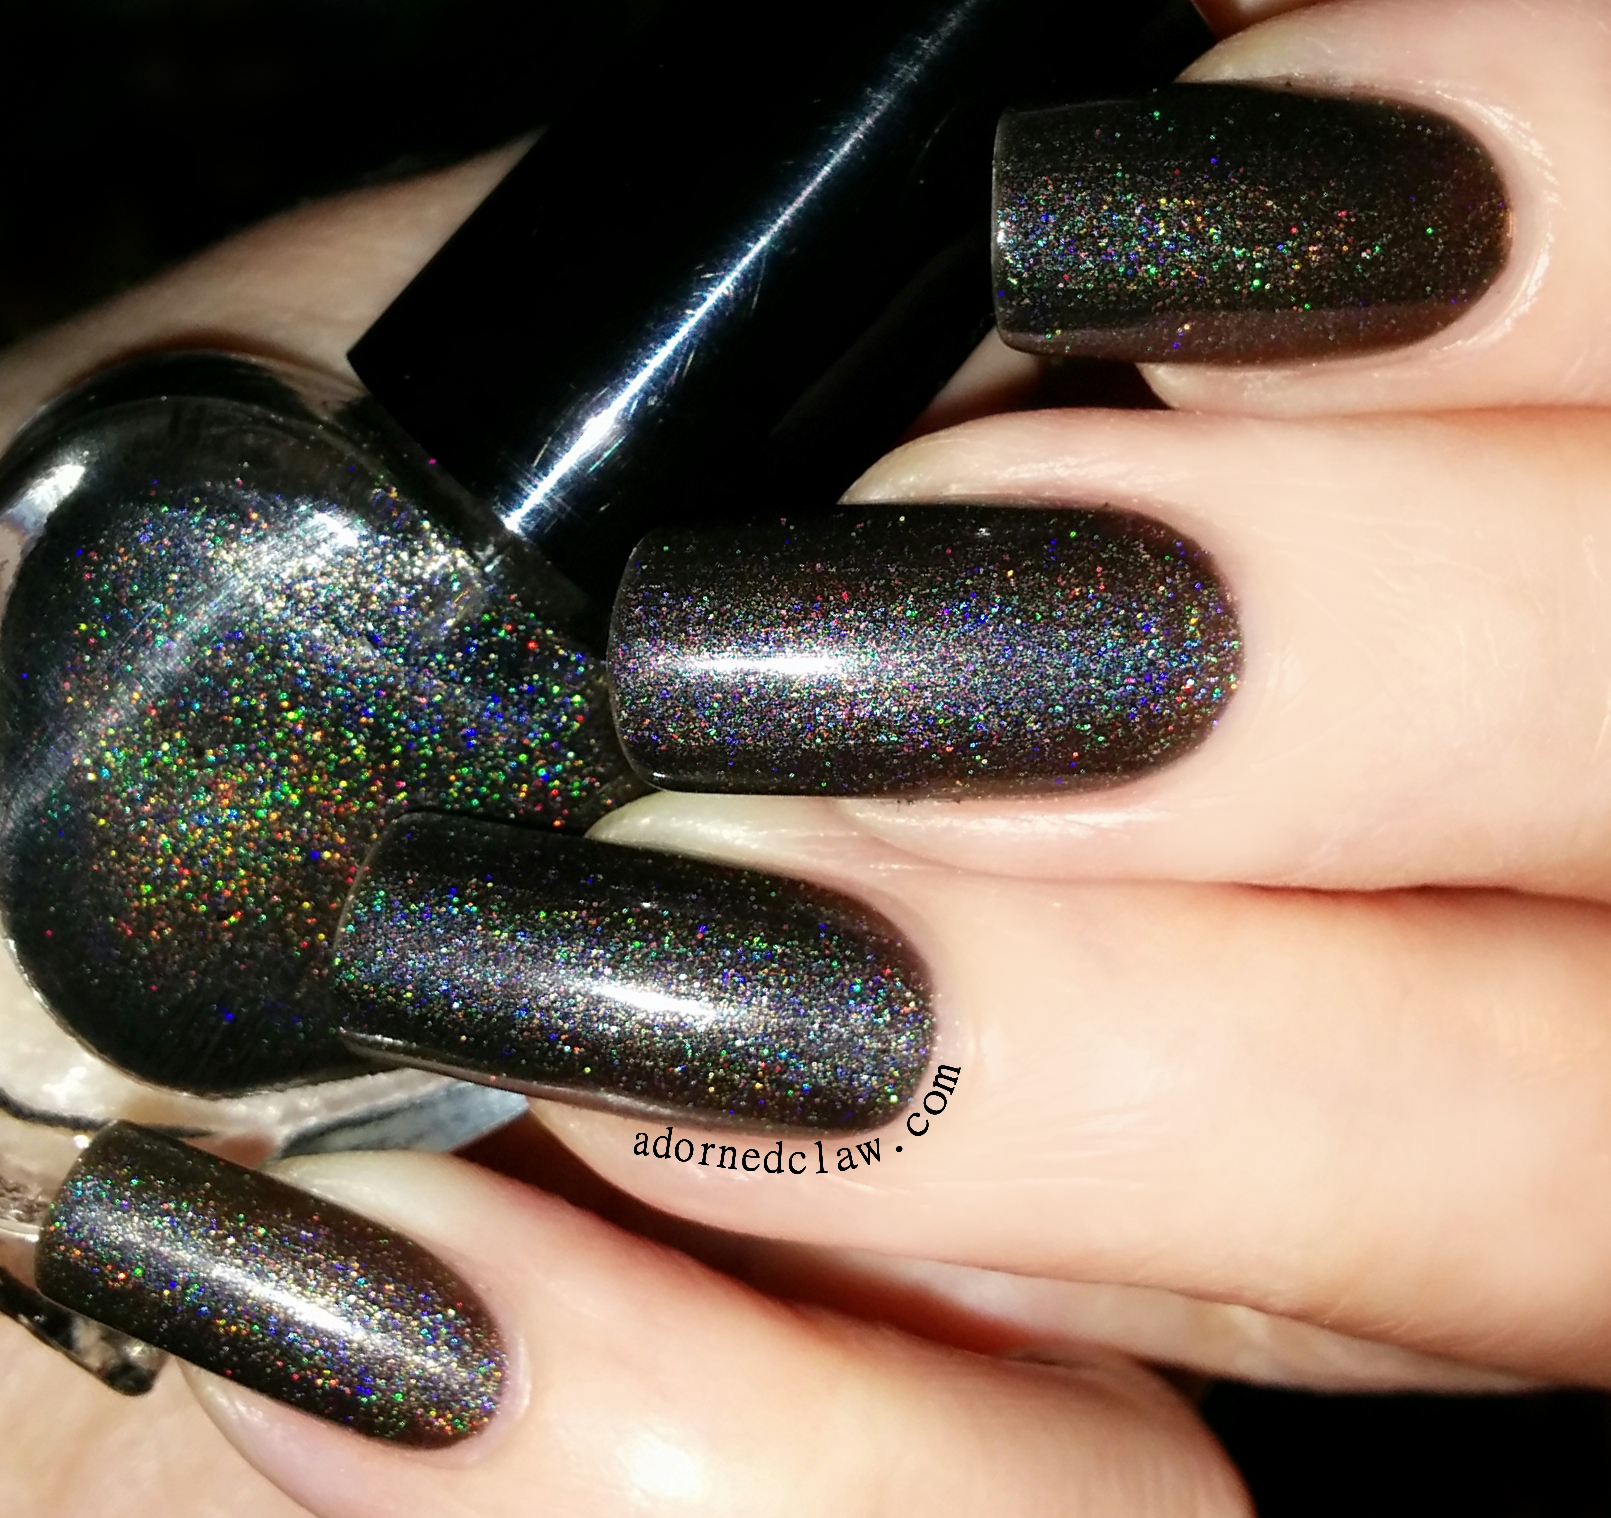
The ingredients in this one was actually quite easy to work out. just two polishes in this one, Sally Hansen – Pure Midnight and Jade – Estasy.

It’s a really pretty sheer scattered holo polish (I’m really pleased with this one)

would I be happy with this if I had brought it? with out a doubt yes!

grey gold glitter franken polish

I don’t know what I was thinking when I made this grey one… I like grey polish, but I really don’t like this…

It’s made from Illamasqua – Raindrops, Bettina – Iron, Different Dimension – Light Year and Daring Digits – Batman

On their own each of these polishes are lovely, but when combined they become a thing of horror. HORROR!

Some of this polish dries the moment it’s applied to the nail, so the first coat was lovely, fast drying, really good amount of glitter. The second coat appears to re liquefy the first coat and changes the consistency to something resembling scrambled egg. Ugh!

This photo is from the second time I tried it, I left half an hour between the two coats and it was still a bit lumpy. I added two layers of Seche Vite to try and even it out lol

I hope that I never receive anything like this from a polish company.  It needs a stake through it and burying at a crossroad!

pink shimmer franken polish

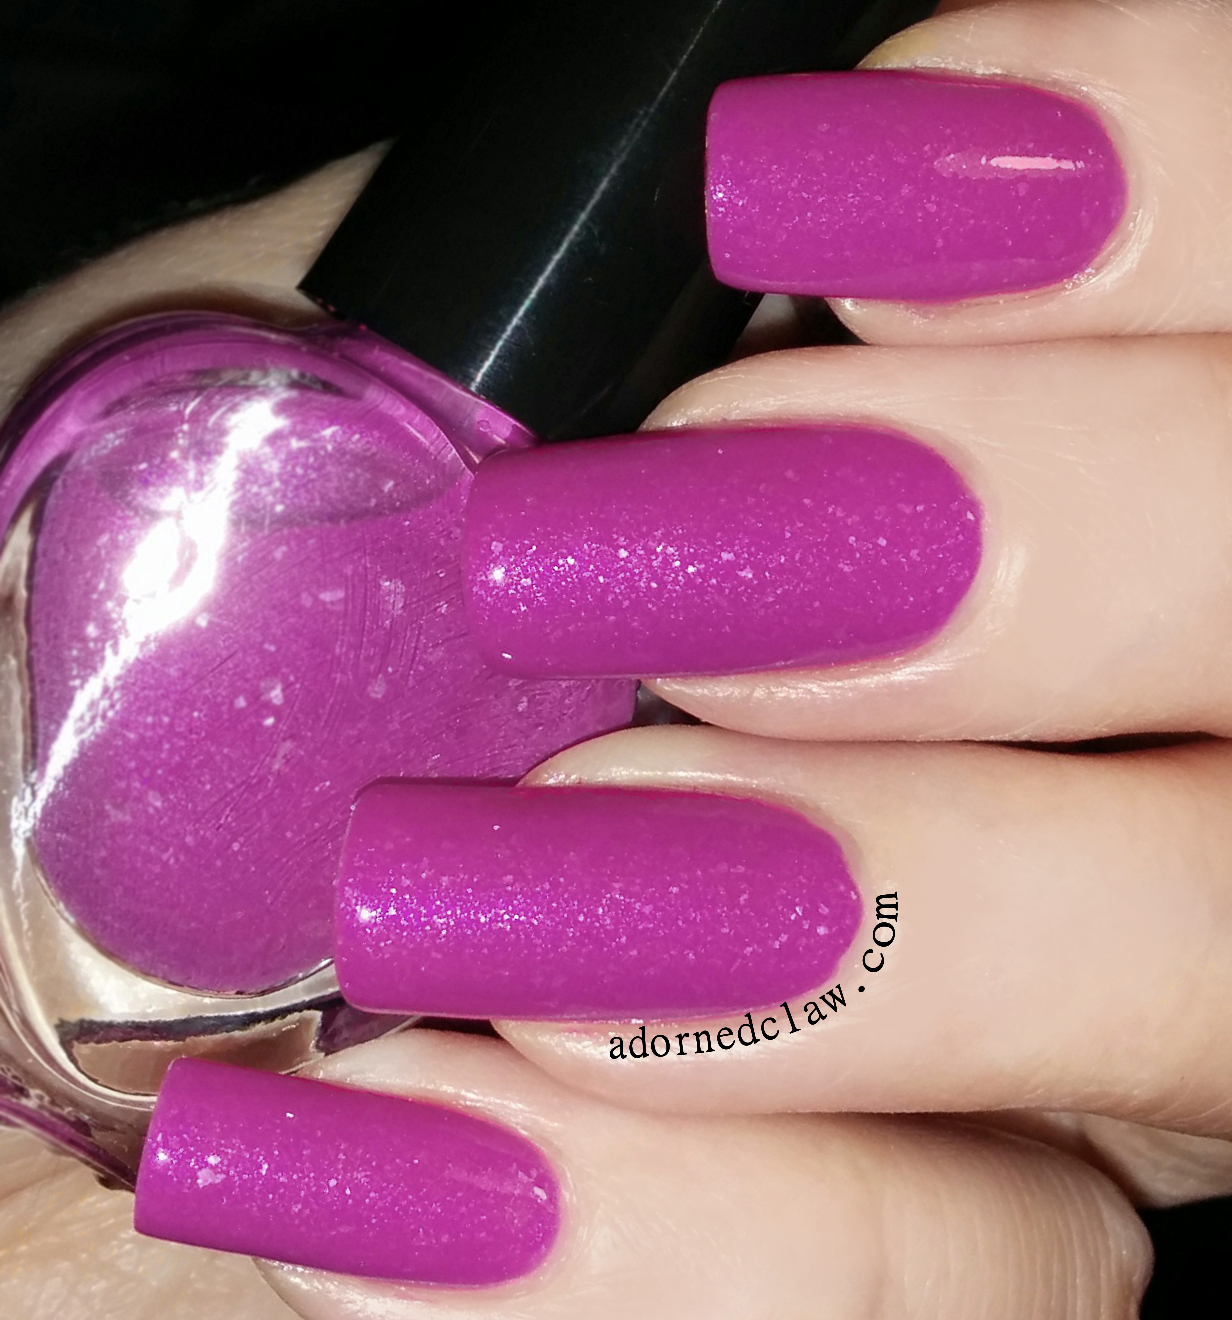
Here is the last one! This pink is (as far as I can tell) a mixture of Pink Raindrops and Collide both from Illamasqua and Glass Slipper from Sally Hansen.

Pink Raindrops from Illamasqua is one of the most disappointing nail polishes I have ever brought. but I’m sure I’ll find some use for it! (even if it is just mixing it with other ones)

This is another polish that I’m not convinced about, it applies really nicely, and it’s really sparkly, but that shade of pink, it’s really not a shade that I would be drawn to. Maybe I mixed this one in the dark lol

If this was a darker or more purple toned pink it would be lovely, it’s opaque in two coats and dried quickly so yes, I would be happy with it if I had brought it!

I think next time I make some franken polishes I’m definitely going to write everything down lol! 🙂


Textured Zebra Nails!

Hello! 😀

Textured Zebra Nails

Textured Zebra Nails

Here are my textured nails for this weeks pick and mix challenge! I decided on the textured prompt for this week, the others are matte and the 60s.  I use matte finish a lot (that might be cheating a bit) and my mind went completely blank at 60s lol!

Textured Zebra Nails Moyou Pro 04

Moyou Pro 04

I managed to break the corners of my index and middle finger nails in a freak cooking accident :/ so I ended up reshaping them… I have to say rounded nails are not for me! I keep thinking they look like spoons or paddles, my poor nails 😦 I think I’m just going to keep them well filed for the next few weeks until they grow back to a shape I like!

Anyway! I used Sugar fix from Sally Hansen Sugar Coat collection as my base for this mani.  This is the first time I have used this polish, probably because it’s textured and I’m not really a big fan…

This is two coats, I used Moyou Pro XL 04 for the image along with Konad Special Polish In Black. I have to say the Sugar Fix is an amazing base for stamping over! The zebra print is so sharp!

Sally Hansen Sugar Fix

Sally Hansen Sugar Fix


31DC2014 Day 19 Galaxy Nails!

Here are my (much shorter) day 19 Galaxy Nails!

Galaxy Nails

Galaxy Nails

The polishes I used for this are,

  • Twilight -Filthy Gorgeous
  • Strap On Your Moon Boots – China Glaze
  • Ruby Sapphire – Sally Hansen
  • Get Outta My Space – China Glaze
  • Barry M Nail are pens in black and silver
  • Seche Vite
Purple Holographic Galaxy Nails

Purple Holographic Galaxy Nails

I decided on the China Glaze polishes as I wanted this to be shimmery, without being too metallic (if that makes any sense) and the Ruby Sapphire for it’s lovely purple blue duo-chrome shift!

After I had  sponged on the galaxy pattern I used the silver nail art pen to draw on the stars. I couldn’t resist the little UFO! 😀

Then I sealed it all in with a coat of Seche Vite

Purple Holographic Galaxy Nails

Purple Holographic Galaxy Nails


Black and Blue Gradient… Or The Unfinished Nails!

Something rather strange happened today… I was planning on creating a stamped gradient but I did the sponging and my nails where so pretty that I just couldn’t bring myself to stamp over them! oO

Blue Black Gradient

Blue Black Gradient

I started with two coats of Black Magic from Revlon, and made the gradient with Sally Hansen Diamond Strength in Pure Midnight and Cold Metal from Color Club.

It’s so shimmery and sparkly! 😀

Blue Black Gradient

Blue Black Gradient

I think this is a case of less is more!


Pink and Purple Cherry Blossom! Moyou Stamped Decal Nail Art

I have been making stamped decals again! 😀 this time I used images from two of my Moyou plates, 01 and 02 from the Suki Collection.

The polishes I used!

  • Barielle Shades – Grape Escape
  • Color Club – Ulterior Motive
  • Revlon – Sweet Revenge (the pink one from the duo)
  • Barry M – Shocking Pink
  • Sally Hansen – Ivory Skull
  • Revlon – Calla Lily
  • Konad Special Polish – Black
  • Color Club – Topcoat
Pink and Purple Cherry Blossom

Pink and Purple Cherry Blossom

I started off by making the flowers, you can find how I made them here.

I used Grape Escape and sponged on a little Ulterior Motive on the tips as the base colour, when that was dry I applied the flowers using the Color Club Topcoat like glue! 😀

When that was all dry,  I applied a couple more coats of topcoat to seal all of my decals in! In some places on my nails there must be at least 6 layers of polish, it feels really thick like Gel! It took ages to dry, about half an hour :/

Cherry Blossom

Cherry Blossom

I really liked making the cherry blossom decals, even tho the tiny flowers where a bit fiddly to paint! The time it took to get them all on my nails was rather a lot longer than I would have liked, then getting them to stick was a pain! I think that it’s because I made them to thick, but I’m going to have to try out some other clear polishes to find the best one for decal making! 😀

This is still quite a new technique to me, practice makes perfect and all that! 😀


Stamping Decal Tutorial

This is how I made my Panda stamped decals!

Things you’ll need

  • Something plastic, I use the lid of a cotton bud box, but anything plastic, shiny, transparent and flexible (that you don’t mind covering in nail polish) should do.
  • Clear nail polish or top coat, make sure it’s not the fast dry stuff or you won’t be able to remove your decals from the plastic! I used Color Club Top coat.
  • Stamping stuff! plate, stamper, scraper and stamping polish. I used BM-424 from Bundle Monster and Konad Special Polish In Black
  • Thin nail art brush.
  • nail polish (one coat/high pigment polish works best) I chose Ivory Skull From Sally Hansen
  • Acetone.
  • Fingernails! 😛
  • And quite a bit of time.
cotton bud lid + nail polish

cotton bud lid + nail polish

Start off by painting squares or rectangles of clear polish directly onto your plastic surface, you want them to be a little bit larger than the image you are going to be using, then leave them until dry.

Sorry about the rubbish picture! My camera really protested about photographing clear stuff on clear stuff :/

stamping

stamping

Stamp the image you want to use on to the dry polish rectangles! I find it easier to hold my plastic lid upside down and line up the image by looking through the polish.

I have found that the best kind of image to use for making stamped decals are ones with an outline and not a huge amount filled in.

paint by numbers

paint by numbers

Now you can start colouring in! Using a thin brush you’ll want to very gently dab the polish on, if you use brush strokes you can smudge the stamped image :/

If you are worried about doing that you can add another coat of the clear polish on top of the stamp and leave it to dry before painting it.

Oh and keep your Acetone close by, the thin nail art brush will dry out really quickly!

see the bits i missed

see the bits i missed

I like to hold mine up to a light source to check for bits I missed and then add a few more dabs of polish to cover them!

With this technique you’ll end up with a decal that’s the opposite way round to the image on the stamping plate.

trim off the extra polish

trim off the extra polish

When your decals are dry (I leave mine for at least a couple of hours) they should be easily removed from the plastic, I peel them off with my nail but you could always use tweezers.

Then with some scissors carefully trim off the excess clear polish.

stick it on

stick it on

To stick your decal to your nail I like to press mine on to almost dry polish and very gently press it down, then add a coat of  topcoat to seal it in. But be really careful, as you won’t be able to reposition the image once it’s on your nail,

Here’s a picture of it all finished!

Panda Nails

Panda Nails

My original pink panda post is here

I hope I have managed to explain this technique clearly enough! 🙂 but I’ll be more than happy to answer any other questions about it!