Category Archives: Tutorials

How I Fix A Broken Nail!

Hello!

This evening I was going to to be doing swatches of all the lovely new Illamasqua polishes I picked up while I was away last week… Unfortunately this happened while I was cleaning D: And my nails are stained from the red polish was wearing D: The swatching will have to wait…

Broken Nail

noooooooooooooooo!!!!

So instead I’m going to show you all how I fix my nails when they break like this!

some stuff I use to fix a broken nail

Some stuff I use to fix a broken nail

I find that it’s really important to get all of the equipment ready before I start a nail repair. There’s a lot of glue involved and I have managed to stick my nails to random stuff while looking for something (hangs head in shame)!

The tools/products I use are

  • A.S.P Brush On Glue
  • Scissors
  • Fiberglass Wrap Strips
  • Tweezers
  • Buffing Block
  • Nail File
  • Non Fleecing Cotton Wool Pad
  • Cup Of Tea
  • Acetone
  • Cotton Buds
  • Non Moisturising Soap/ Hand Wash
  • Broken Piece Of Nail!

The very first thing I needed to do was to remove all the oils from my fingers and the broken bit of nail, I do this by washing my hands a couple of times with non moisturising hand wash and then applying acetone with a cotton bud to the detached nail and my fingernail. (This is why my fingers and cuticles are looking so unhappy in these pictures!)

Holding the broken piece of nail with tweezers, I find that it’s much easier to do this with the curve facing down, apply a thin coat of glue to the broken edge. Then I applied it to my nail, it was a bit like a little jigsaw puzzle so I gave it a bit of a jiggle to get the nail firmly stuck in place, then I held the nail in place with the tweezers with a firm (but not so much it hurts) pressure for around 30 seconds so the glue has time so set.

Fixing a broken nail

Glued on!

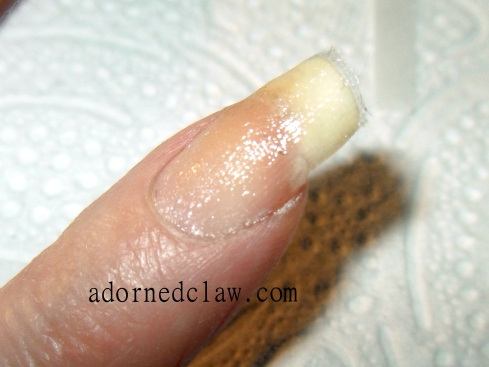
The next step is to apply a little glue to the seam to strengthen the join. Ugh my poor finger looks dreadful 😦

fiberglass strips

Fiberglass Strip

I picked up this fiberglass wrap strip from Sally’s, I chose to use fiberglass because silk wouldn’t be strong enough and also I really don’t like the idea of anything being boiled alive for my beauty products!

I like to cut the wrap into thin strips, I find it much easier to work with, I’m also really rubbish at cutting it to the right size for my nail, and I don’t mind having a bit of an overlap in the middle

fiberglass wrap strips cut to size

cut to size

Using a really sharp pair of scissors I shaped the fiberglass to fit my nail bed. The third strip was just in case I messed any up lol!

fiberglass strips attatched to nail

fiberglass strips on nail

Here are the two thin strips (badly) applied to my nail.

It can sometimes be a bit fiddly to remove the backing paper and the fiberglass can disintegrate a little so I always start peeling on the unshaped edge. Once the fiberglass is freed from the backing paper, I gently lay it on the nail and reposition it with tweezers until its in the correct position, then do the same with the other strip.

Starting at the base of the nail I then gently press the strips into place.

trim to a few millimeters

trim to a few millimeters

Then it’s time to trim away the excess, I left a couple of millimeters at the end to help stop it from lifting away from the nail when the glue is first applied.

Glue over fiberglass

Glue over fiberglass

I then applied a thin layer of glue to the whole of the wrap, I did try to be careful to not get any on my cuticles… But the glue decided that’s where it wanted to be :/

When the glue had dried It really doesn’t take that long but I like to leave around ten minutes for this, I filed away the little overhanging bit at the edge of my nail, holding the file at a 45 degree angle and filing downwards or away from the nail, it’s important not to pull any bits of the fiberglass as this can damage the glue and the wrap won’t last as long.

After all the excess had been filed away it was time to start buffing!

Buffing!

Buffing!

Mmmm dusty zombie finger!

I used the ridge removing side of my buffing block to start removing the textured feeling from the wrap, I have found that buffing the nail too much will weaken the wrap but not enough buffing and the nail will look lumpy.

More Glue!

More Glue!

After the first round of buffing its time for more glue, and waiting for another ten minutes. I do have some resin activator that can be used with this glue but it really doesn’t agree with my skin. so waiting it is…

more buffing

more buffing

This second lot of buffing is to see which parts of the nail need building up with even more glue, so this time I used an up and down movement so when gently I wiped away the dust with cotton wool it was easy to see which parts needed more glue. And there is a big section directly over the join! So I repeated the gentle buffing, wiping with dry cotton wool and applying glue until it was level with the rest of  my nail.

even more glue

even more glue

Then I had nearly finished! Yay! 😀

tidying up the edges

tidying up the edges

The last thing I needed to do was to file away that sharp point to stop it from catching on everything!

Then it was time for all of the cuticle oil and hand cream!

Finished!

Finished!

And now I have just noticed that Ive run out of acetone free polish remover…

Oh noes I must go shopping 😀


Stamping Decal Tutorial

This is how I made my Panda stamped decals!

Things you’ll need

  • Something plastic, I use the lid of a cotton bud box, but anything plastic, shiny, transparent and flexible (that you don’t mind covering in nail polish) should do.
  • Clear nail polish or top coat, make sure it’s not the fast dry stuff or you won’t be able to remove your decals from the plastic! I used Color Club Top coat.
  • Stamping stuff! plate, stamper, scraper and stamping polish. I used BM-424 from Bundle Monster and Konad Special Polish In Black
  • Thin nail art brush.
  • nail polish (one coat/high pigment polish works best) I chose Ivory Skull From Sally Hansen
  • Acetone.
  • Fingernails! 😛
  • And quite a bit of time.
cotton bud lid + nail polish

cotton bud lid + nail polish

Start off by painting squares or rectangles of clear polish directly onto your plastic surface, you want them to be a little bit larger than the image you are going to be using, then leave them until dry.

Sorry about the rubbish picture! My camera really protested about photographing clear stuff on clear stuff :/

stamping

stamping

Stamp the image you want to use on to the dry polish rectangles! I find it easier to hold my plastic lid upside down and line up the image by looking through the polish.

I have found that the best kind of image to use for making stamped decals are ones with an outline and not a huge amount filled in.

paint by numbers

paint by numbers

Now you can start colouring in! Using a thin brush you’ll want to very gently dab the polish on, if you use brush strokes you can smudge the stamped image :/

If you are worried about doing that you can add another coat of the clear polish on top of the stamp and leave it to dry before painting it.

Oh and keep your Acetone close by, the thin nail art brush will dry out really quickly!

see the bits i missed

see the bits i missed

I like to hold mine up to a light source to check for bits I missed and then add a few more dabs of polish to cover them!

With this technique you’ll end up with a decal that’s the opposite way round to the image on the stamping plate.

trim off the extra polish

trim off the extra polish

When your decals are dry (I leave mine for at least a couple of hours) they should be easily removed from the plastic, I peel them off with my nail but you could always use tweezers.

Then with some scissors carefully trim off the excess clear polish.

stick it on

stick it on

To stick your decal to your nail I like to press mine on to almost dry polish and very gently press it down, then add a coat of  topcoat to seal it in. But be really careful, as you won’t be able to reposition the image once it’s on your nail,

Here’s a picture of it all finished!

Panda Nails

Panda Nails

My original pink panda post is here

I hope I have managed to explain this technique clearly enough! 🙂 but I’ll be more than happy to answer any other questions about it!


Crackle Polish Experiment!

I’m not really the biggest fan of crackle polishes and somehow I have collected 11 bottles of the stuff!

So I decided that I should actually have a play with them rather than leaving them to gather dust! I chose Nina Ultra Pro in French White for the base colour and Black Shatter from OPI.

OPI Black Shatter over Nina Ultra Pro French White

OPI Black Shatter over Nina Ultra Pro French White

This is one coat of shatter polish, The OPI seems a lot more ‘crackly’ than some of my other shatter polishes, it shows more of the base colour, and it dries to be rather textured, this took two coats of top coat to smooth it out!

Braid Brush Strokes

Braid Brush Strokes

With brush strokes in different directions, (like braided nails but with one colour) the crackle effect is more controllable, and gives a much more even effect!

Black crackle sponged gradient.

Black Shatter sponged gradient.

I was really surprised at actually liking this, 🙂 I think it will look much better in different colours, perhaps silver and black or red with gold crackle polish for something a bit mote festive! But in black and white it looks like lightning!

Half crackle Mani

I taped off half of my nail before applying the shatter polish, The silver stripe is Night Moves from Barielle Shades, it’s just to hide the edge of the crackle polish as it was rather messy! 🙂


Ombre Nails Tutorial (only using black and white polish)

Ombre Nails

Ombre Nails

An Ombre Manicure Is a really easy! It is a gradient from nail to nail with five nail polishes which are applied each on one full nail (rather than a gradient over one nail, which is a gradient manicure).

I have been wanting to an Ombre tutorial for a little while now but I haven’t found three shades of grey polish that would work… Madness!

So with the polish I already own I decided to mix my own shades!

Ombre Nails Tutorial Equipment

Ombre Nails Tutorial Equipment

This is what I used!

  • one cotton bud (q tip) with one end cut off.
  • a paint brush/nail art brush.
  • Nina Ultra Pro – French White.
  • Sinfulcolors -Black on Black.
  • Acetone.
  • A Dapen Dish or small container. (Just make sure it’s not plastic)
  • An old Plate
  • some paper

Begin by painting two coats of white on your thumb nails and black on your little finger nails. It’s best to wait until they have dried before continuing.

Then pour little acetone into the Dapen dish or small container this is to rinse the brush in later.

To start with put three drops of black polish with one drop of white together on the plate, using the cotton bud (with the end cut off) as a mixing tool, combine the two polishes until it is an even shade, you’ll have to be quite fast with mixing so the polish doesn’t dry to much. Then using the brush apply it to your ring finger nails,  use the paper to wipe the extra polish from the brush before rinsing it in Acetone.

On another part of the plate mix two drops of black with two drops of white. This shade is for the middle finger nails. after you have applied the polish remember to clean the brush to remove the extra polish

And for your pointer finger nails use a ratio of three drops of white to one drop of black.

If you need to apply a second coat, wait until the first coat has dried and follow the steps again! 🙂 Then apply some topcoat.

This technique can be used with lots of different colours, you just have to make sure that the amount of pigment in the individual polishes you choose to use is roughly the same!


Nail Polish Clean Up Tutorial

I have to admit that I’m not the neatest of people, especially when it comes to painting my nails. (Far to much coffee probably has something to do with it.) So this is how I clean up my fingers and (try to) tidy up my finished polish.

These are the things that I use.

100% Pure acetone – For the clean up I like to use pure acetone. I have found that it is loads faster than using standard nail polish remover but this method will work with standard polish removers.

Cotton buds (q-tips) – if it is really messy!

A brush. – At the moment I use a stiff artists brush (one for oil paint) I found this type of brush works really quite well but I am going to have to get a new one soon, mine is starting to look a bit worn, I suggest experimenting with different brushes to find one that works best for you. There are plenty out there in different price ranges!

Paper towel or tissue – to wipe your brush.

A small container – Any small container should work, just make sure that it is not plastic! An egg cup or small bowl,  or even the lid from your acetone/polish remover! I have used all of these things in the past but now I use my little glass Dappen Dish. 🙂

Cuticle Pen/oil or cream – I like Burt’s Bees Lemon butter cuticle cream. It’s rich with out being greasy and it smells amazing! Oh and some hand cream.

some of the stuff you'll need.

some of the stuff you’ll need.

I have used a sponging technique using Greige Gardens and Pure Midnight, both from Sally Hansen, Black on Black from Sinfulcolours and Cosmic Dust from China Glaze.

I usually clean up my cuticles before applying the top coat, cleaning up before the top coat is a lot faster as the polish hasn’t had time to fully dry. The only time I clean up after is when I have been doing a nail stamp manicure, I have managed to smudge the print and ruin it a couple of times.

Pour a little bit of acetone/polish remover into your small container, there is no point in filing it all the way up as more will end up evaporating.

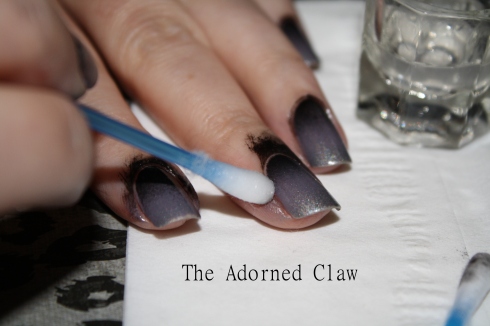
For a messy manicure like this one I like to remove the majority of the polish from my fingers to start with. I use a cotton bud (q-tip). You want to wipe rather than rub the polish if you rub at it too much you may end up staining your skin.

Use a cotton bud to remove most of the polish

Use a cotton bud to remove most of the polish

It takes a little practice but if you gently rotate the cotton bud (q-tip) in the opposite direction to the direction you are wiping it will lift away loads more of the polish you want to get rid of!

You’ll want to clean up as close to the cuticle as you can, as cleaning it all up with a brush will take ages!

removing excess polish

Dip the brush into acetone, tap the brush on the side of your container to get rid of  the extra. This helps to stop your cuticles from getting soaked with acetone and messing up the edges of your polish.

Brush along the cuticle toward the nail tip.

Brush along the cuticle toward the nail tip.

Starting at the base of the nail gently sweep the brush along the cuticle toward the nail tip to remove the excess polish.

Clean up

Make sure you are very gentle while doing this as you don’t want to be taking off too much polish from the nail plate, wipe the polish from the brush on to the paper towel. Then repeat until you are happy with the results!

For your non dominant hand doing this can be a bit of a problem I’m still not amazing at it!

There are a few things that have helped me the first is to rest your elbows on your table, (this is to help steady your hands) and move the nail on your dominant hand under the brush rather than moving the brush to your nail then there is just to practice, it gets easier 🙂

Nearly finished

Nearly finished

Once your hands and cuticles are free from polish. Apply your top coat (if not already applied) I use Seche Vite, it’s really fast drying and helps the polish last for ages! Wait for it to dry, then give your hands a good wash, this is because no matter how careful you are there is going to be a really thin layer of polish left on your fingers and I’m sure that can’t be good!

Now it’s time for some cuticle cream, I think this is really important as acetone can be very drying!
Carefully massage it around your cuticles, apply some hand cream and you are done!

All Finished! :D

All Finished! 😀

I hope you have found this useful 🙂