*Press Sample*
Hello! 😀
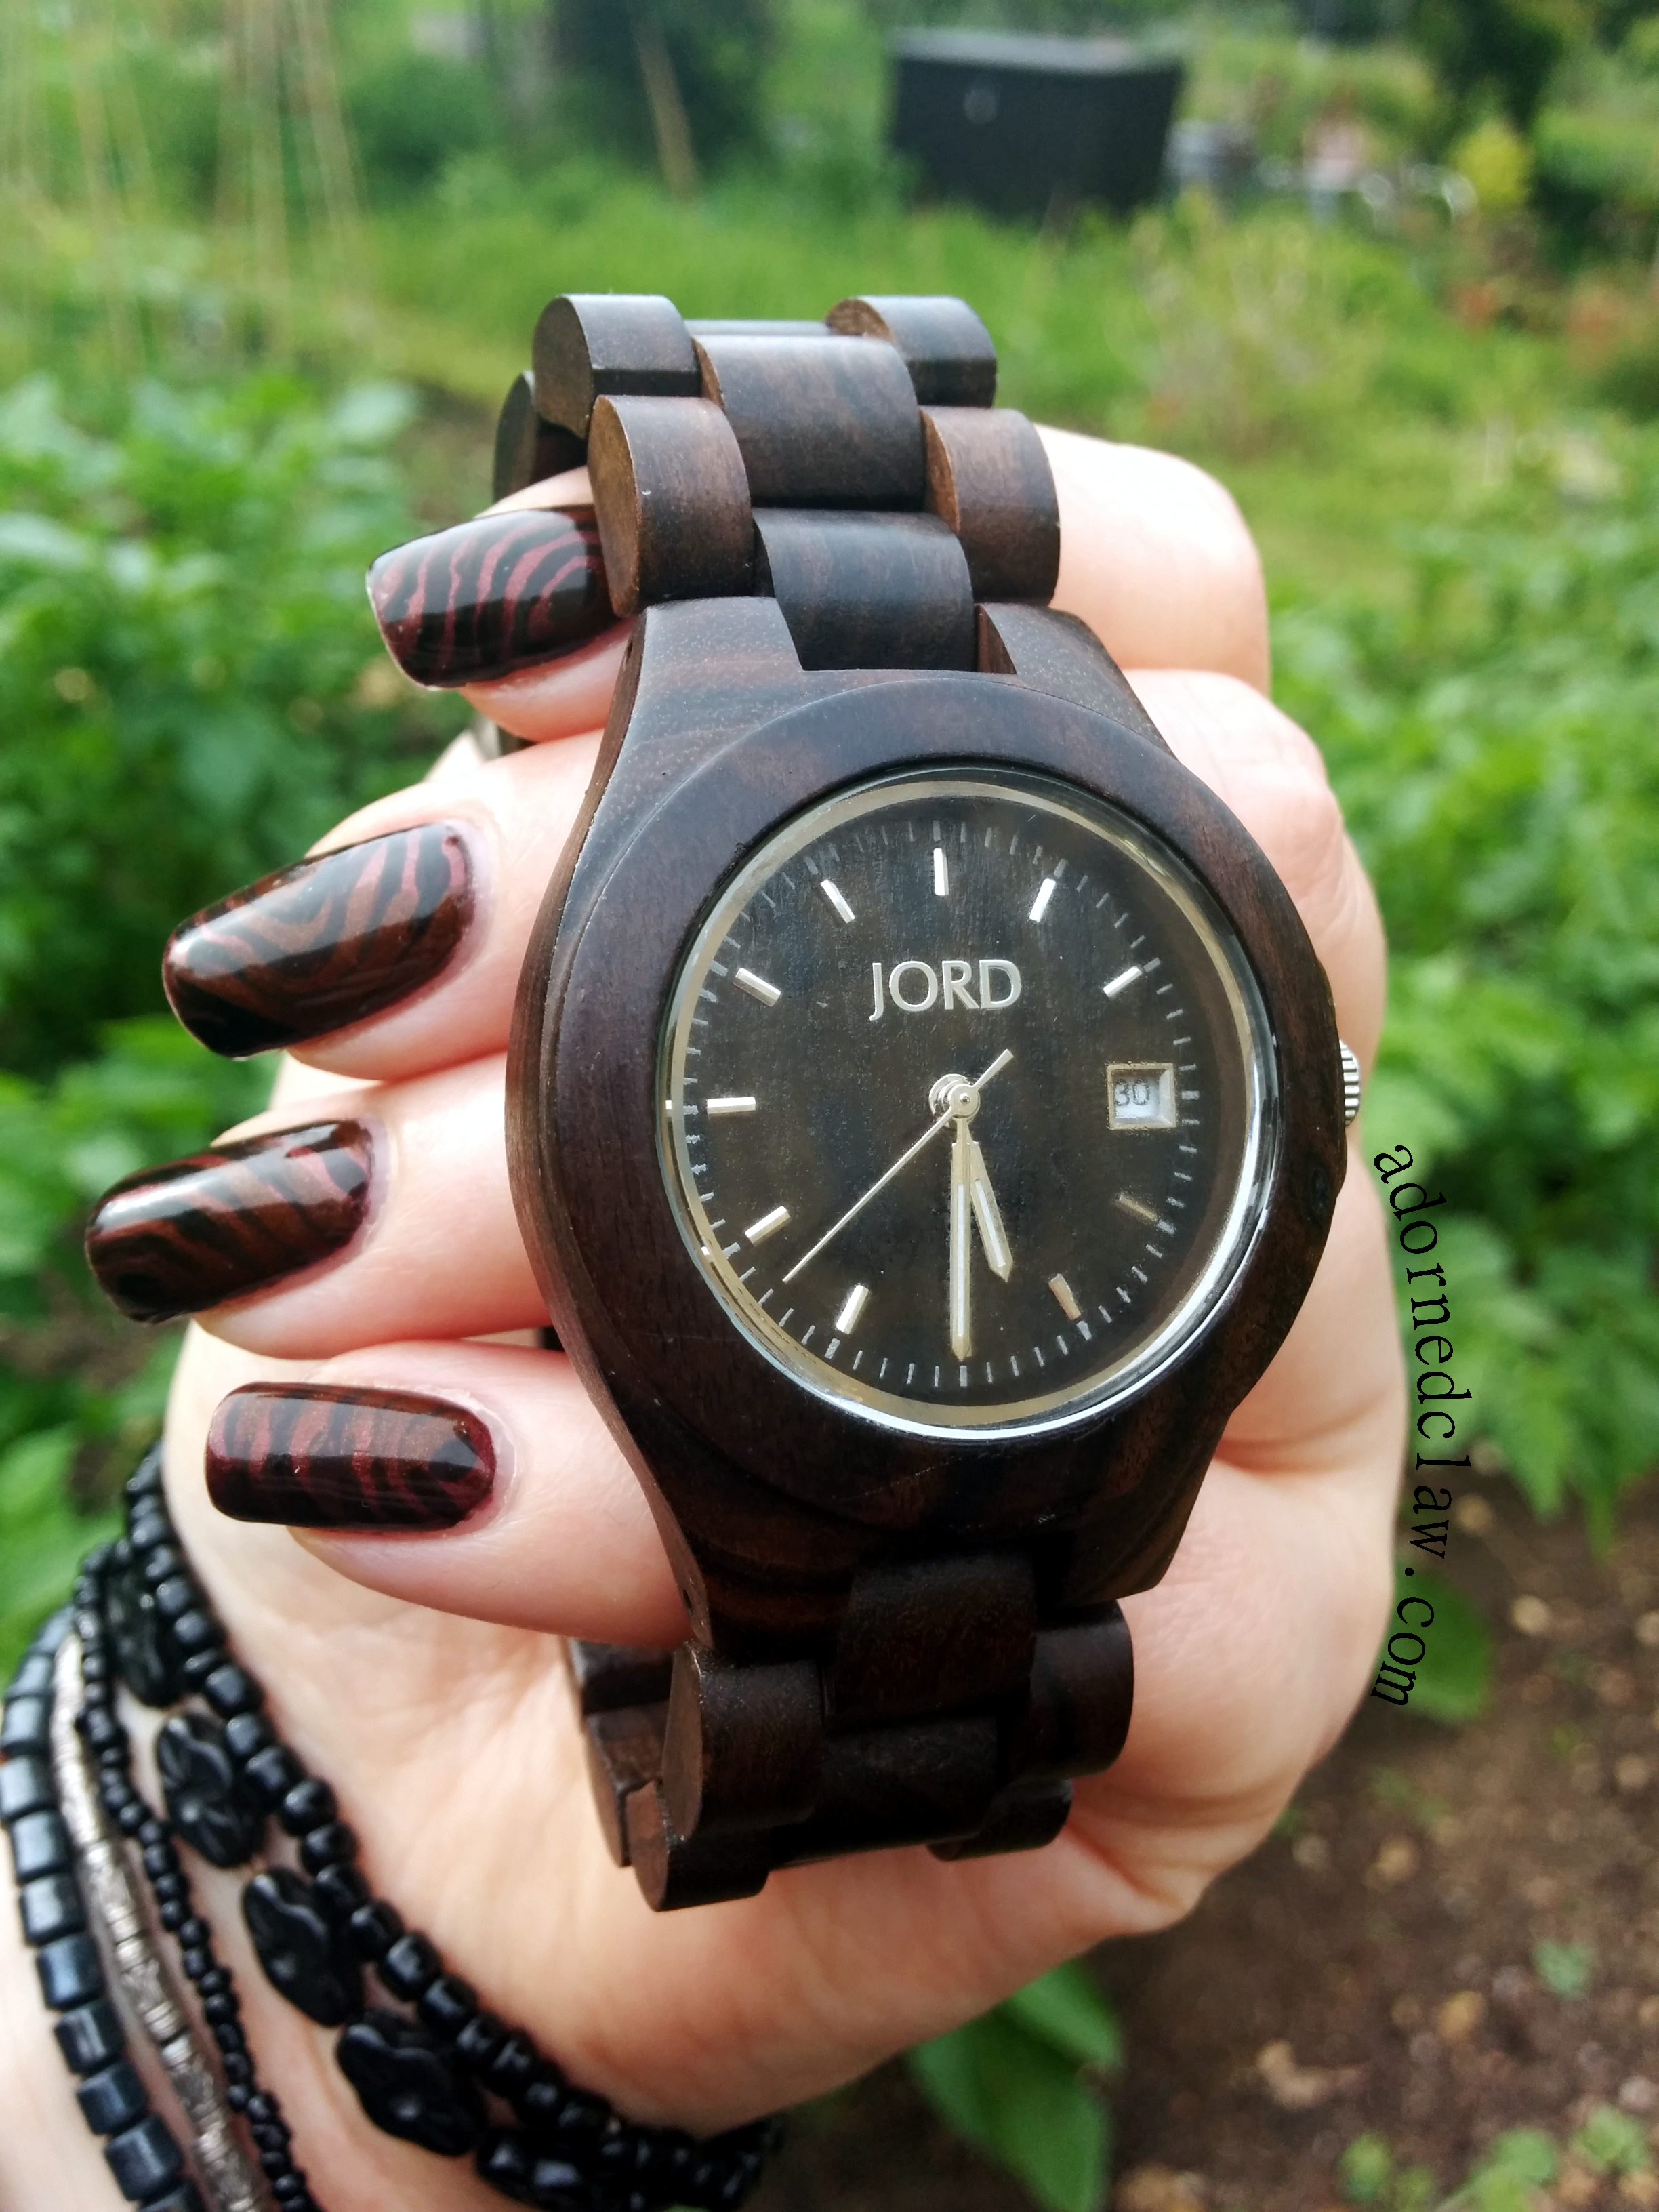
Jord Ely Watch
Today I have a wonderful wooden watch that has been kindly sent to me from JORD to share with you!
This is the Ely in black. And I absolutely love it!
You can find the JORD website right here woodwatches.com
as well as Facebook/Instagram/Twitter/Vine/G+
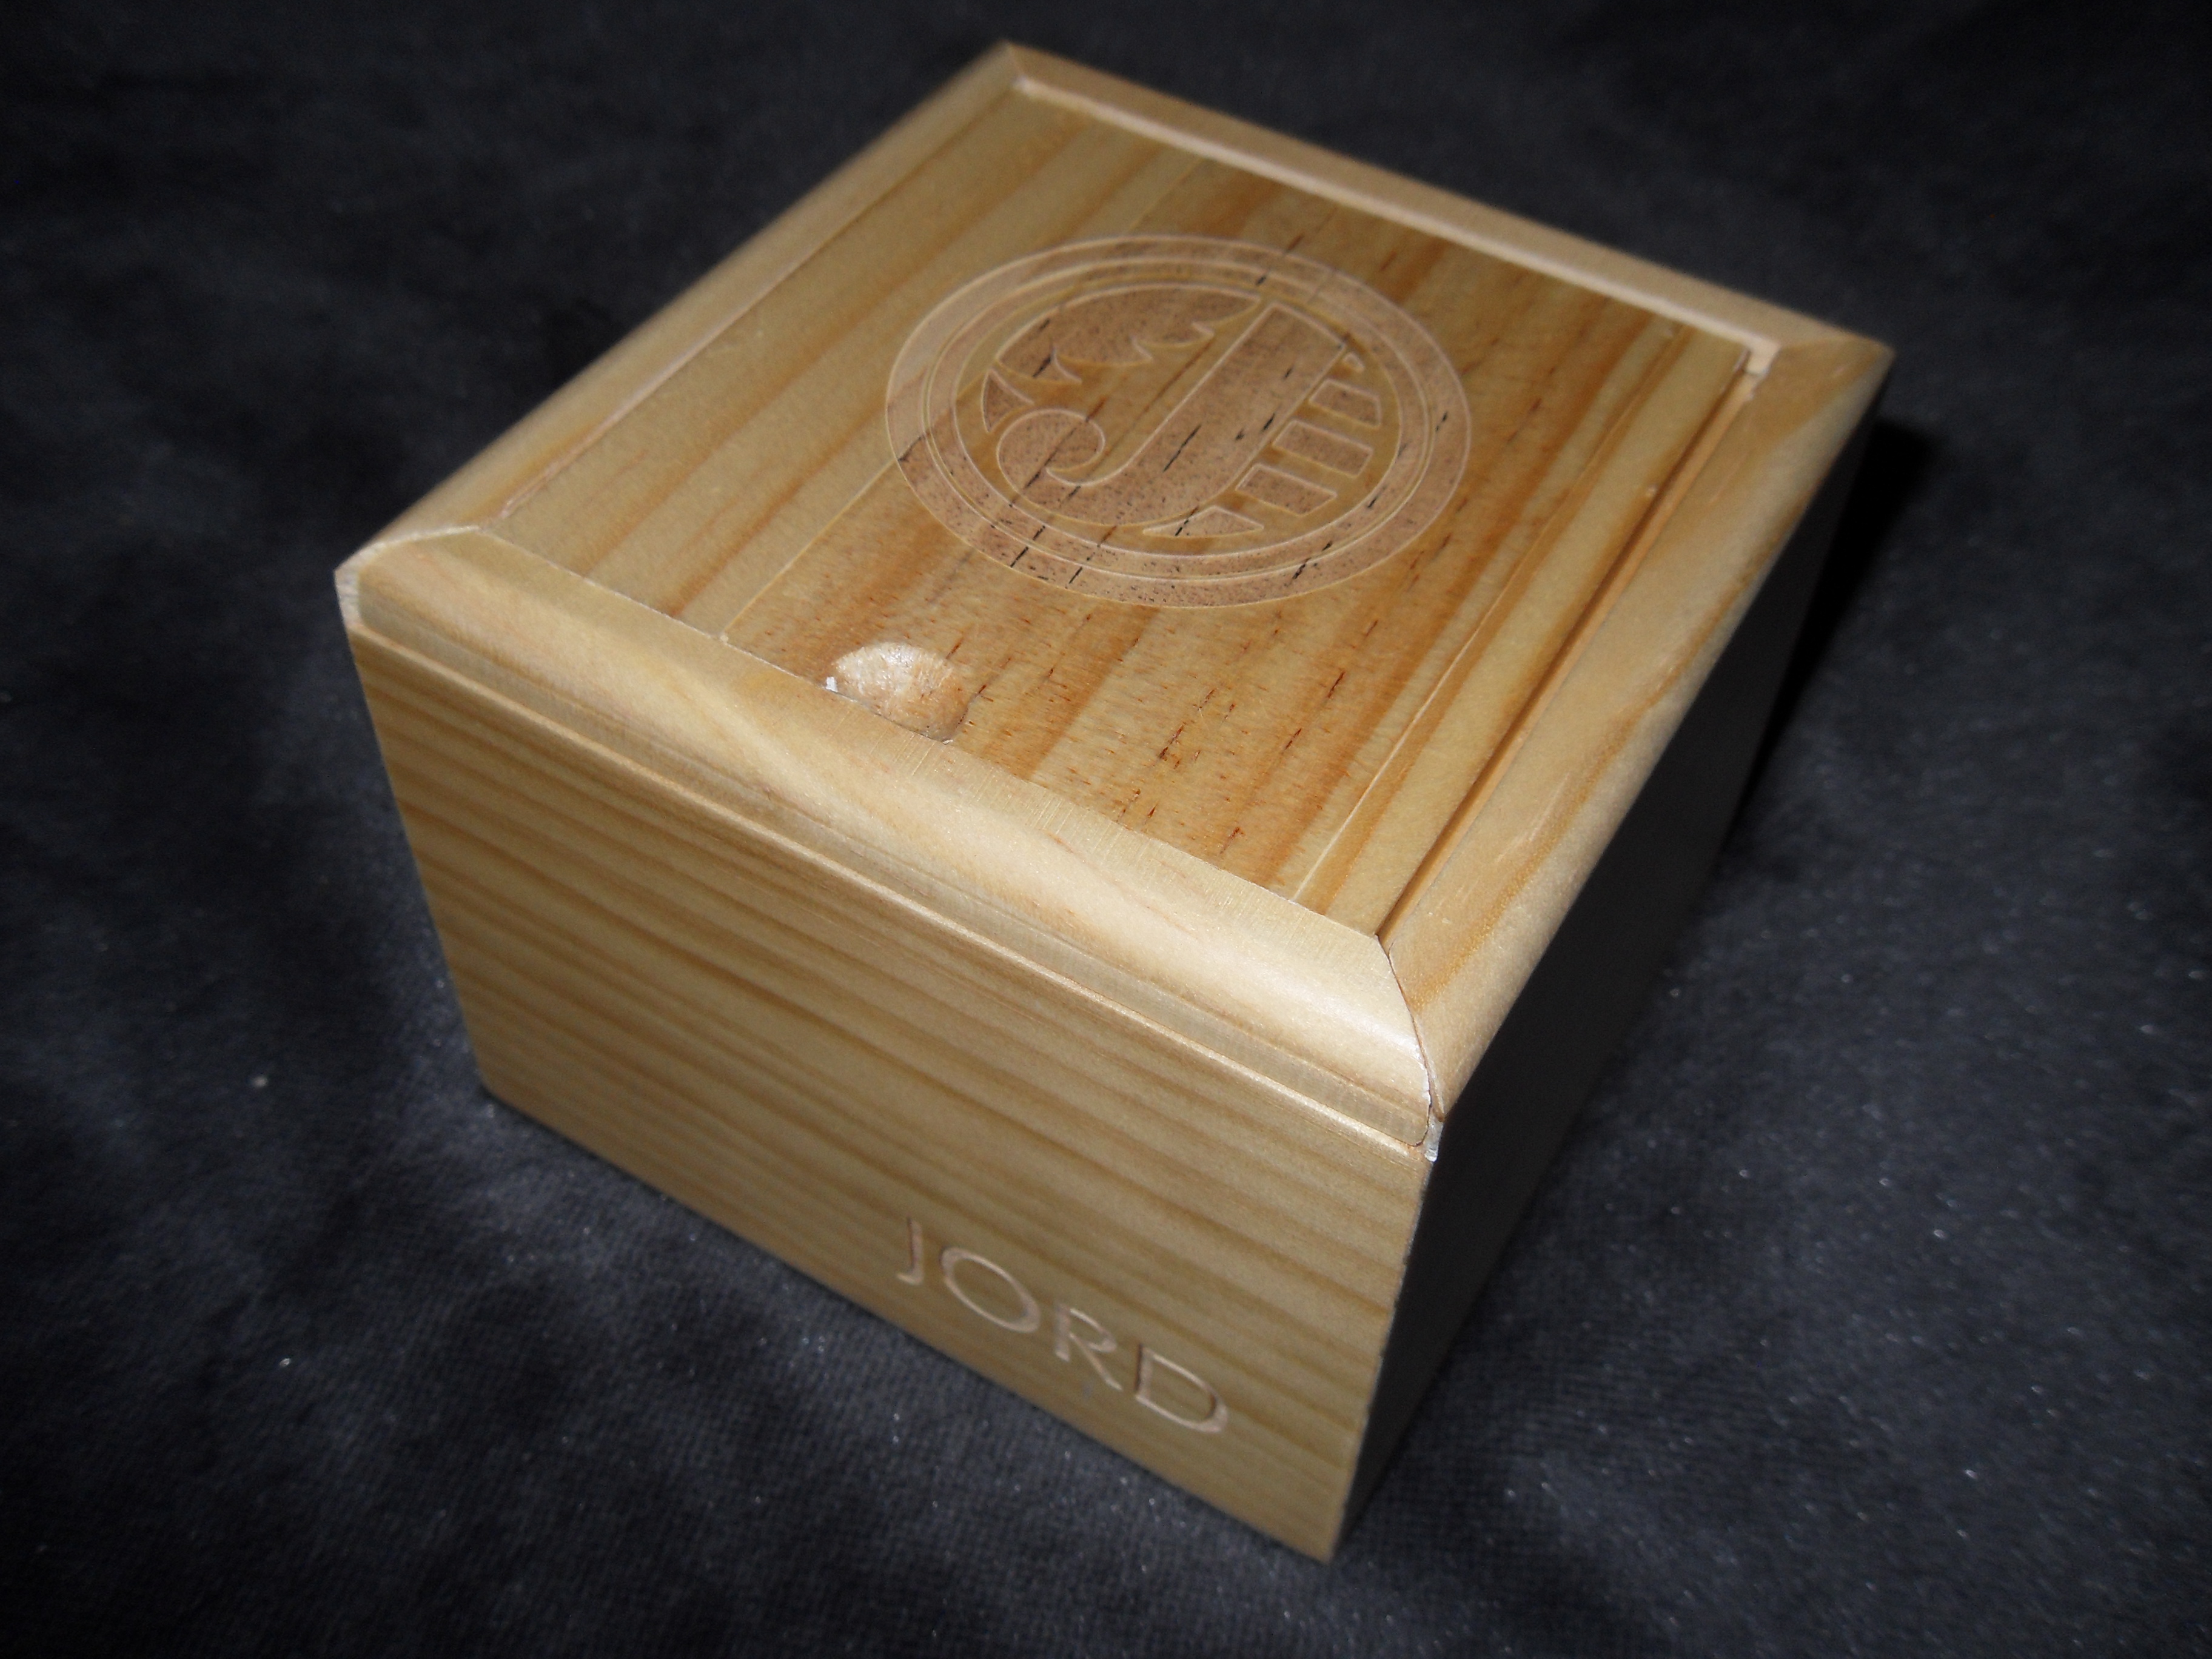
JORD wooden watch Box
The wooden box it arrived in is so cute! (I do have a weakness for well designed packaging)
But more importantly. What’s in the box?!
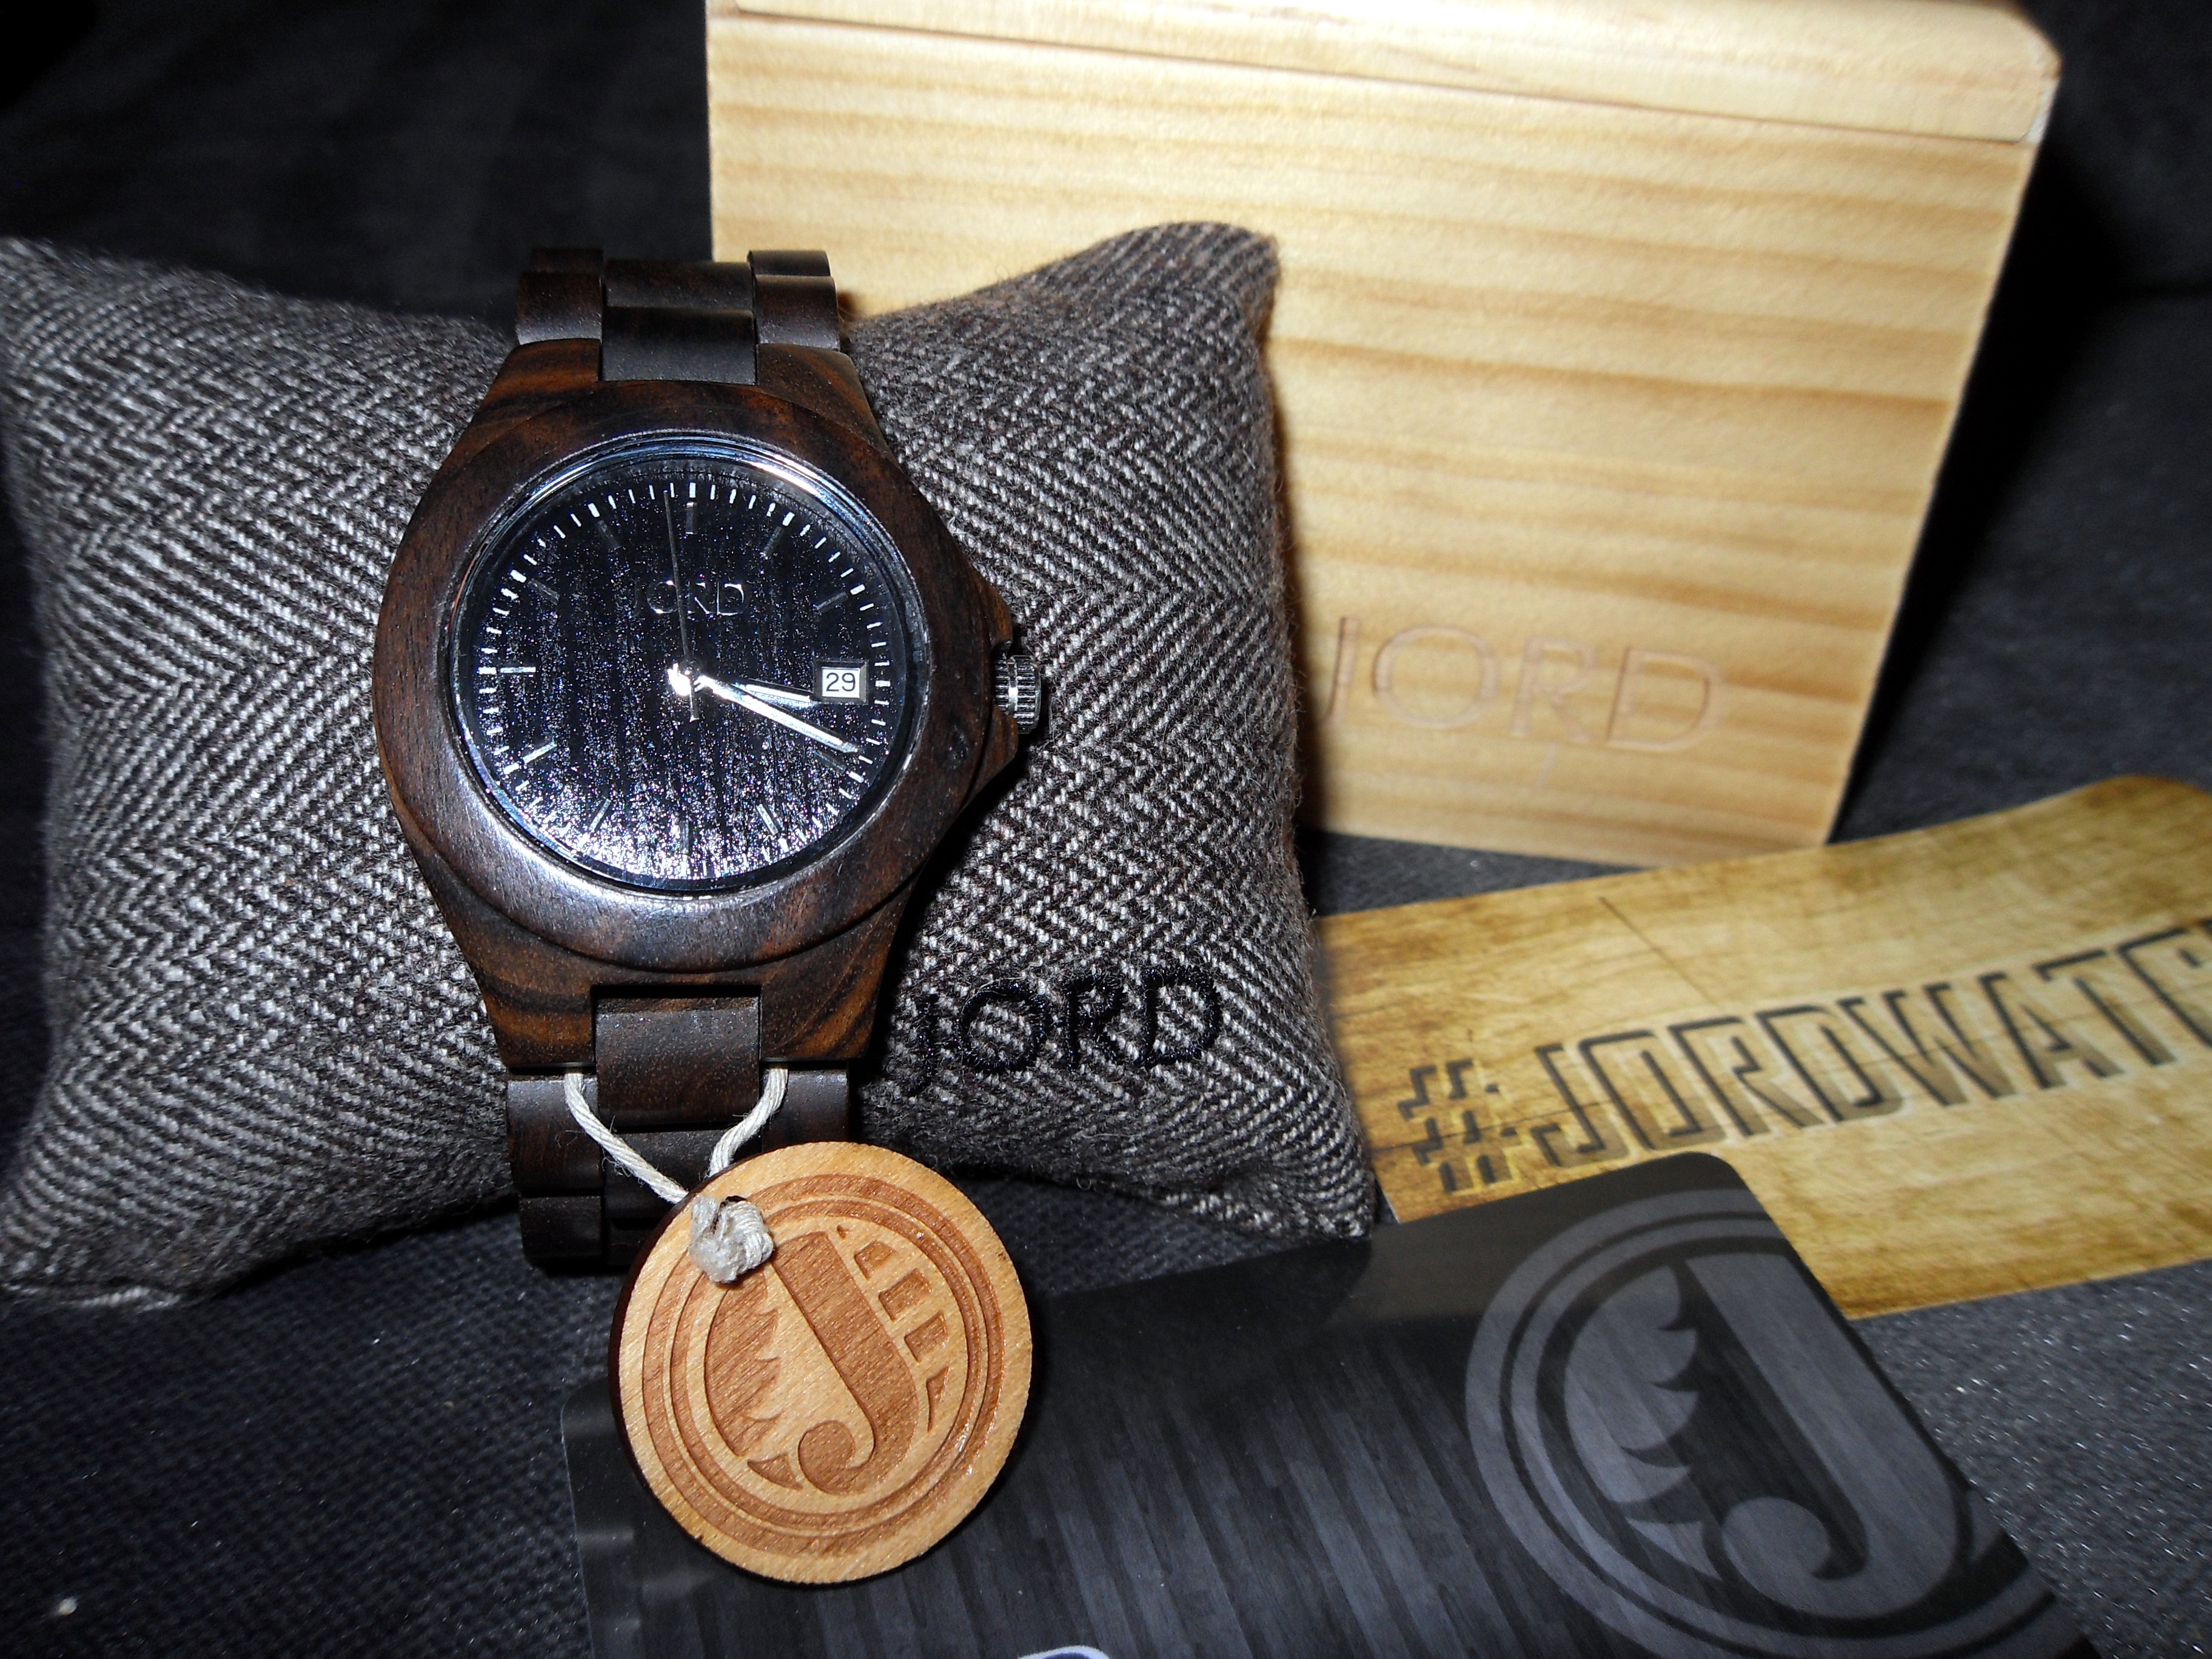
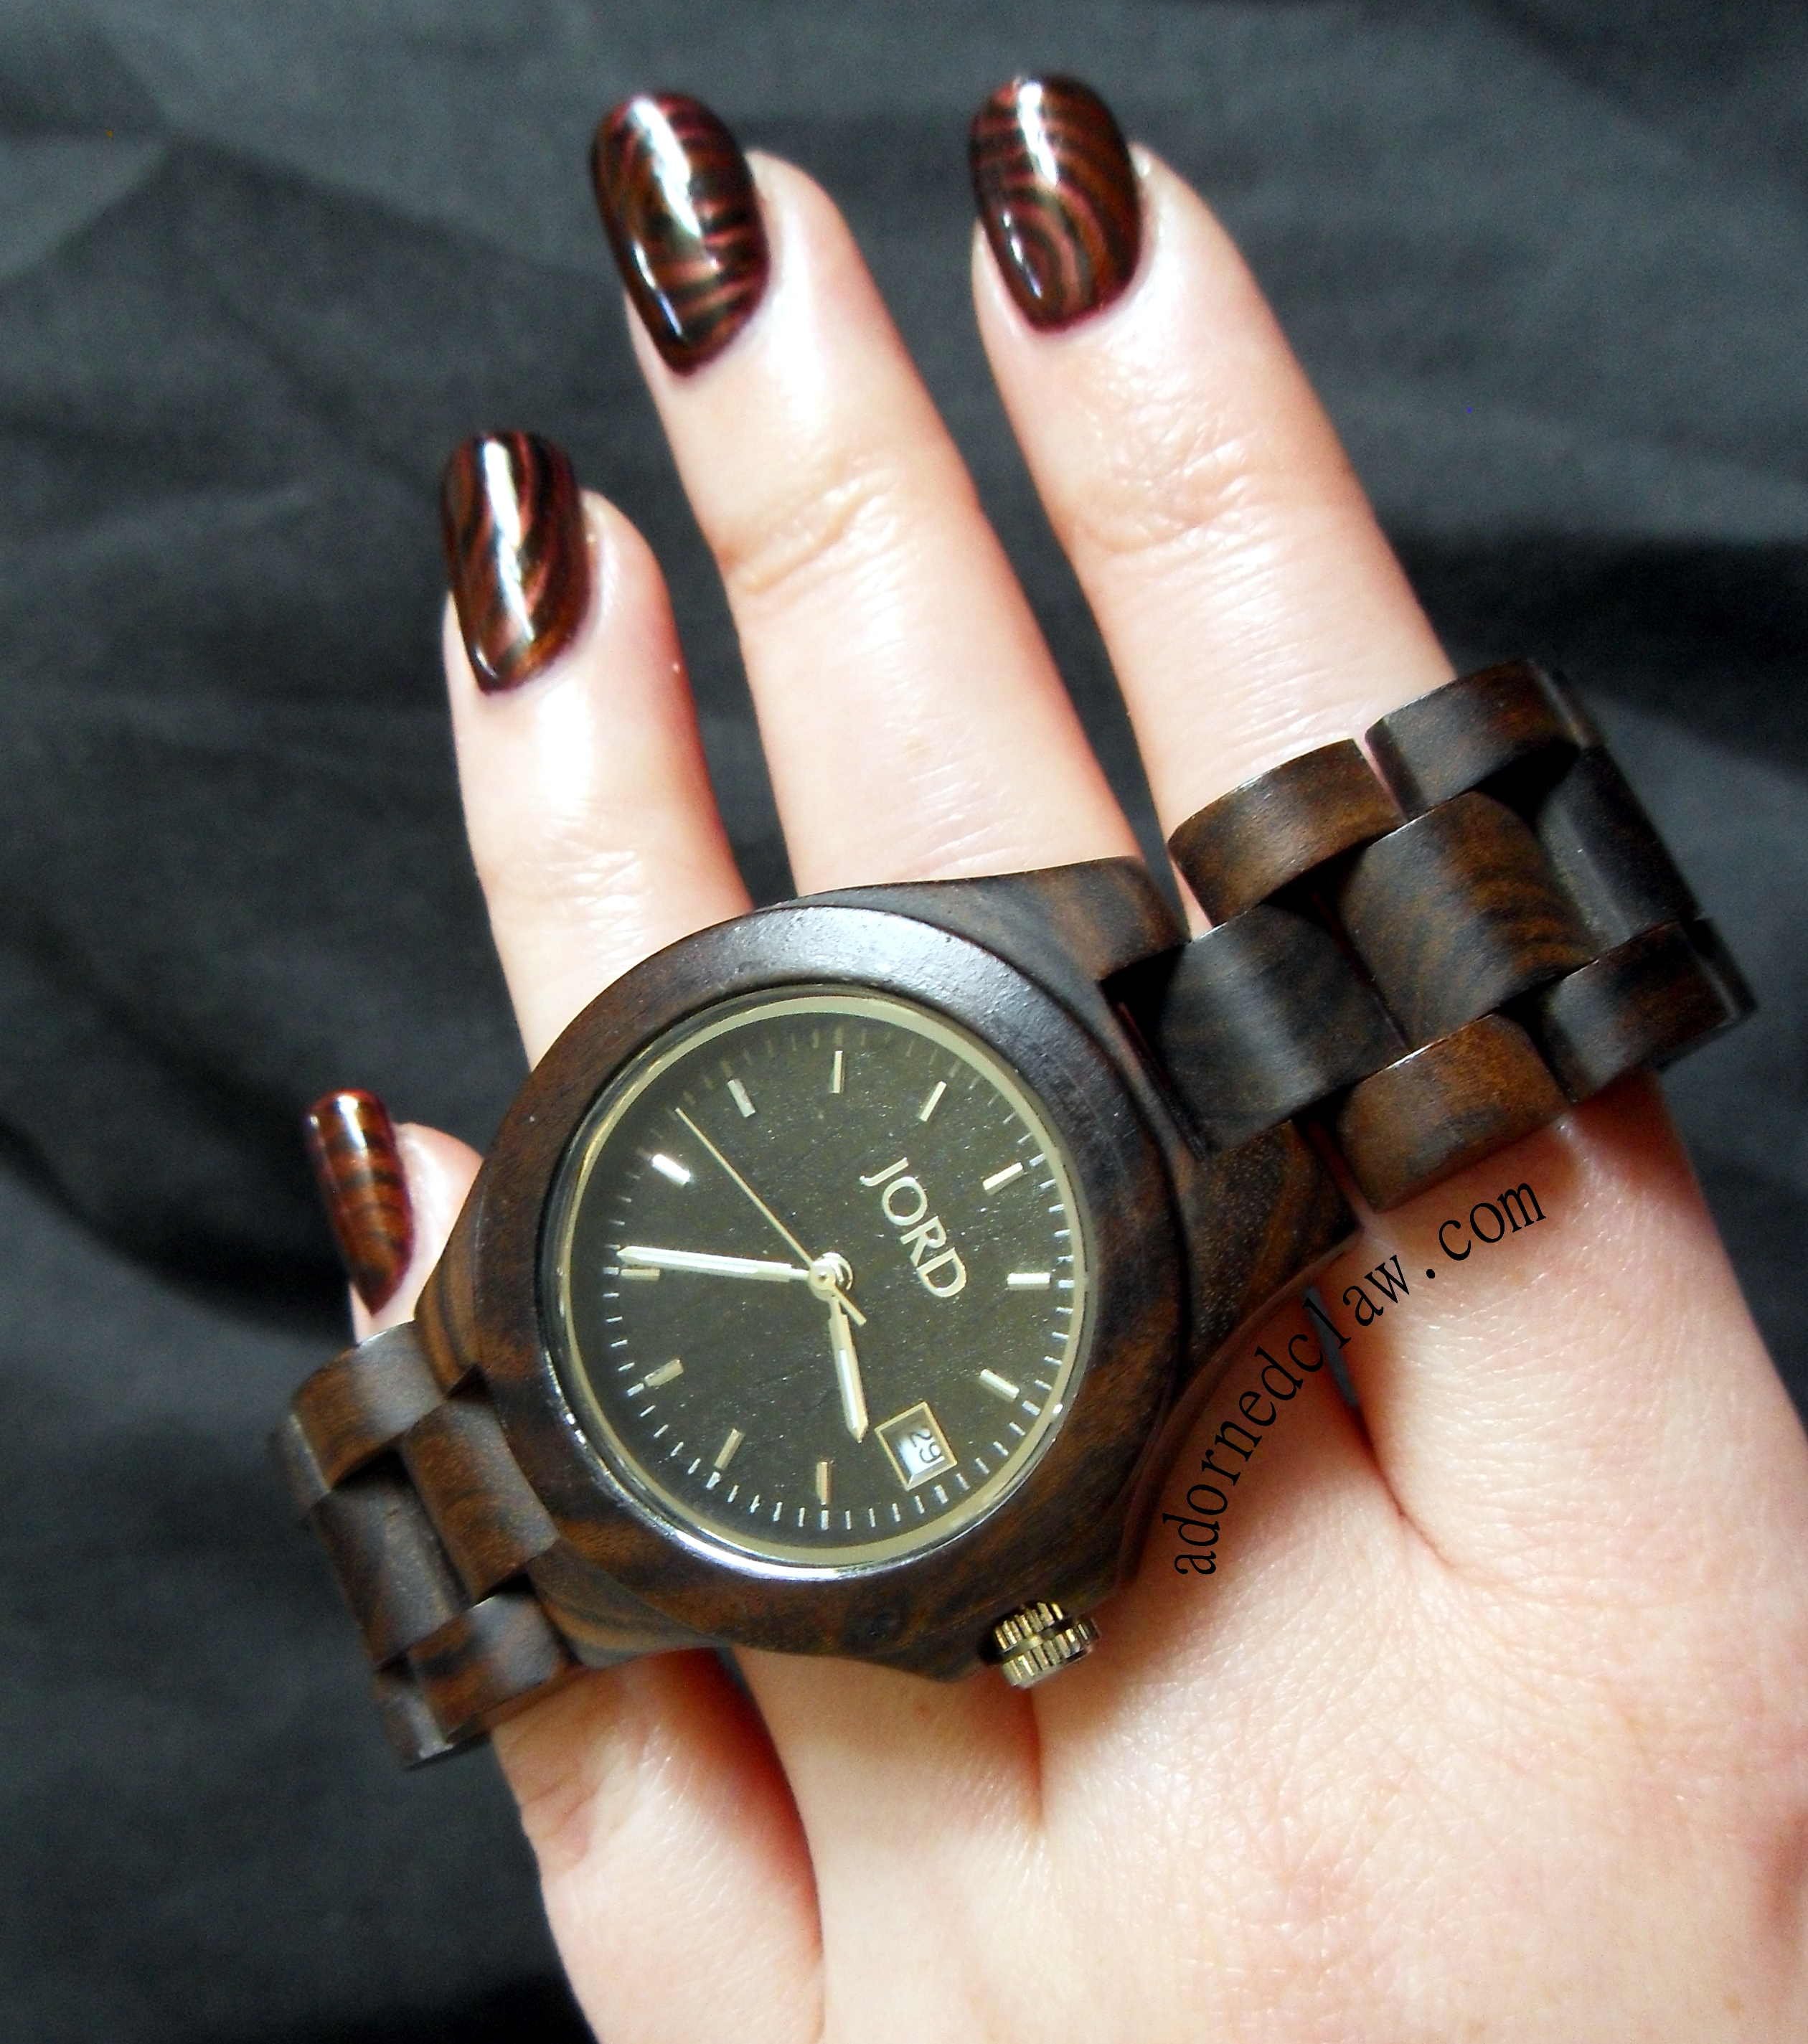
JORD Ely Wooden Watch
The Ely watch is on it’s own branded pillow with a little engraved wooden tag, a warranty card and a card with social media information along with a couple of extra links for the strap.
It all arrived carefully packed inside and out with bubble wrap, and made it all the way from America with out a single scratch!
The Ely retails at $129 which is around £83 and JORD ship internationally.
The Ely is available in four different types of wood, each one a different colour, Black (my one), Cherry (a warm red), Natural Green with Maple (green toned light wood) and Maple (pale honey shade).
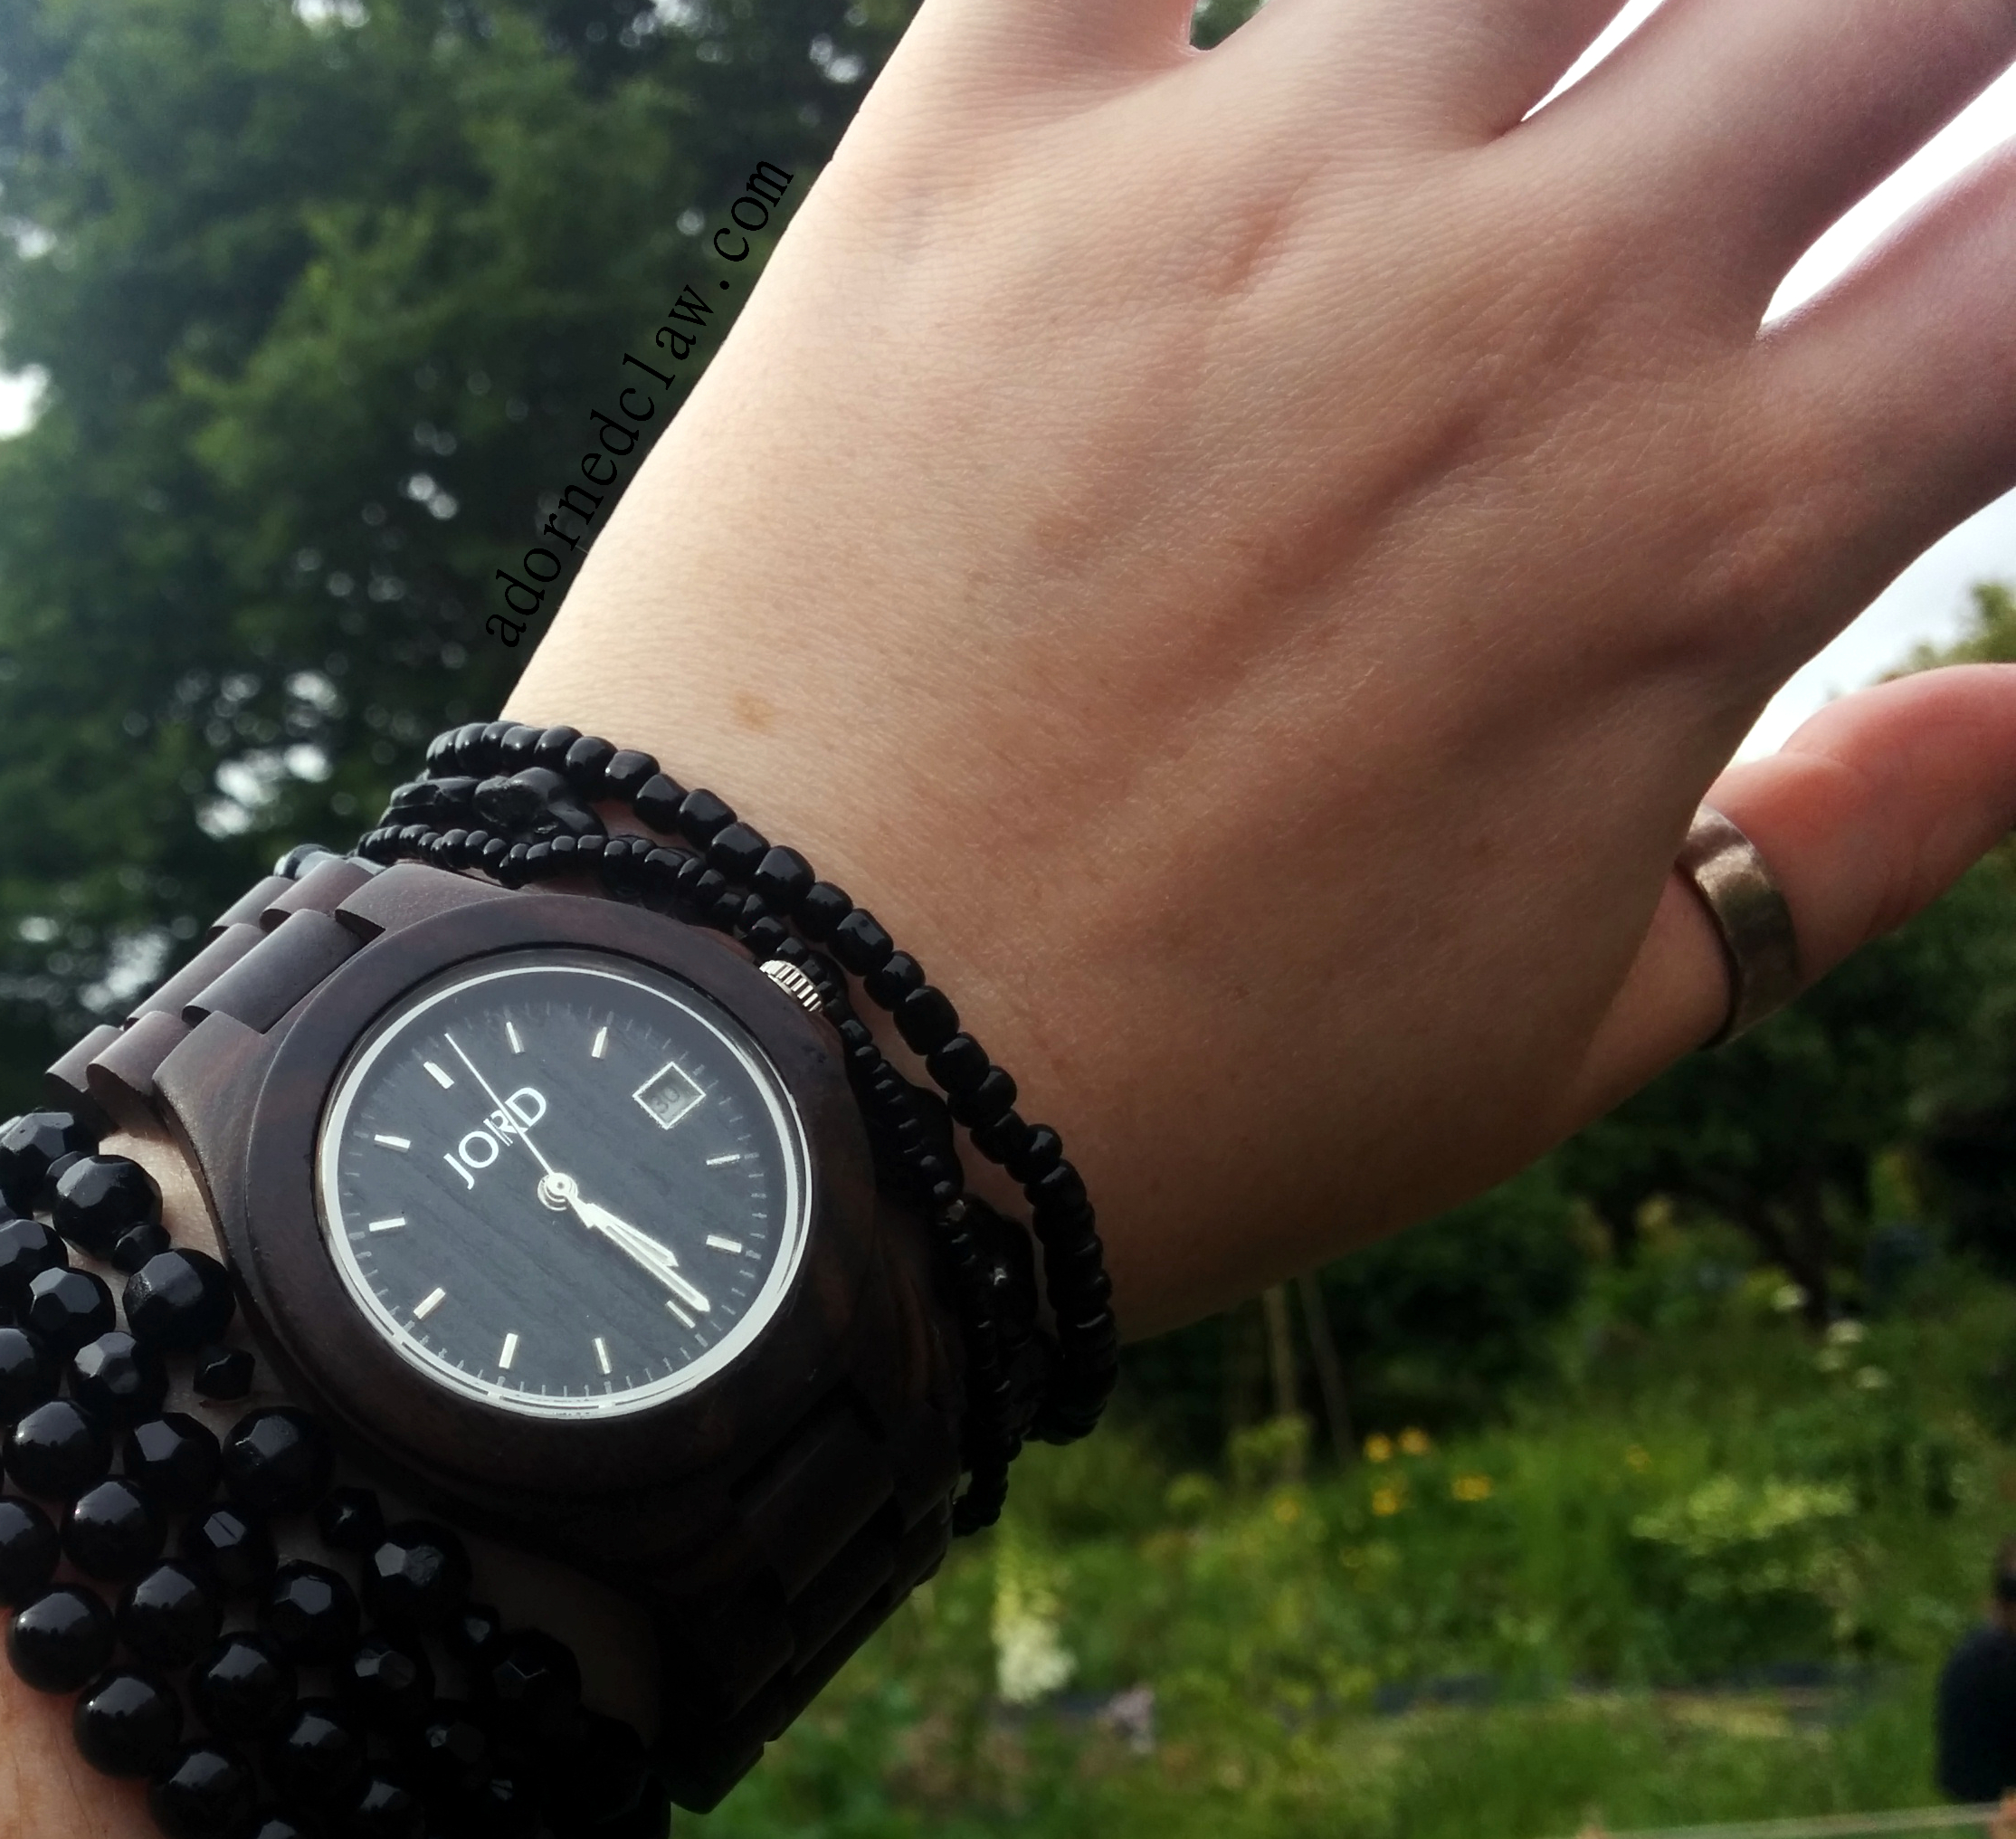
JORD Ely Wooden Watch in the wild!
The watch itself feels really well made, the wood is very smooth and surprisingly tactile, I keep finding myself stroking it lol.
This is what JORD say about the Ely Watch.
“Ely is produced using a slightly smaller dial and band, with the addition of a date display. The simplicity of this design accentuates the intricacy of the wood grain. The Ely is understated and effortless.”
And the technical details.
- Deployment Buckle with Push Button
- Scratch Resistant Mineral
- Citizen Miyota Quartz Movement (2015 w/Date Display)
- Case Width: 37mm
- Case Thickness: 11mm
- Lug Ends: 45mm
- Band Length: 200mm
- Band Thickness: 21mm
Also the clasps are made from stainless steel which is great if you have metal allergies.
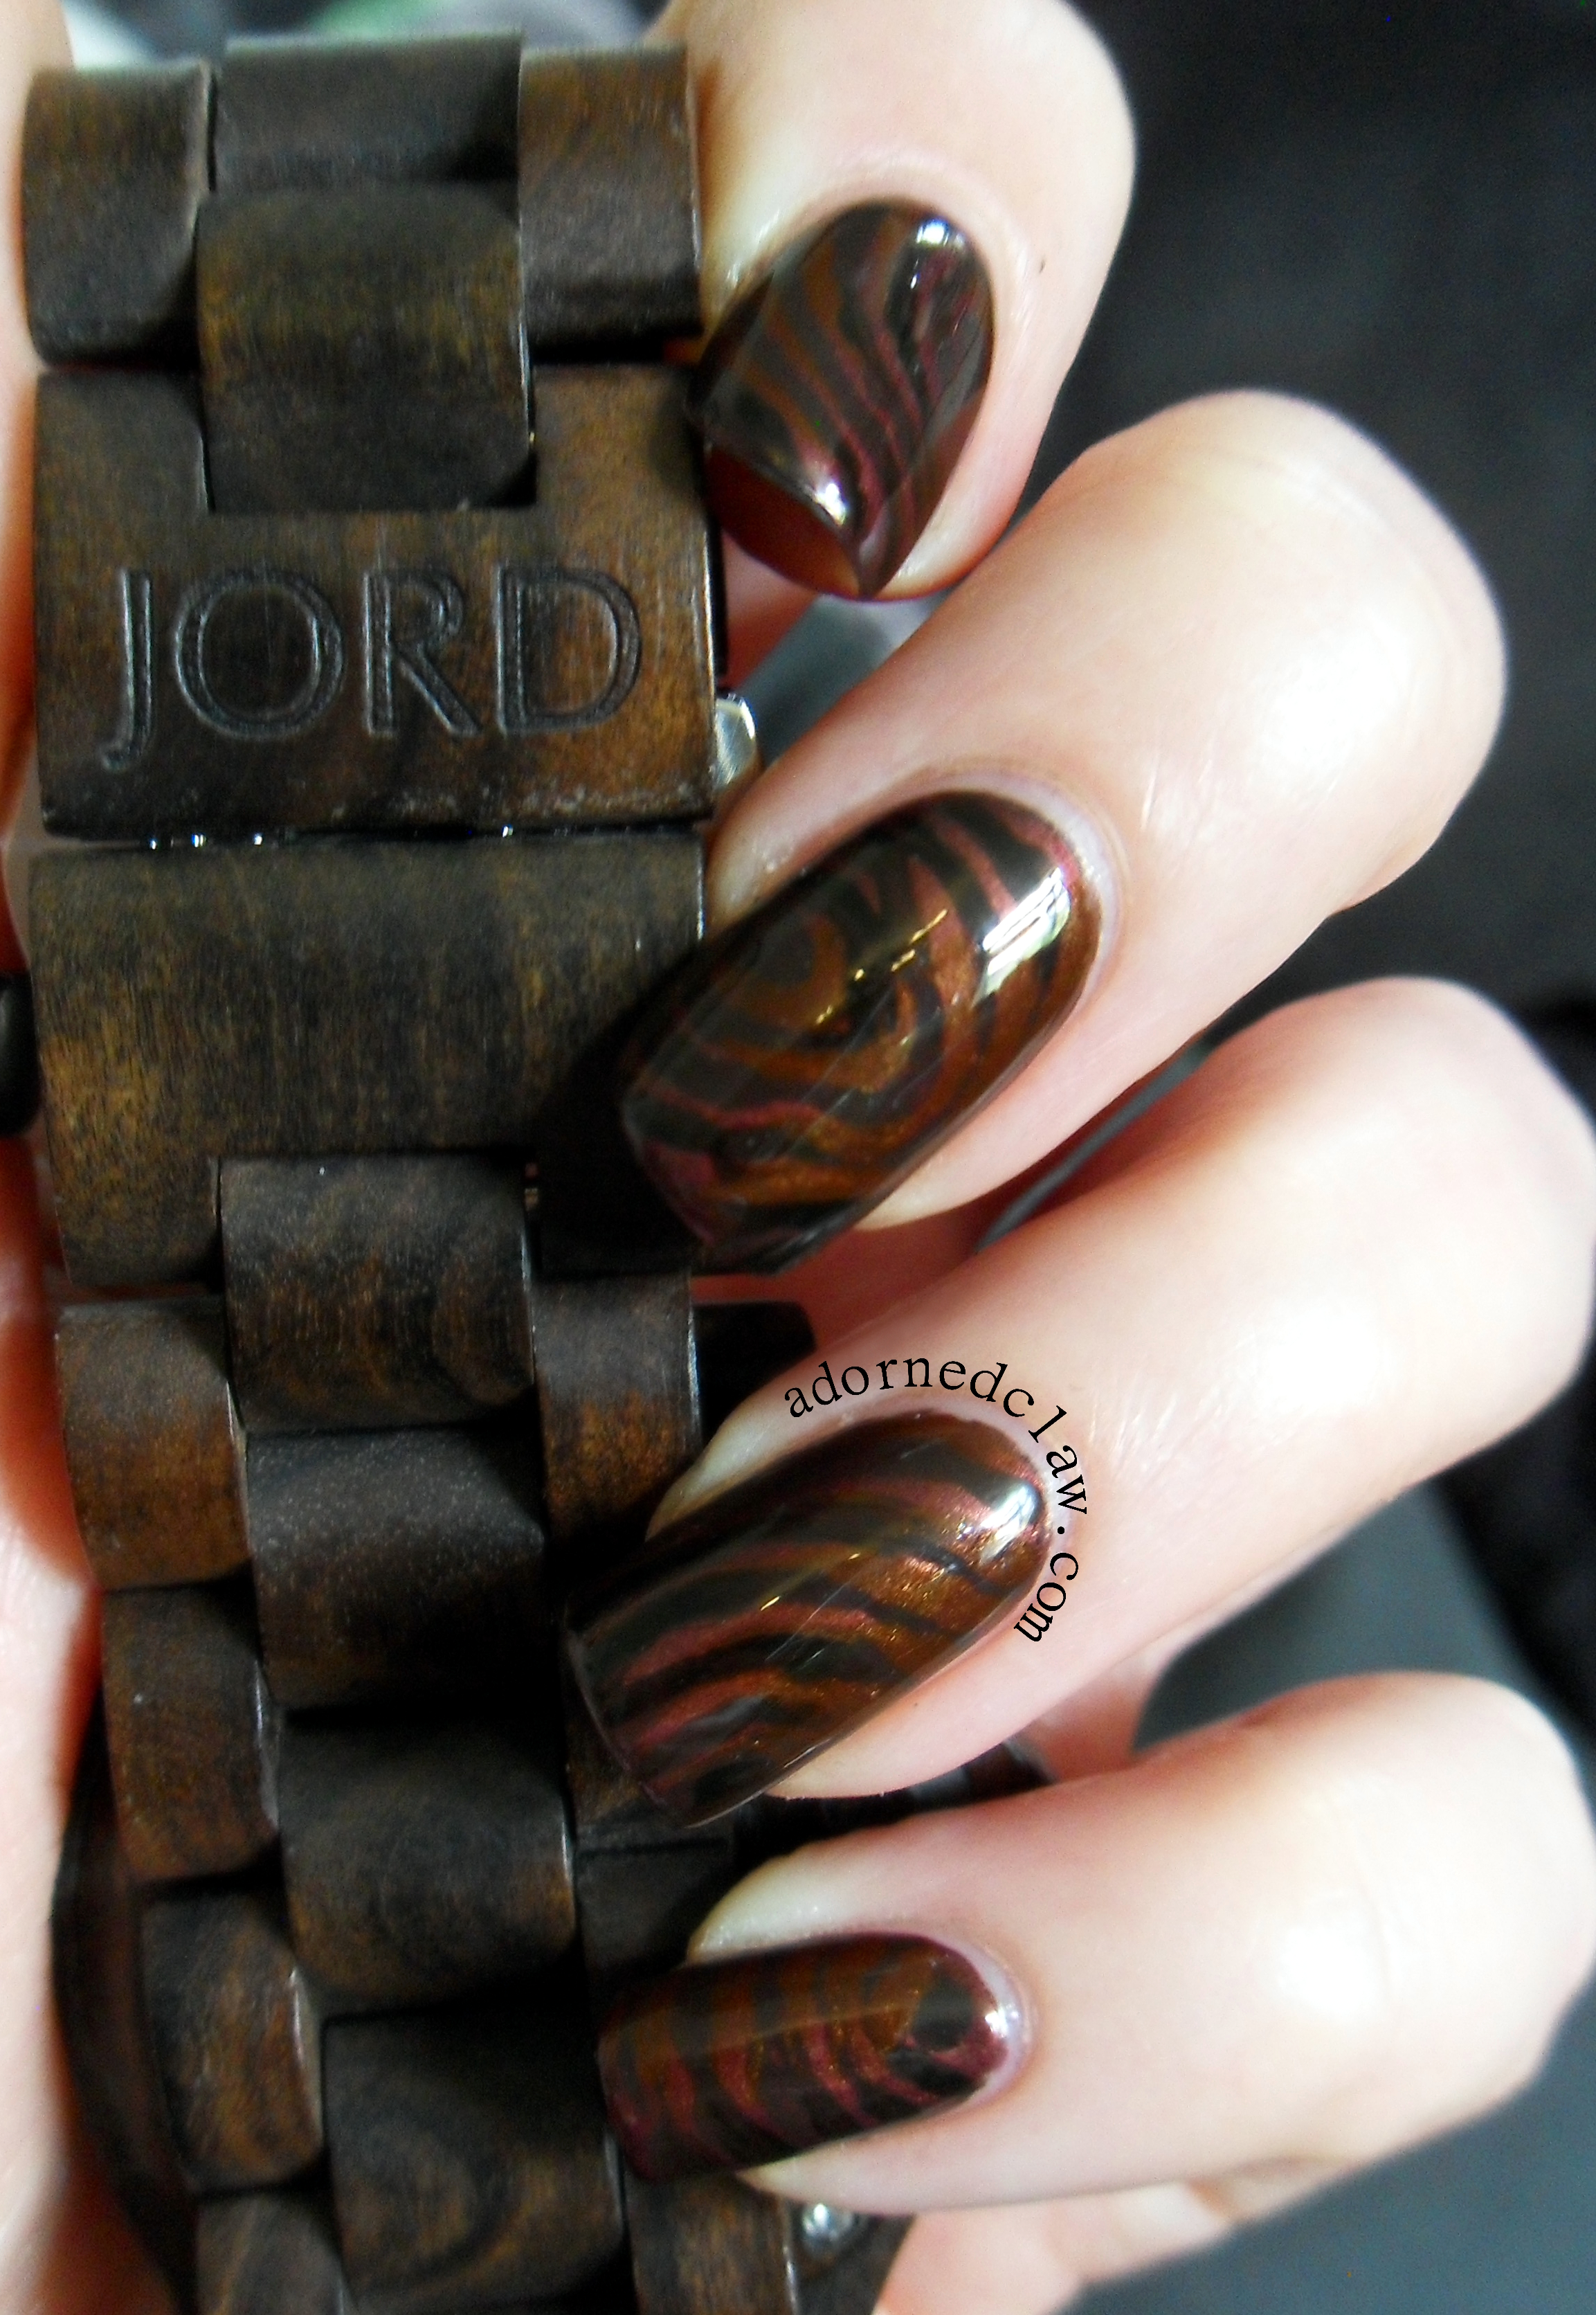
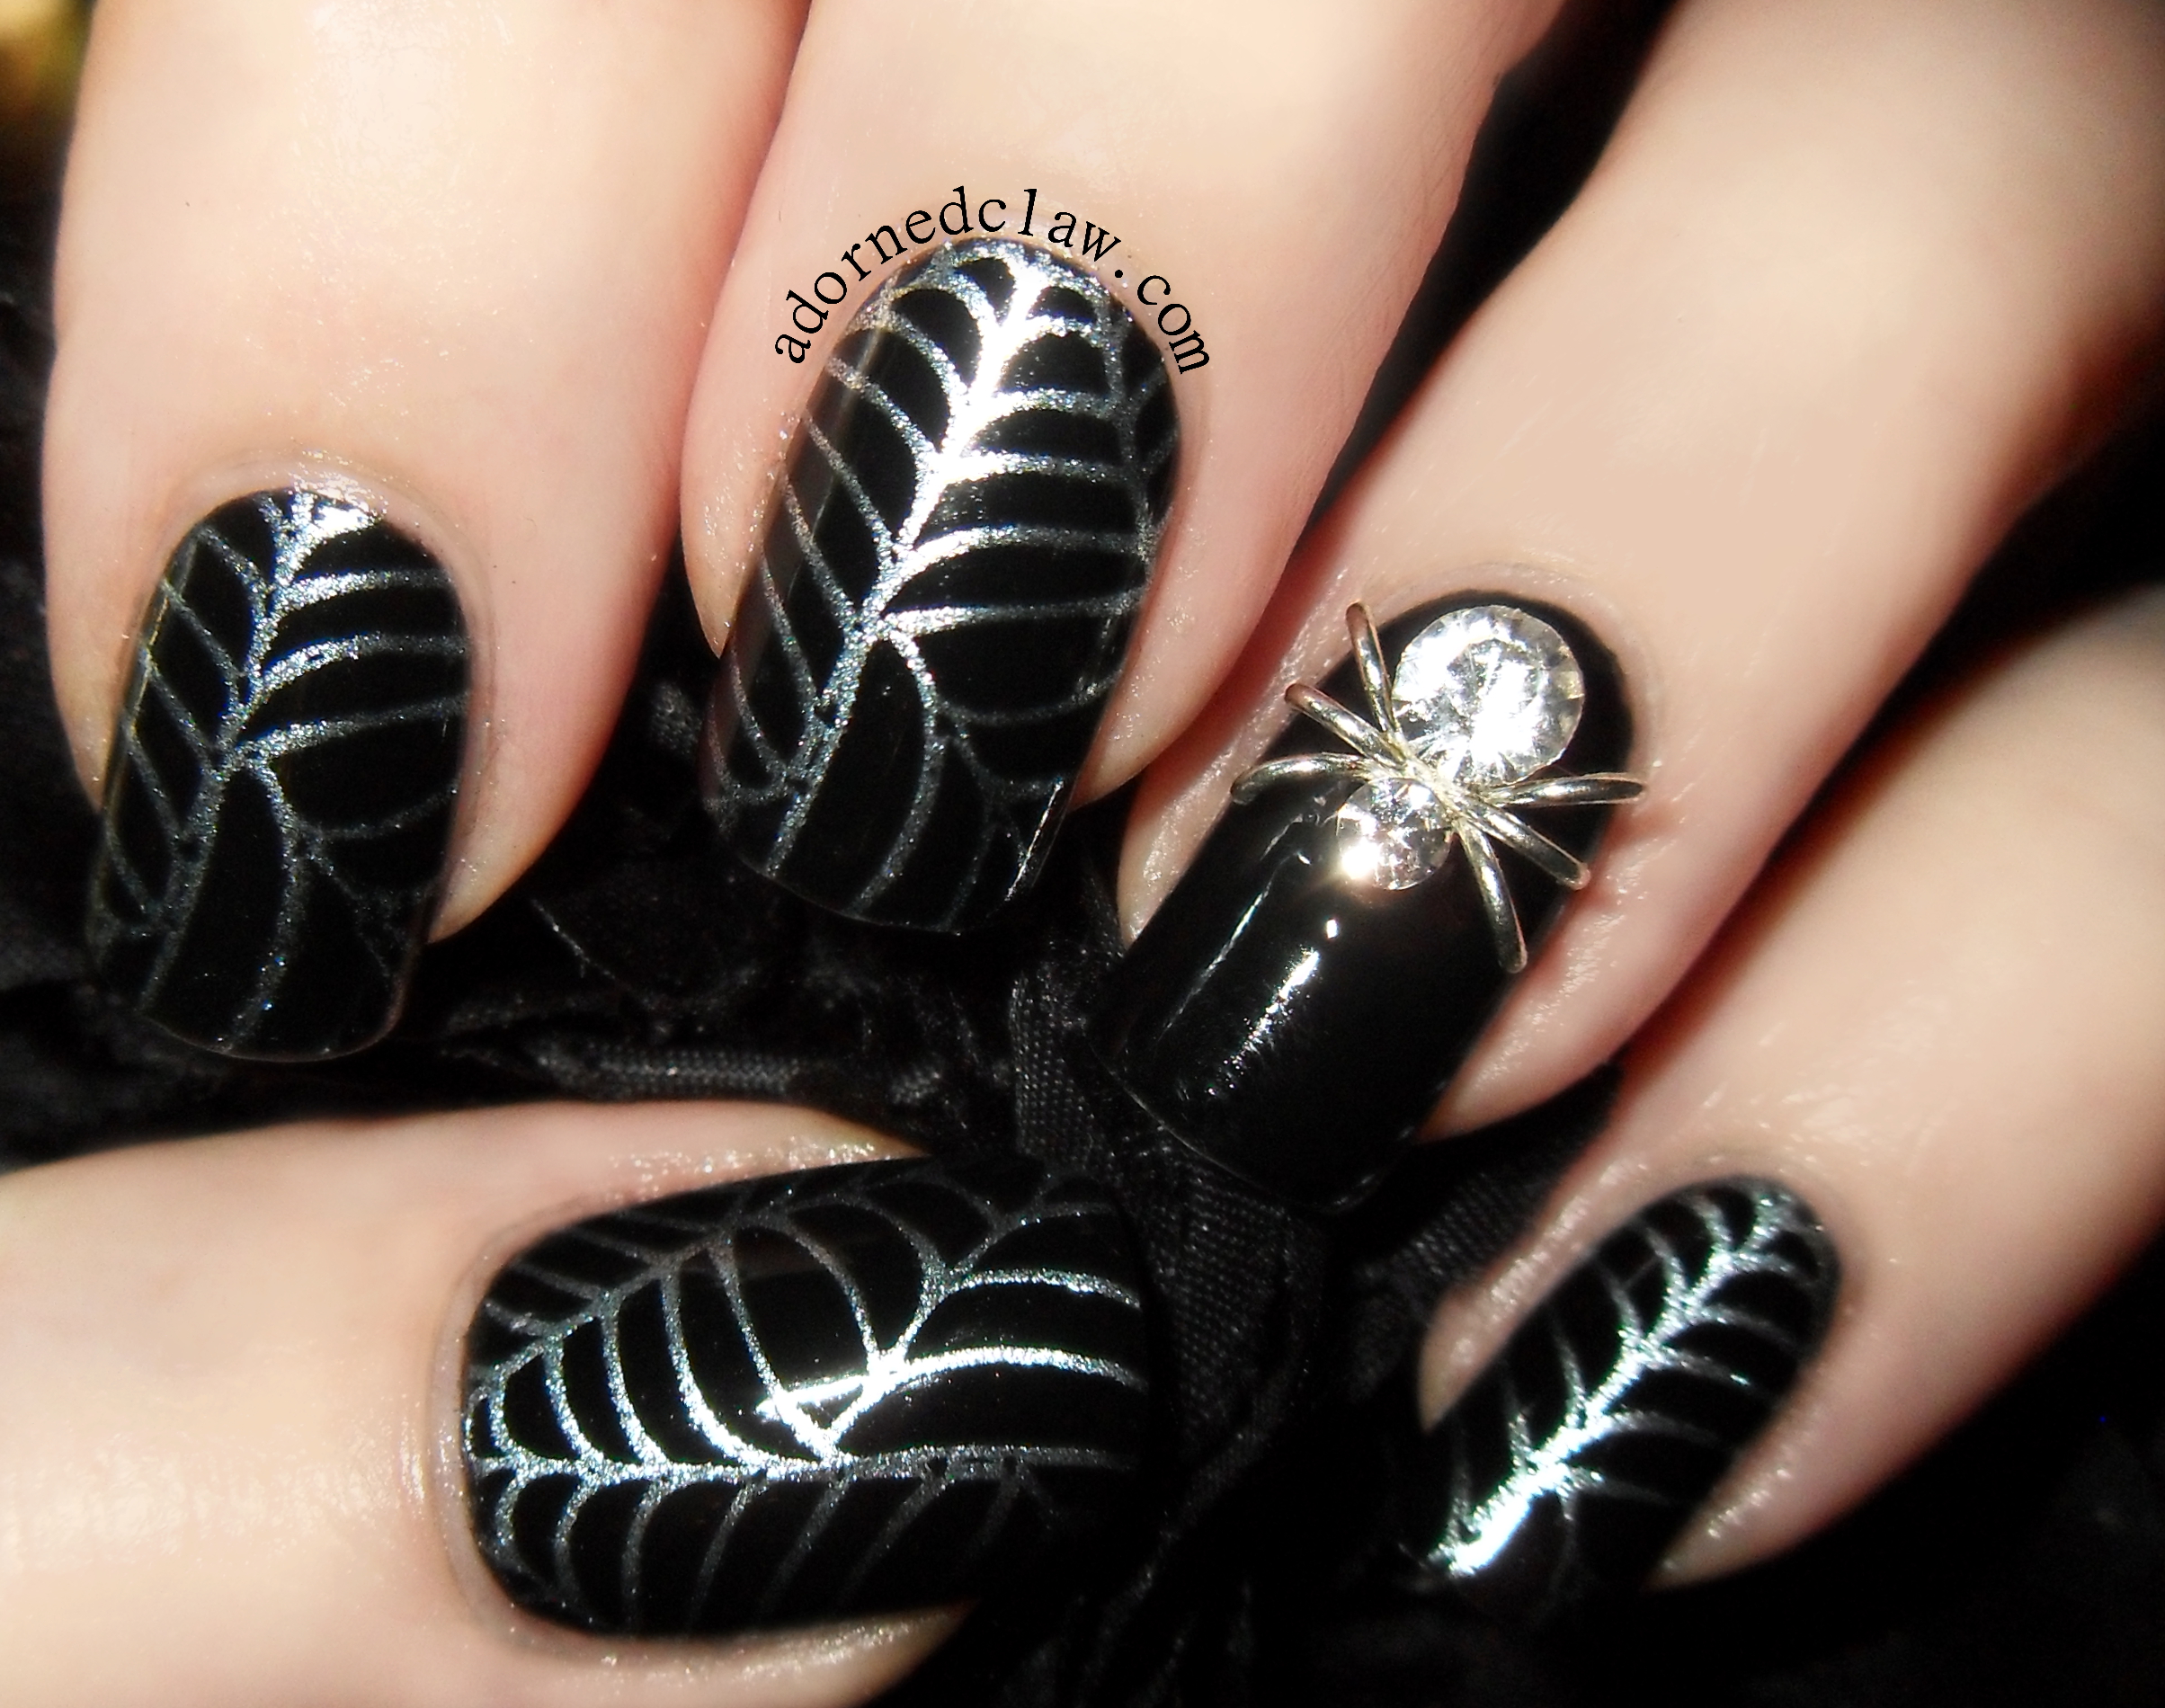
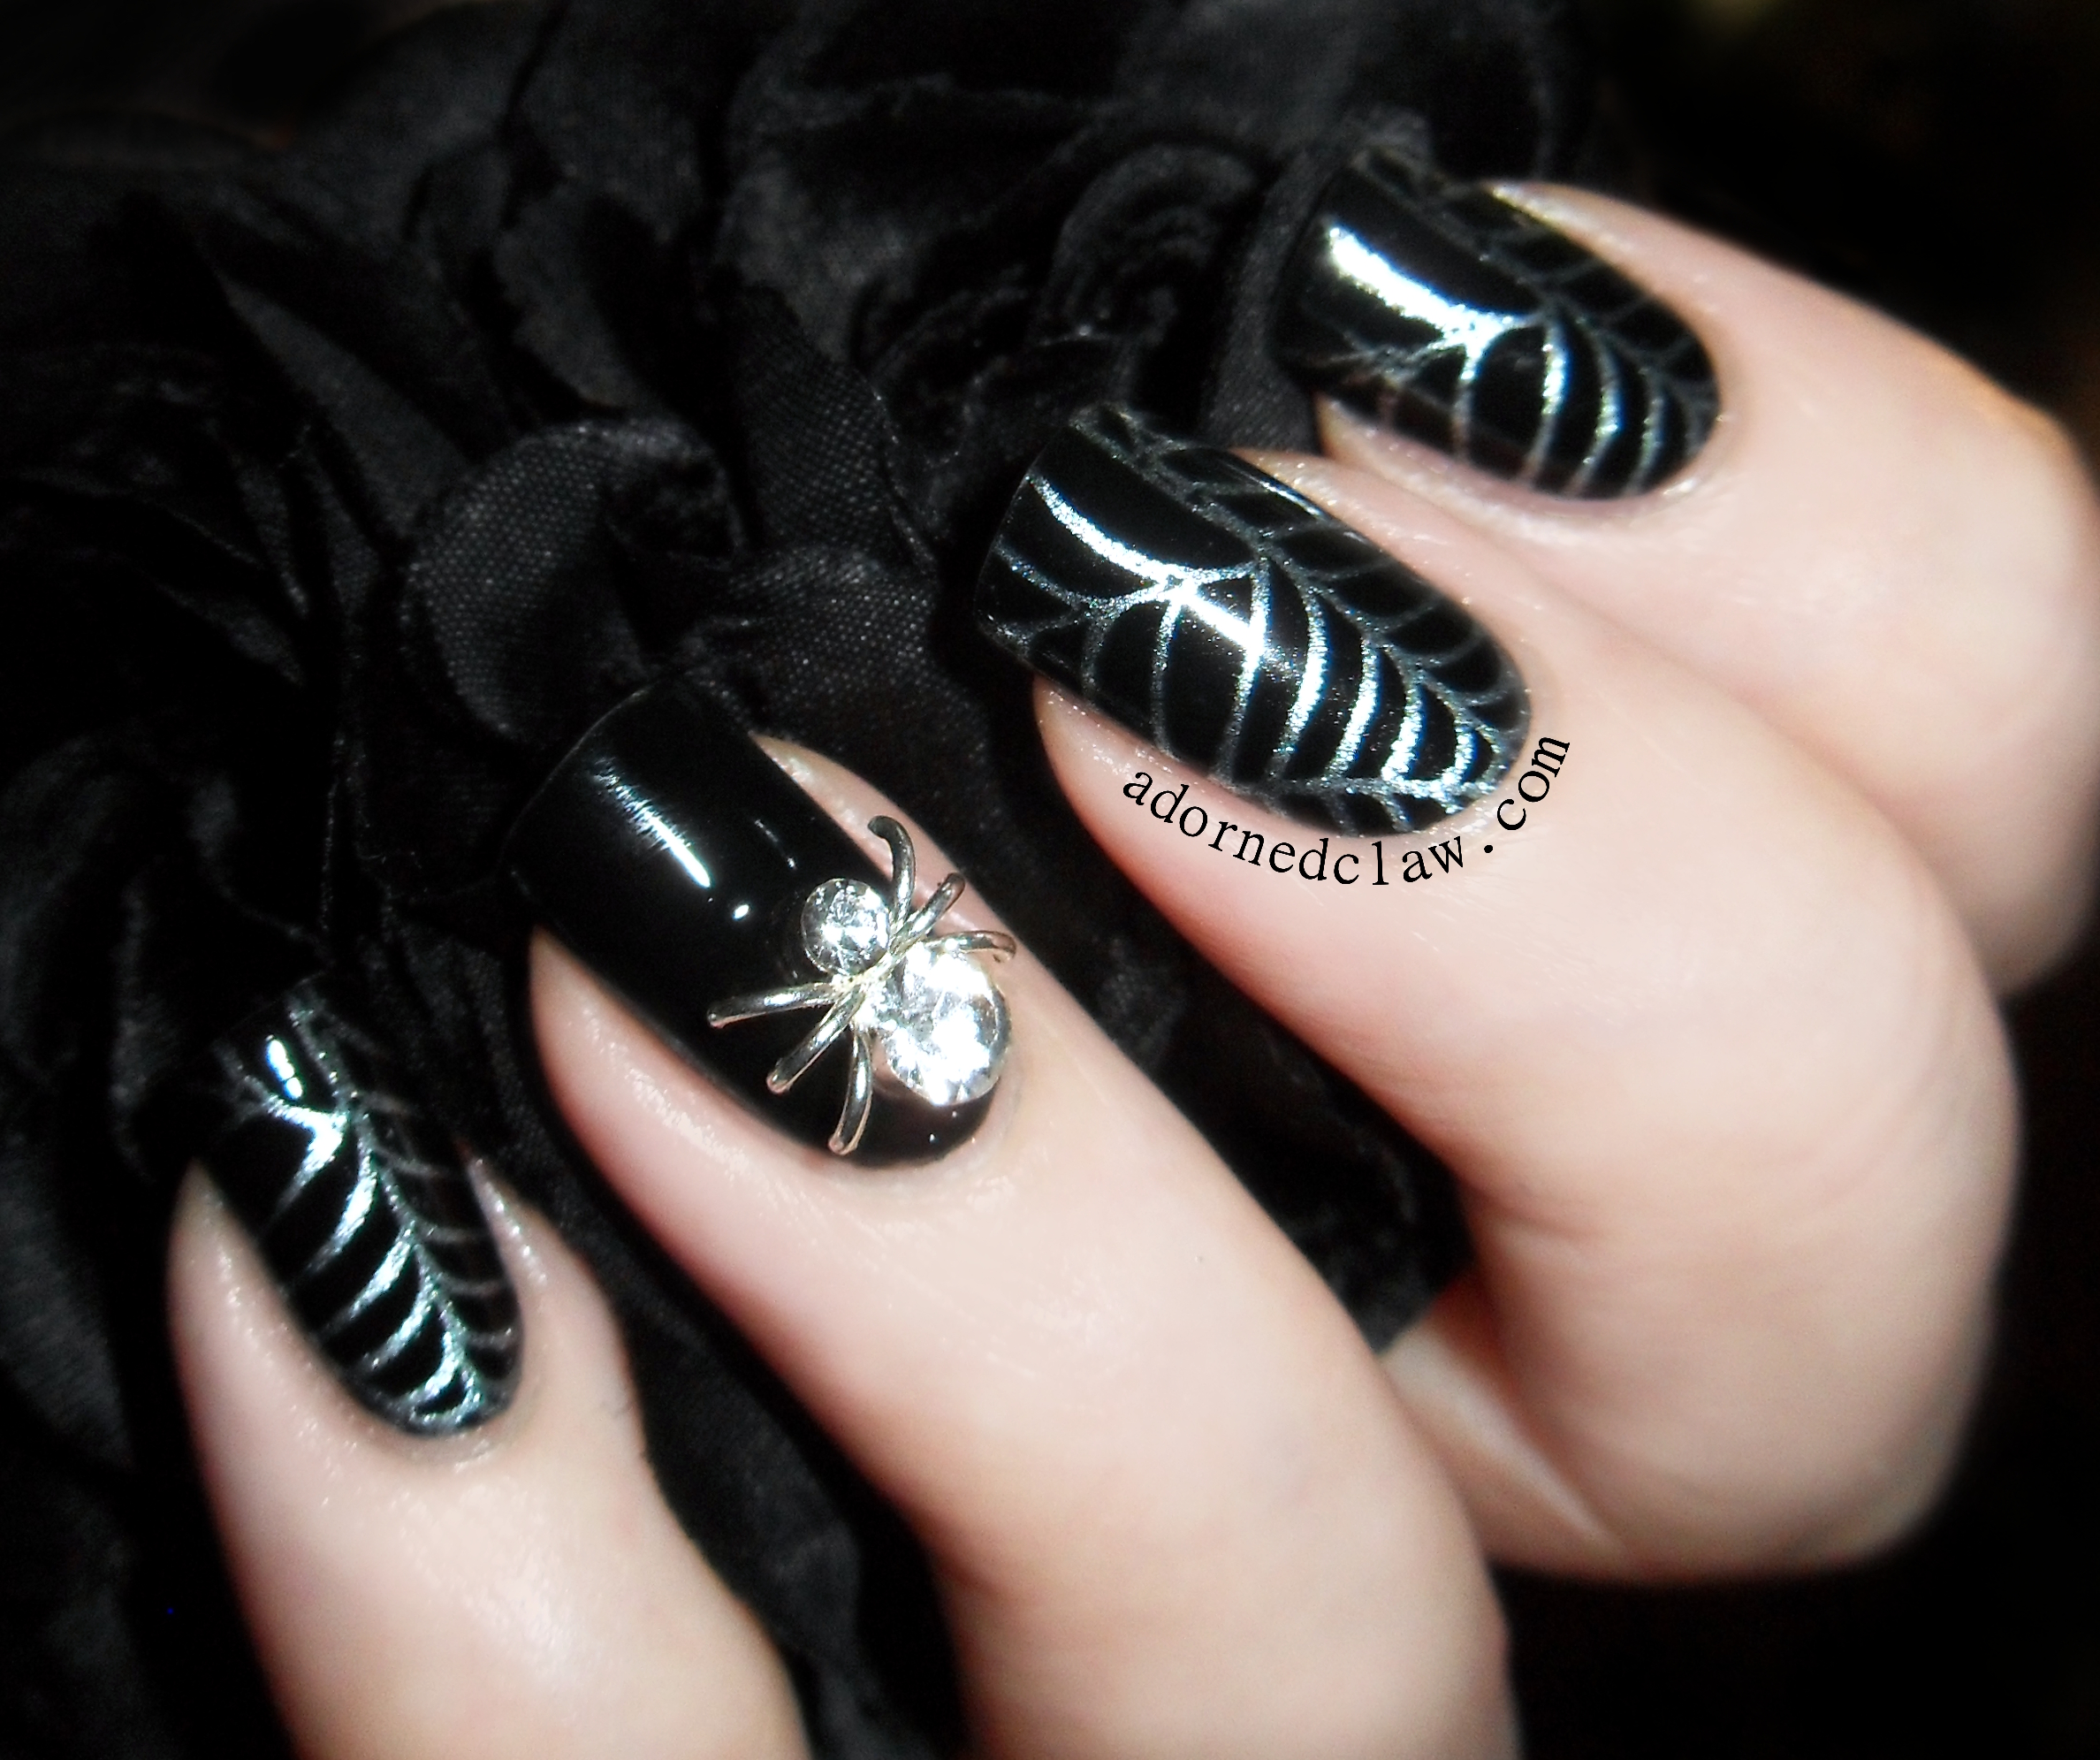
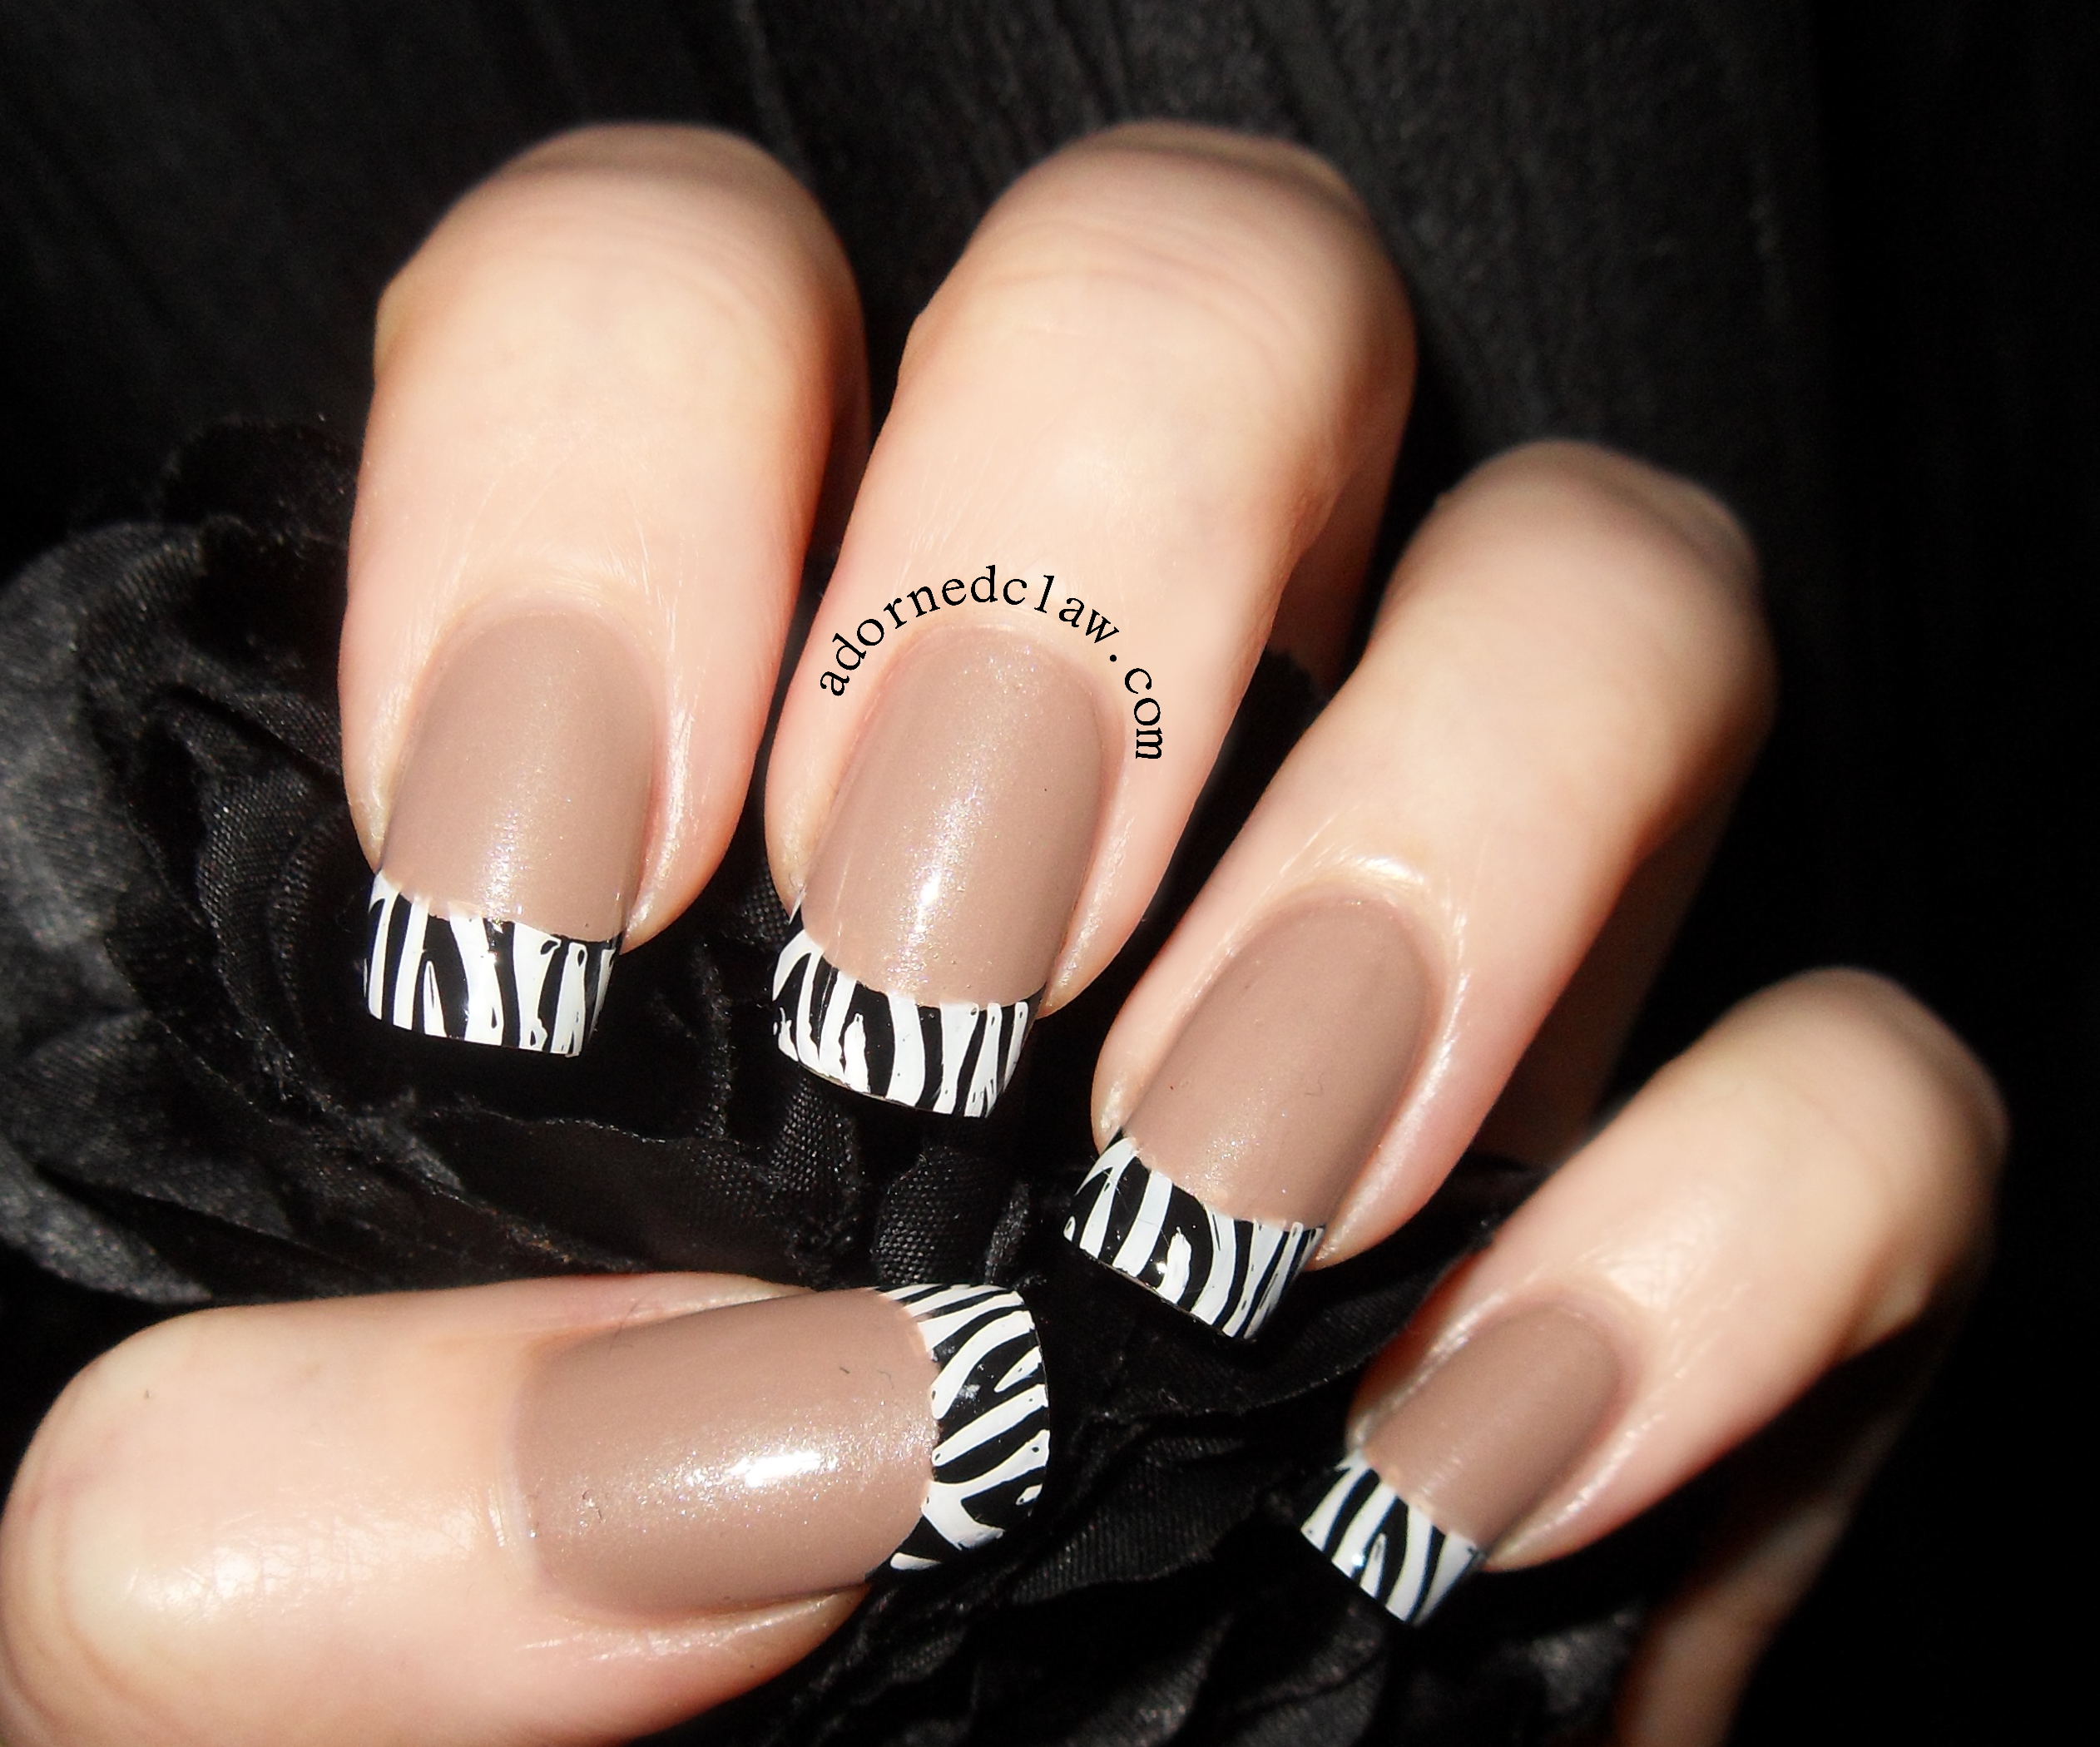
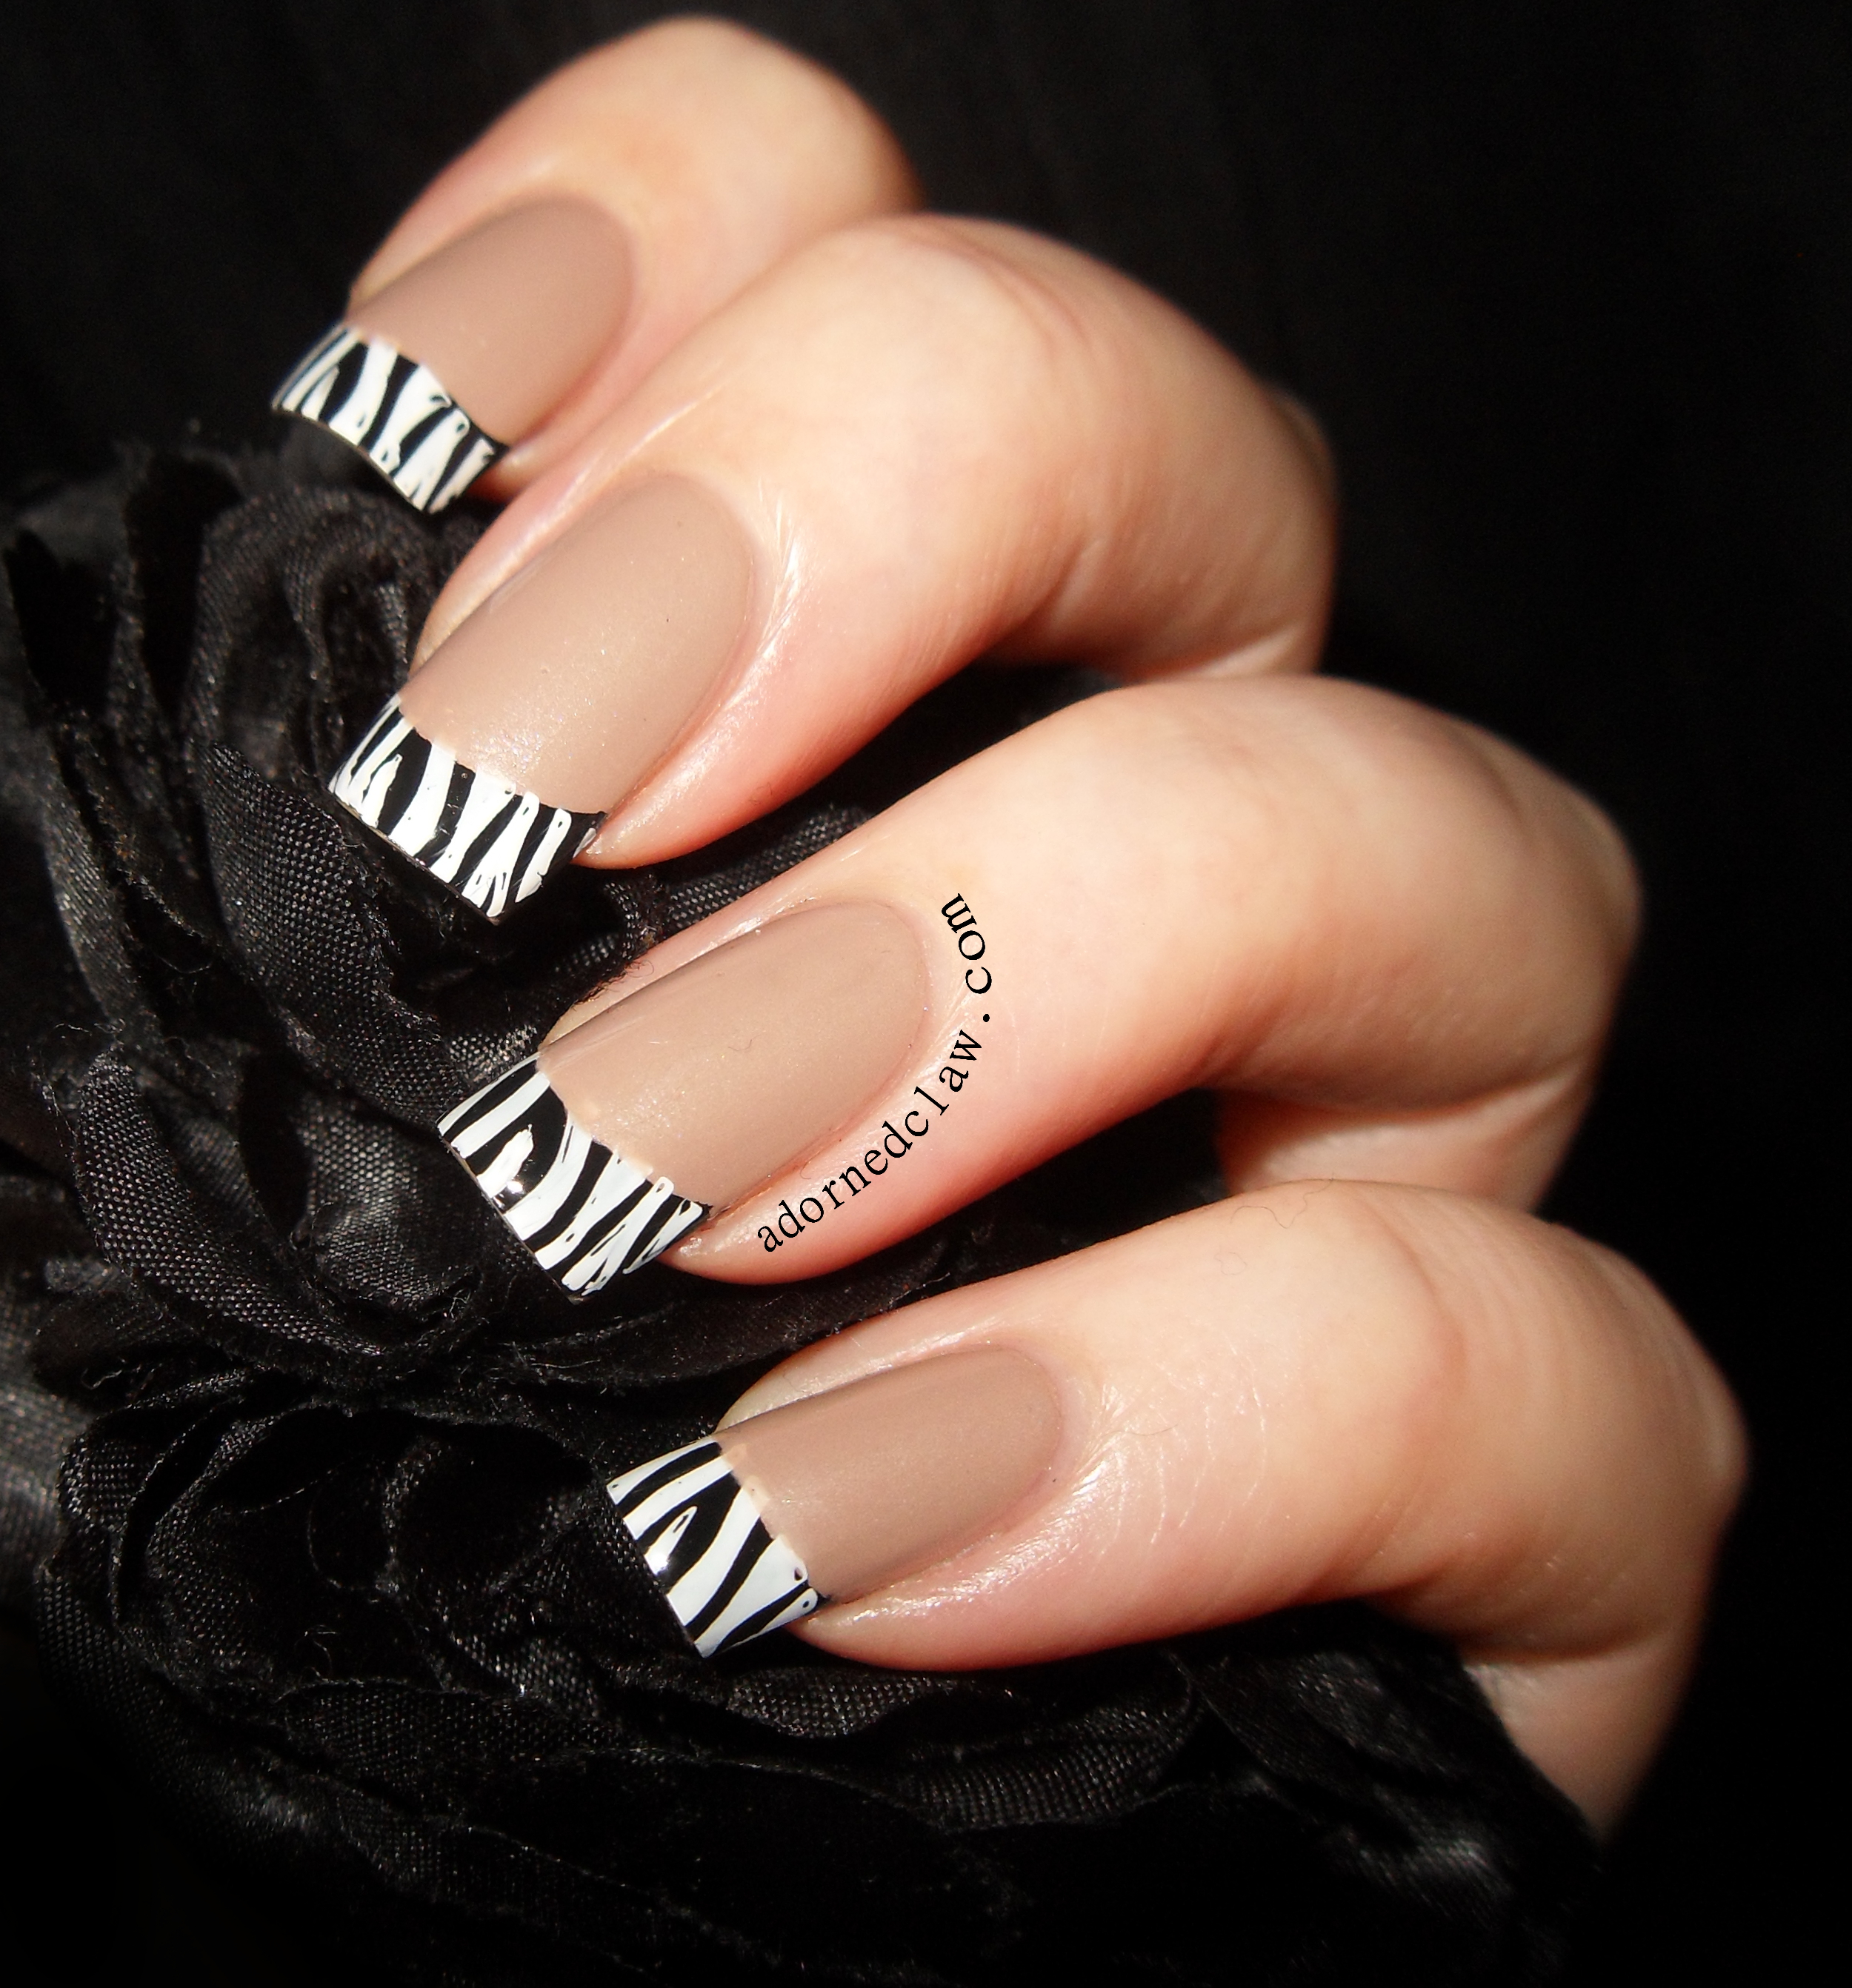
JORD Wooden Watch With wood nails
For my JORD inspired wood grain nails I used
- Color Club Black-ish
- Color Club Rebel Spirit
- Malava Zanzibar
- Revlon Hot For Chocolate
- Revlon Stiletto
Starting with a base of Hot For Chocolate I used a thin brush and Stiletto to paint the grain, I decided that a different pattern on each nail as the wood of each link has a different pattern.
With the same thin brush I added Rebel Spirit, Black-ish and Zanzibar to add a little more depth to the wood grain pattern.
JORD Wooden Watch
I really love that this watch is unique, it’s light and easy to wear, and because of the lovely neutral colours and classic design it’s really easy to dress up or down. 😀