Tag Archives: Seche Vite

Scribbled Nails!

Hey! 🙂

scribble nail art

Today I have another new to me technique to share with you all 🙂

scribble nail art

This really was incredibly easy to do! I started by painting a square of polish (on my lovely pink silicone baking sheet) then scribbling over it with my smallest dotting tool, you could probably use a toothpick or folded hair slide and get the same effect.

When it had dried I added a layer of topcoat to make the decal!

scribble nail art

The polish I used as the base for this nail art look is Barry M – Orchid, and for the scribbled decals I used NYC – Evil and Seche Vite.

scribble nail art

I came across this technique from catching a few seconds of a nail art compilation video I saw in a facebook group, I don’t know if the post was removed as when I went back to look I couldn’t find it again :/

So if by any chance you know who came up with this please let me know so I can properly give them credit! 😀


My Almost New Year Nails!

Hello! I hope you are having a fantastic start to this brand new year!

black and gold glitter gradient

This is the nail design that I was going to be wearing at new year but because I was ill, I ended up not going anywhere other than my sofa and feeling sorry for myself. Boooo!

black and gold glitter gradient

But these nails are so pretty I had to share them with you all! 🙂 So sparkly!

Annoyingly, after only a couple of days of getting better from my last horrible cold,  I seem to be coming down with another one D:

Stoopid germs!

black and gold glitter gradient

The polishes I used for this very sparkly look are Maxxed Out from CrowsToes and Beauty Never fails from A England!

If you’re interested, you can find my swatch of Beauty Never Fails (along with my other lovely A England polishes) Here

I decided on using Beauty Never fails rather than a black cream because of the beautiful greenish gold shimmer running through it, I think it really complements the magnificent sparkles of Maxxed Out.

black and gold glitter gradient

Maxxed Out is quite possibly the sparkliest nail polish I own! It’s one of the lovely collection of polishes I picked up from a blog de-stash from the lovely Debbie over at The Crumpet!

Look at all the holographic glitters! Lots of varying sized hex in different shades of gold, gold glitter and a smattering of quite long bar glitters.

With this super sparkly glitter bomb I was expecting application to be a nightmare but I actually really easy to apply, all the glitters behaved I didn’t have to fish for any of the larger ones, and applied they all laid flat against my nails, the only bits that I moved around where some of the bar glitters.

The first coat of glitter I used a sponge just to add a layer of glitter like a messy french tip, after applying the second coat, with the brush I realised that I really didn’t need to have done the sponge coat at all!

I added one coat of Seche Vite to smooth it out and add a glassy finish, then very carefully filed away the overhanging glitter (some how I forget to file my thumb, I’m going to blame the germs).

black and gold glitter gradient

I’m not usually a fan of gold nail polish, but I really do like both of these! 😀


Frosty Forest Nail Art!

Hello! 🙂

Frosty Forest Nail Art

when I created my misty graveyard nails last Halloween I thought at the time that using the same polish to make this frosty forest mani!

Frosty Forest Nail Art

For my franken jelly polish I simply mixed raindrops from Illamasqua mixed with clear polish, I think the mixture was around one part raindrops to six parts clear.

Frosty Forest Nail Art

The trees took ages! I used Camelot from A England and a tiny brush. I don’t think I should have worried so much about the detail on the first couple of trees on each nail as most of it was obscured by later layers of polish.

Frosty Forest Nail Art

Even though I don’t really do that much freehand nail art, I really enjoyed painting these 🙂


Glitter For Blood!

Hello! 🙂

Halloween glitter blood nail Art

Today I have this rather gruesome and glittery gradient to share with you!

Halloween glitter blood nail ArtFor this I used

  • Barry M Red Glitter
  • Estee Lauder Red Hot
  • Revlon Stiletto
  • Seche Vite
  • A Thin Nail Art Brush
  • and a Sponge

I started off with the red and black gradient, which I really think is a classic vampy nail art look. Then to add some Halloween joy I added the glittery blood lol. 🙂

I like this bit I think it would look a bit more interesting if the two red polishes had contrasting shades, on the nail they are surprisingly similar.

Halloween glitter blood nail Art

I ended up with so many bubbles in my topcoat, it’s probably because the glitter polish, is getting really thick, and trapping air in all the lumps and bumps.

This mani is definitely going to go on the list of ones to recreate 🙂


Halloween Monster Eyes and Some Candlewick Greens Waxy Goodness!

Hello! 🙂

Halloween Monster Eyes

Sorry about the lack of posts last week, I managed to cut my finger :/ don’t worry, it’s on my dominant hand so there won’t be any gory pictures! And I’ve also have a cold (ugh, stoopid germs).

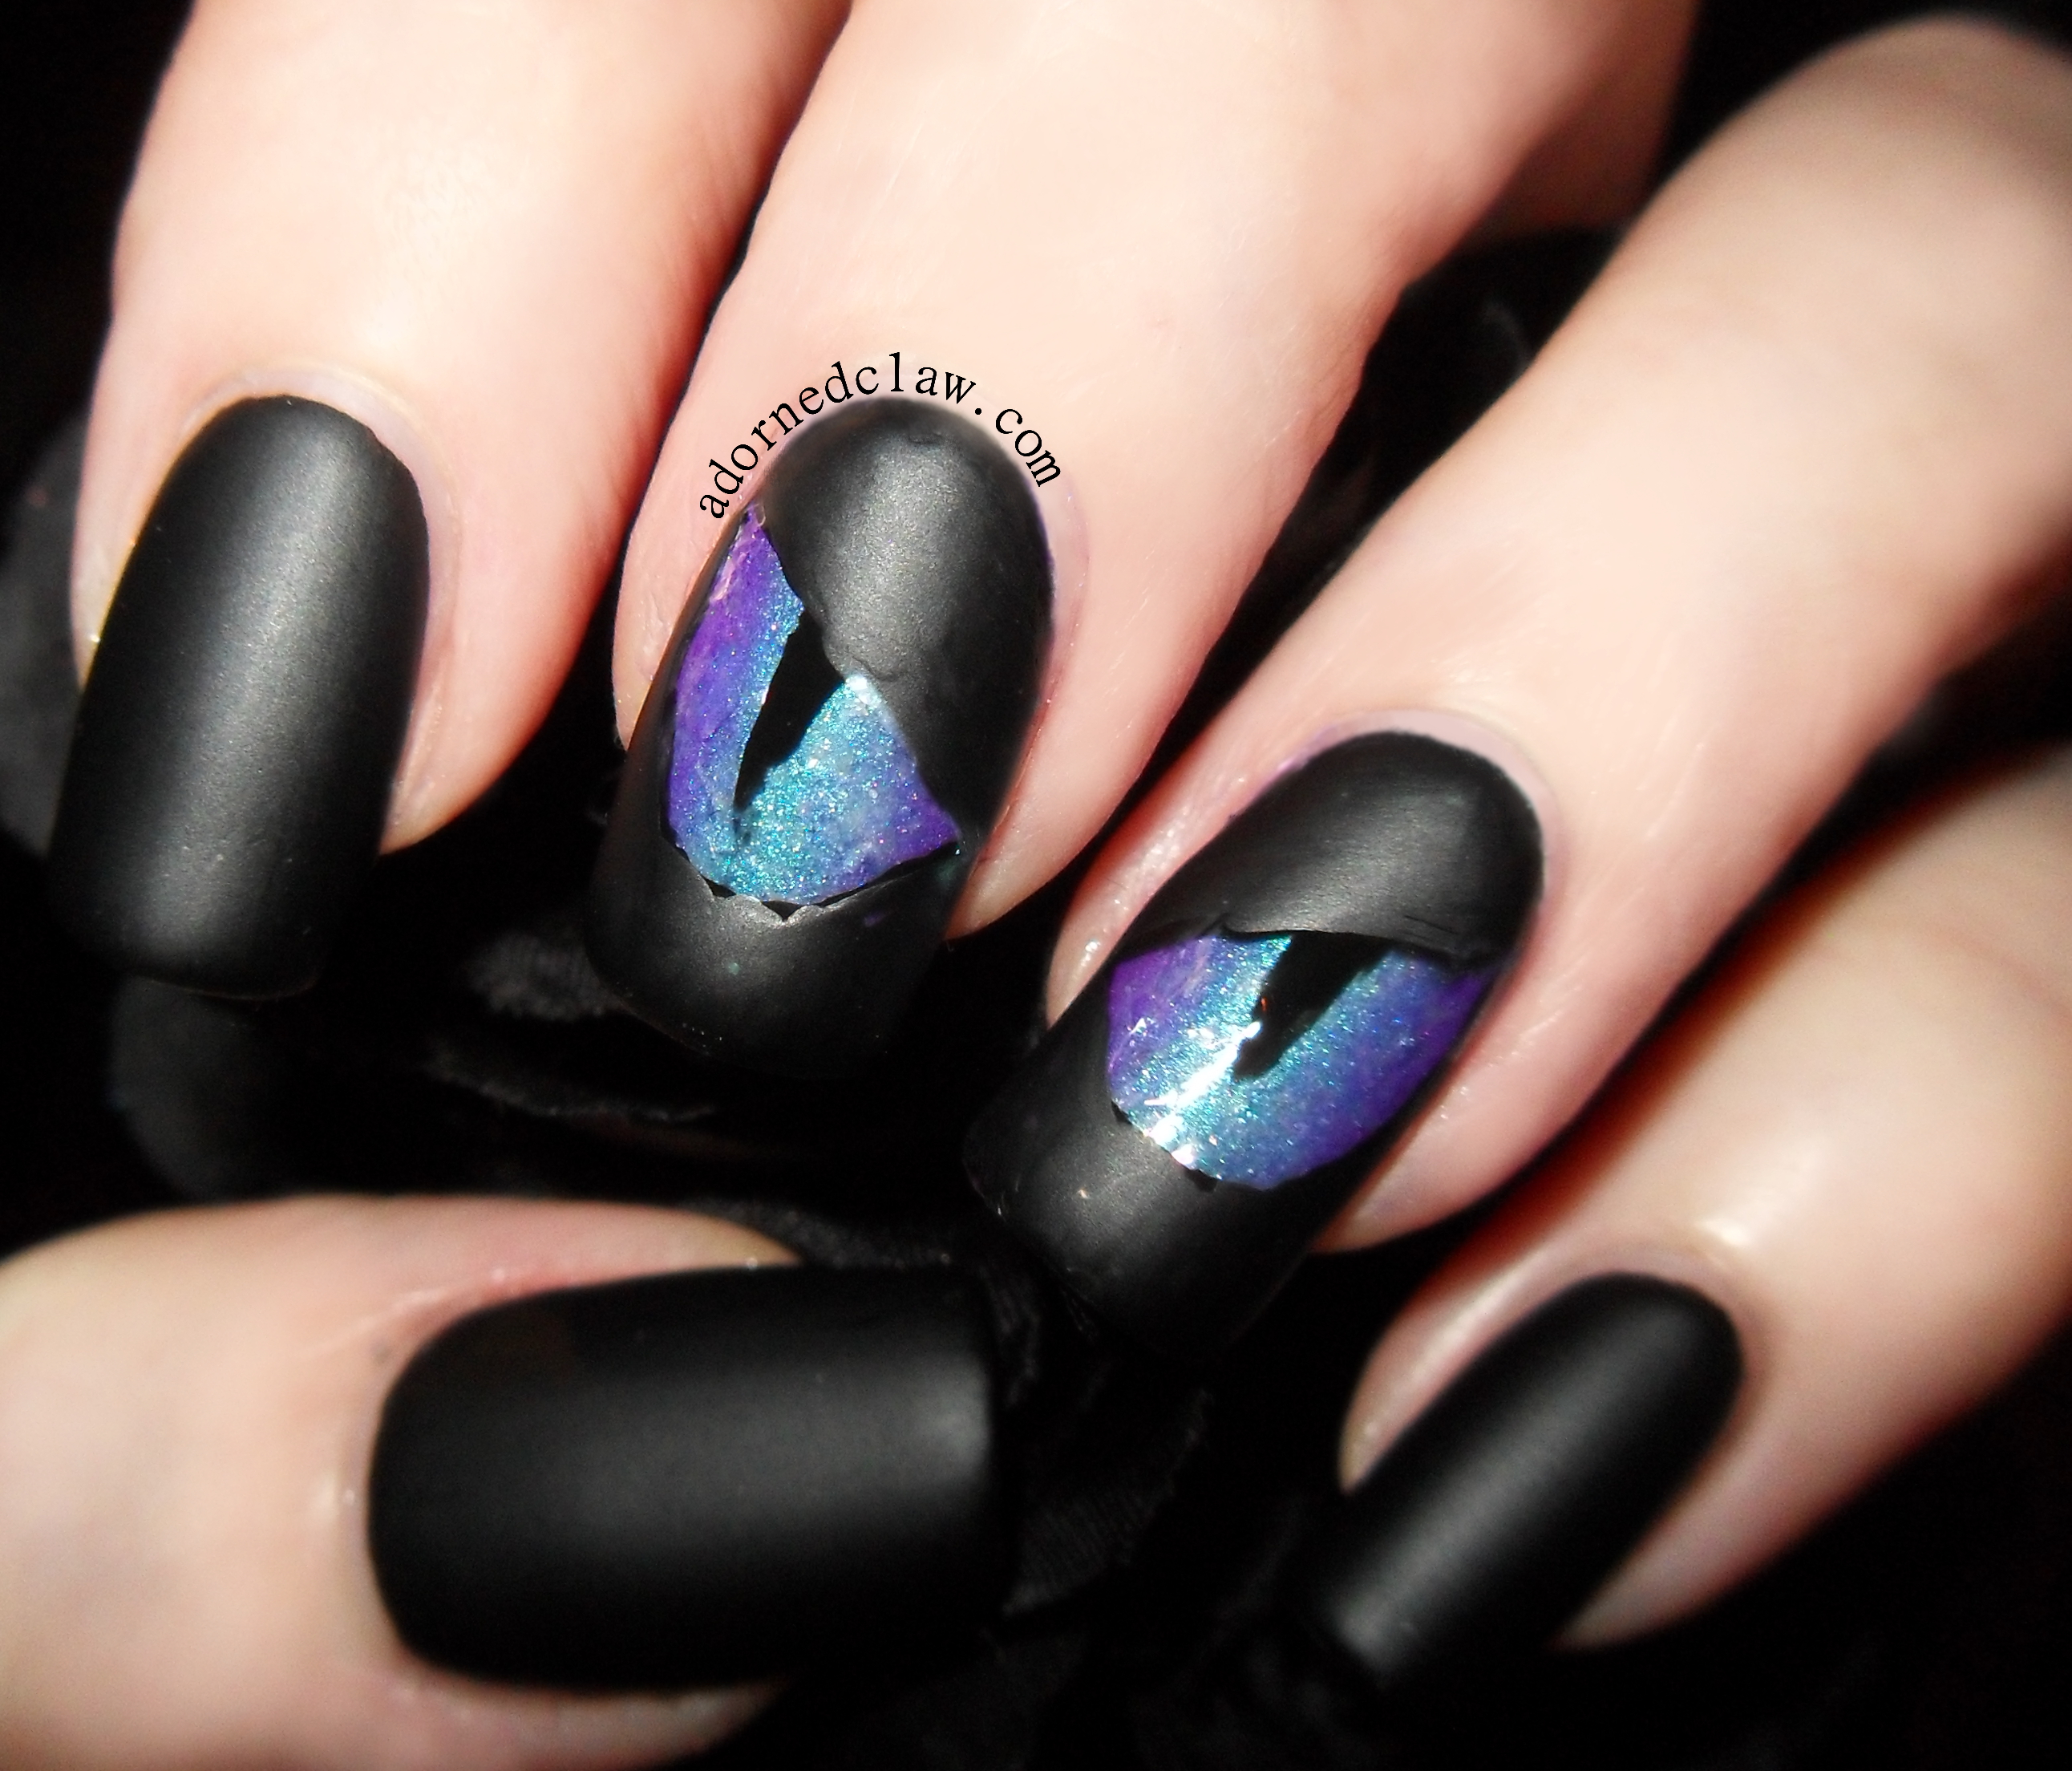
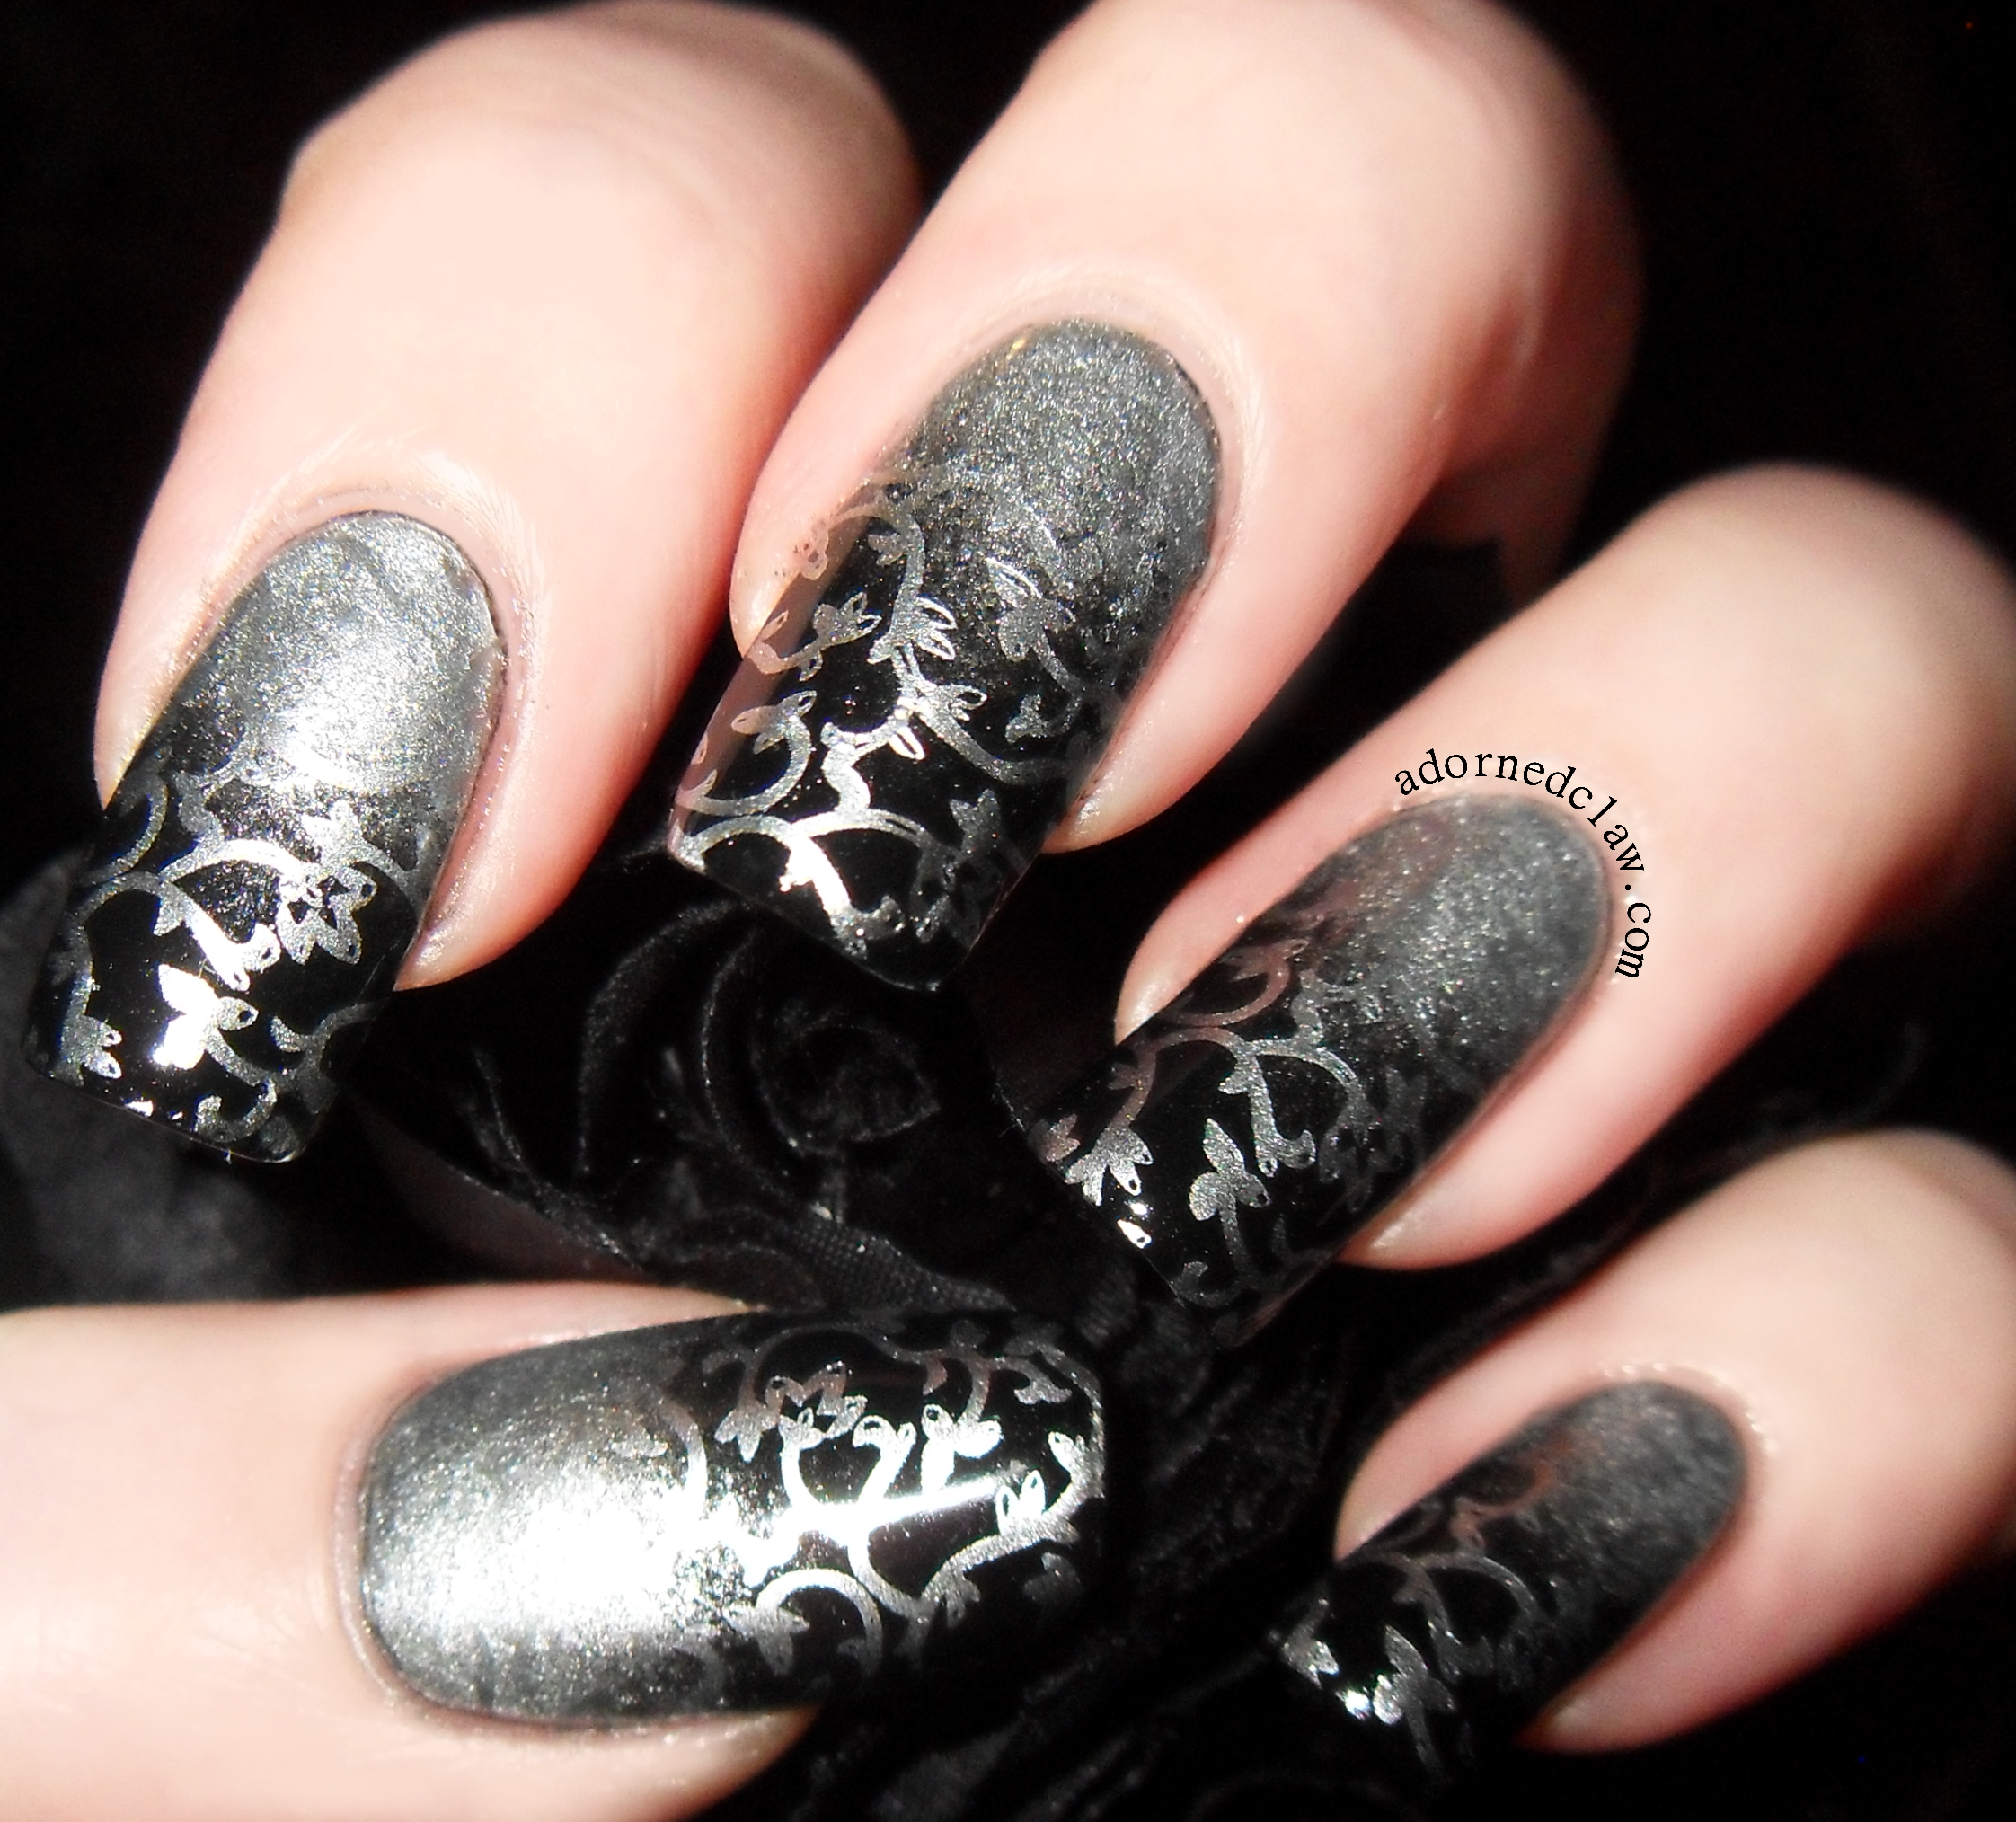
But now that I have dragged myself out of my sofa cocoon and polish remover isn’t really painful to use. I can share with you a two part post starting with these Monster Eyes! 🙂

halloween monster eyes

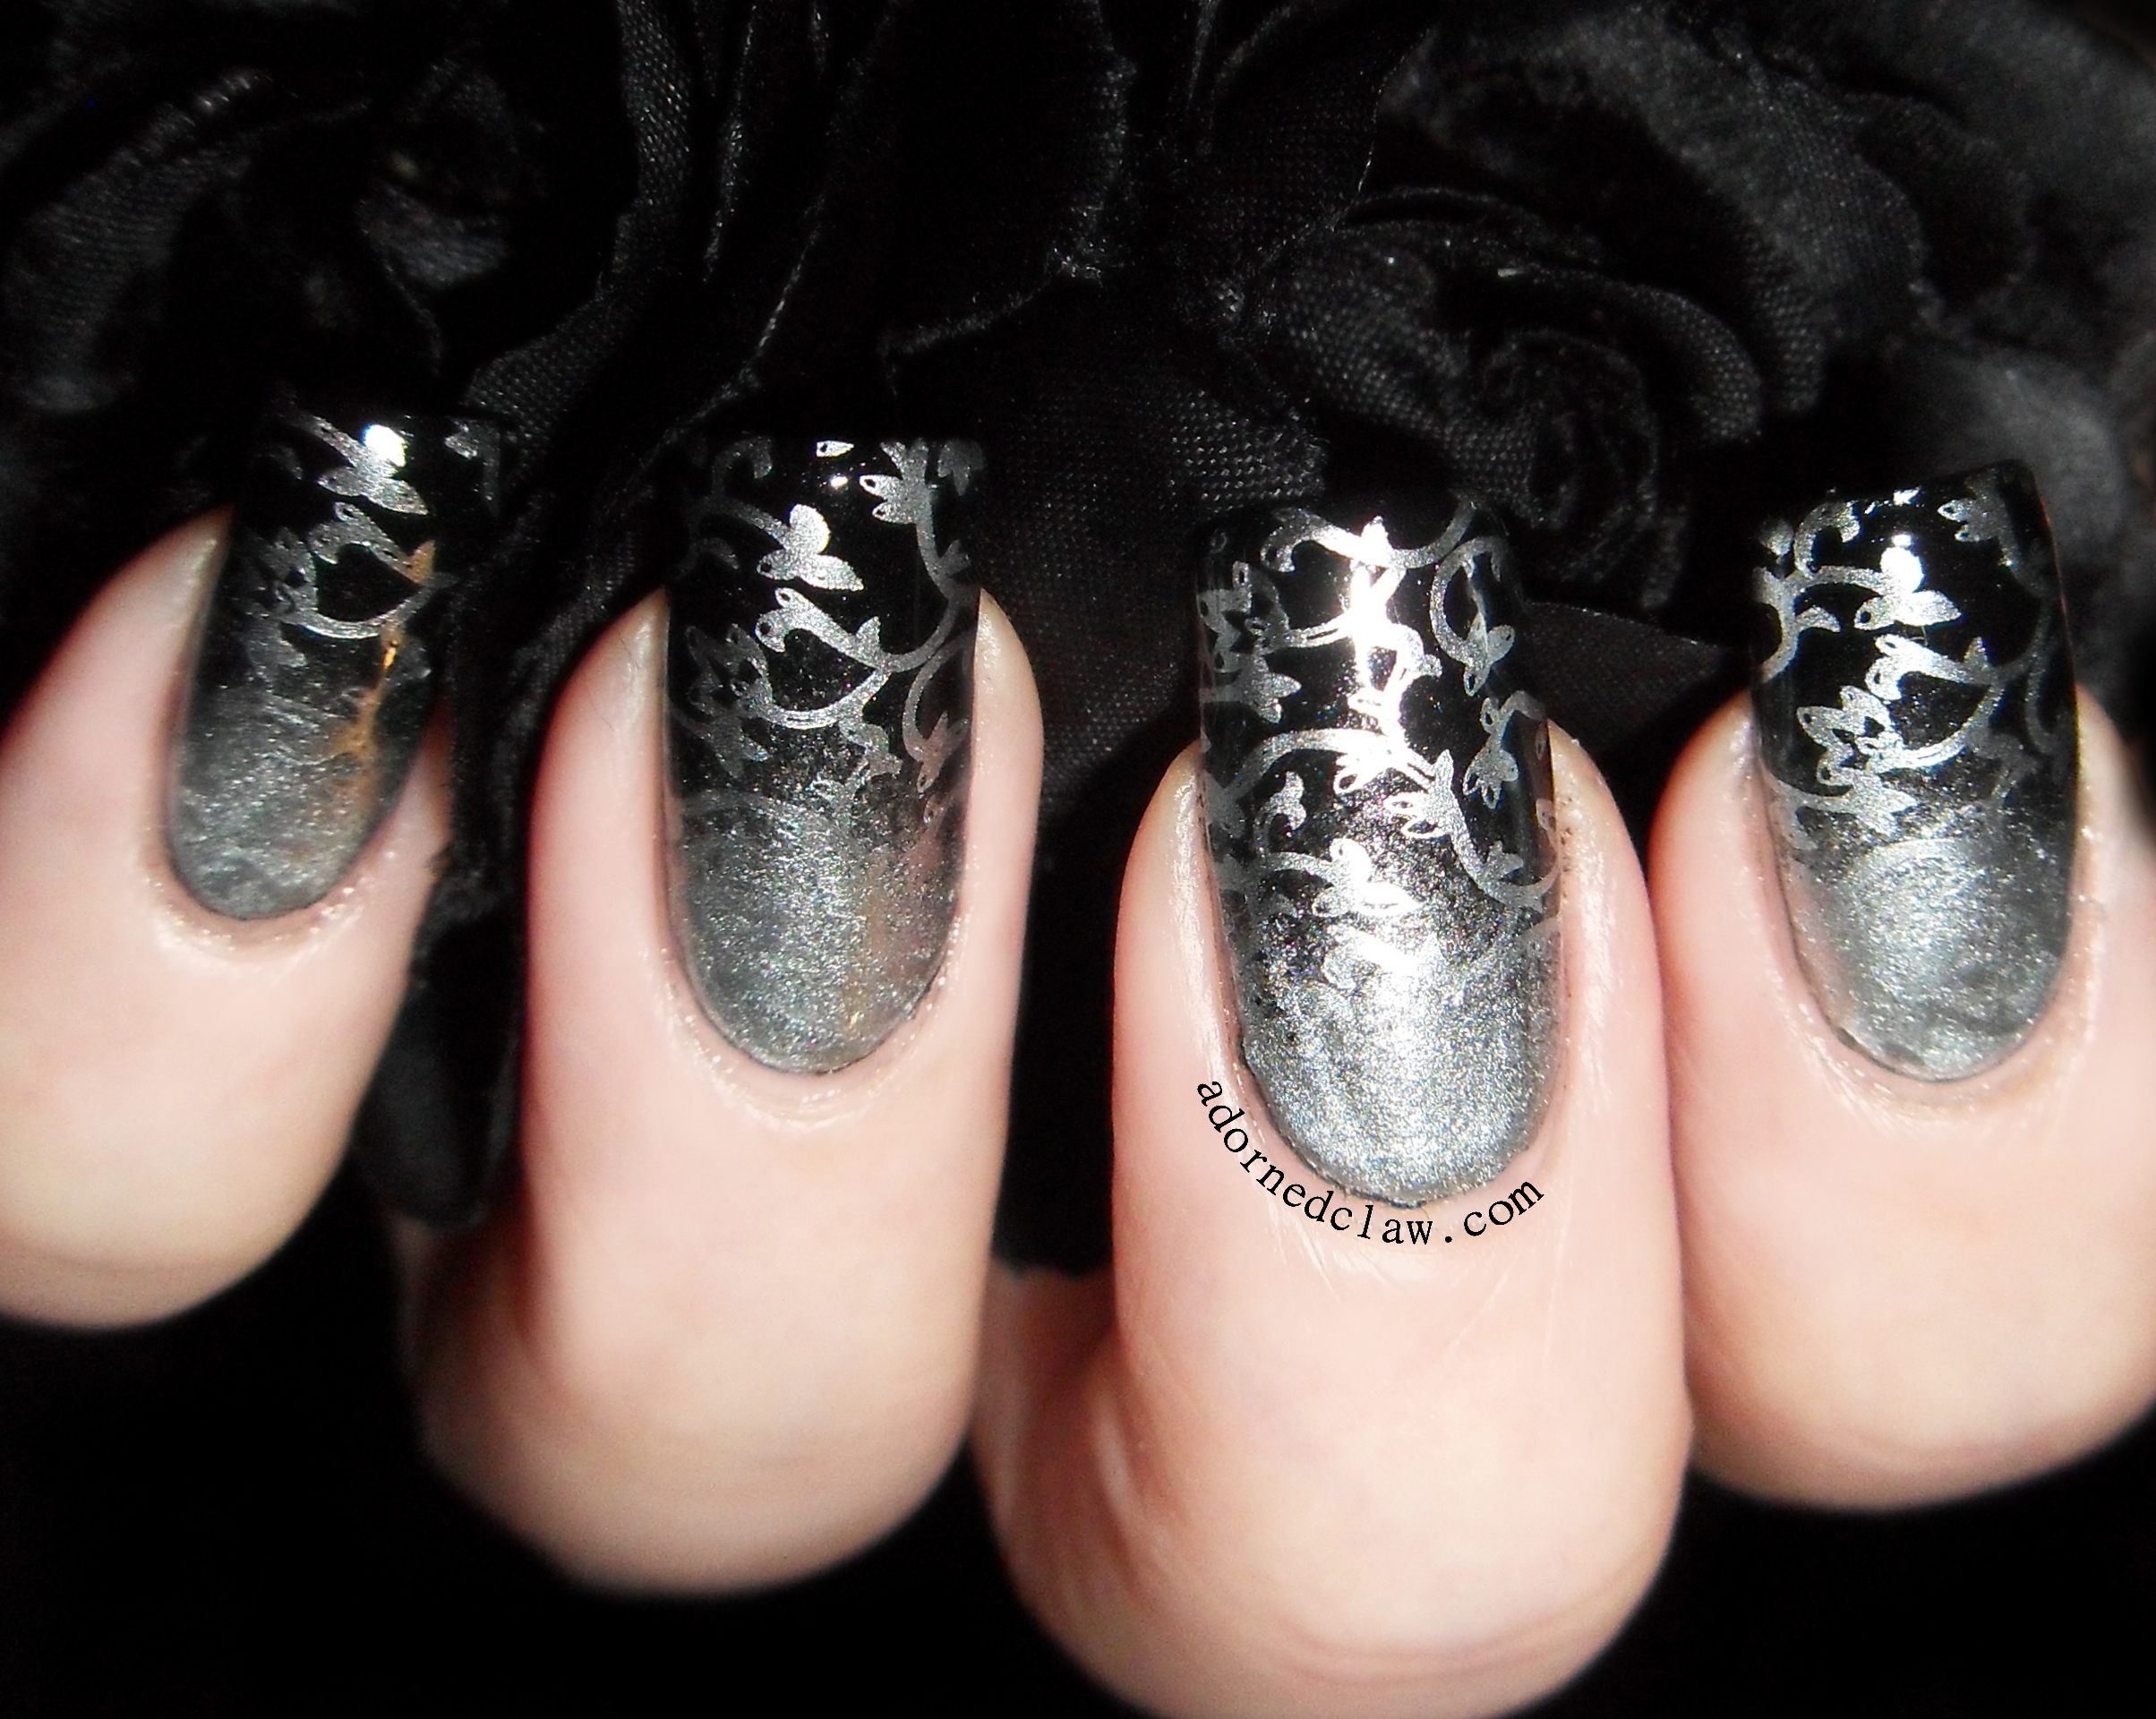
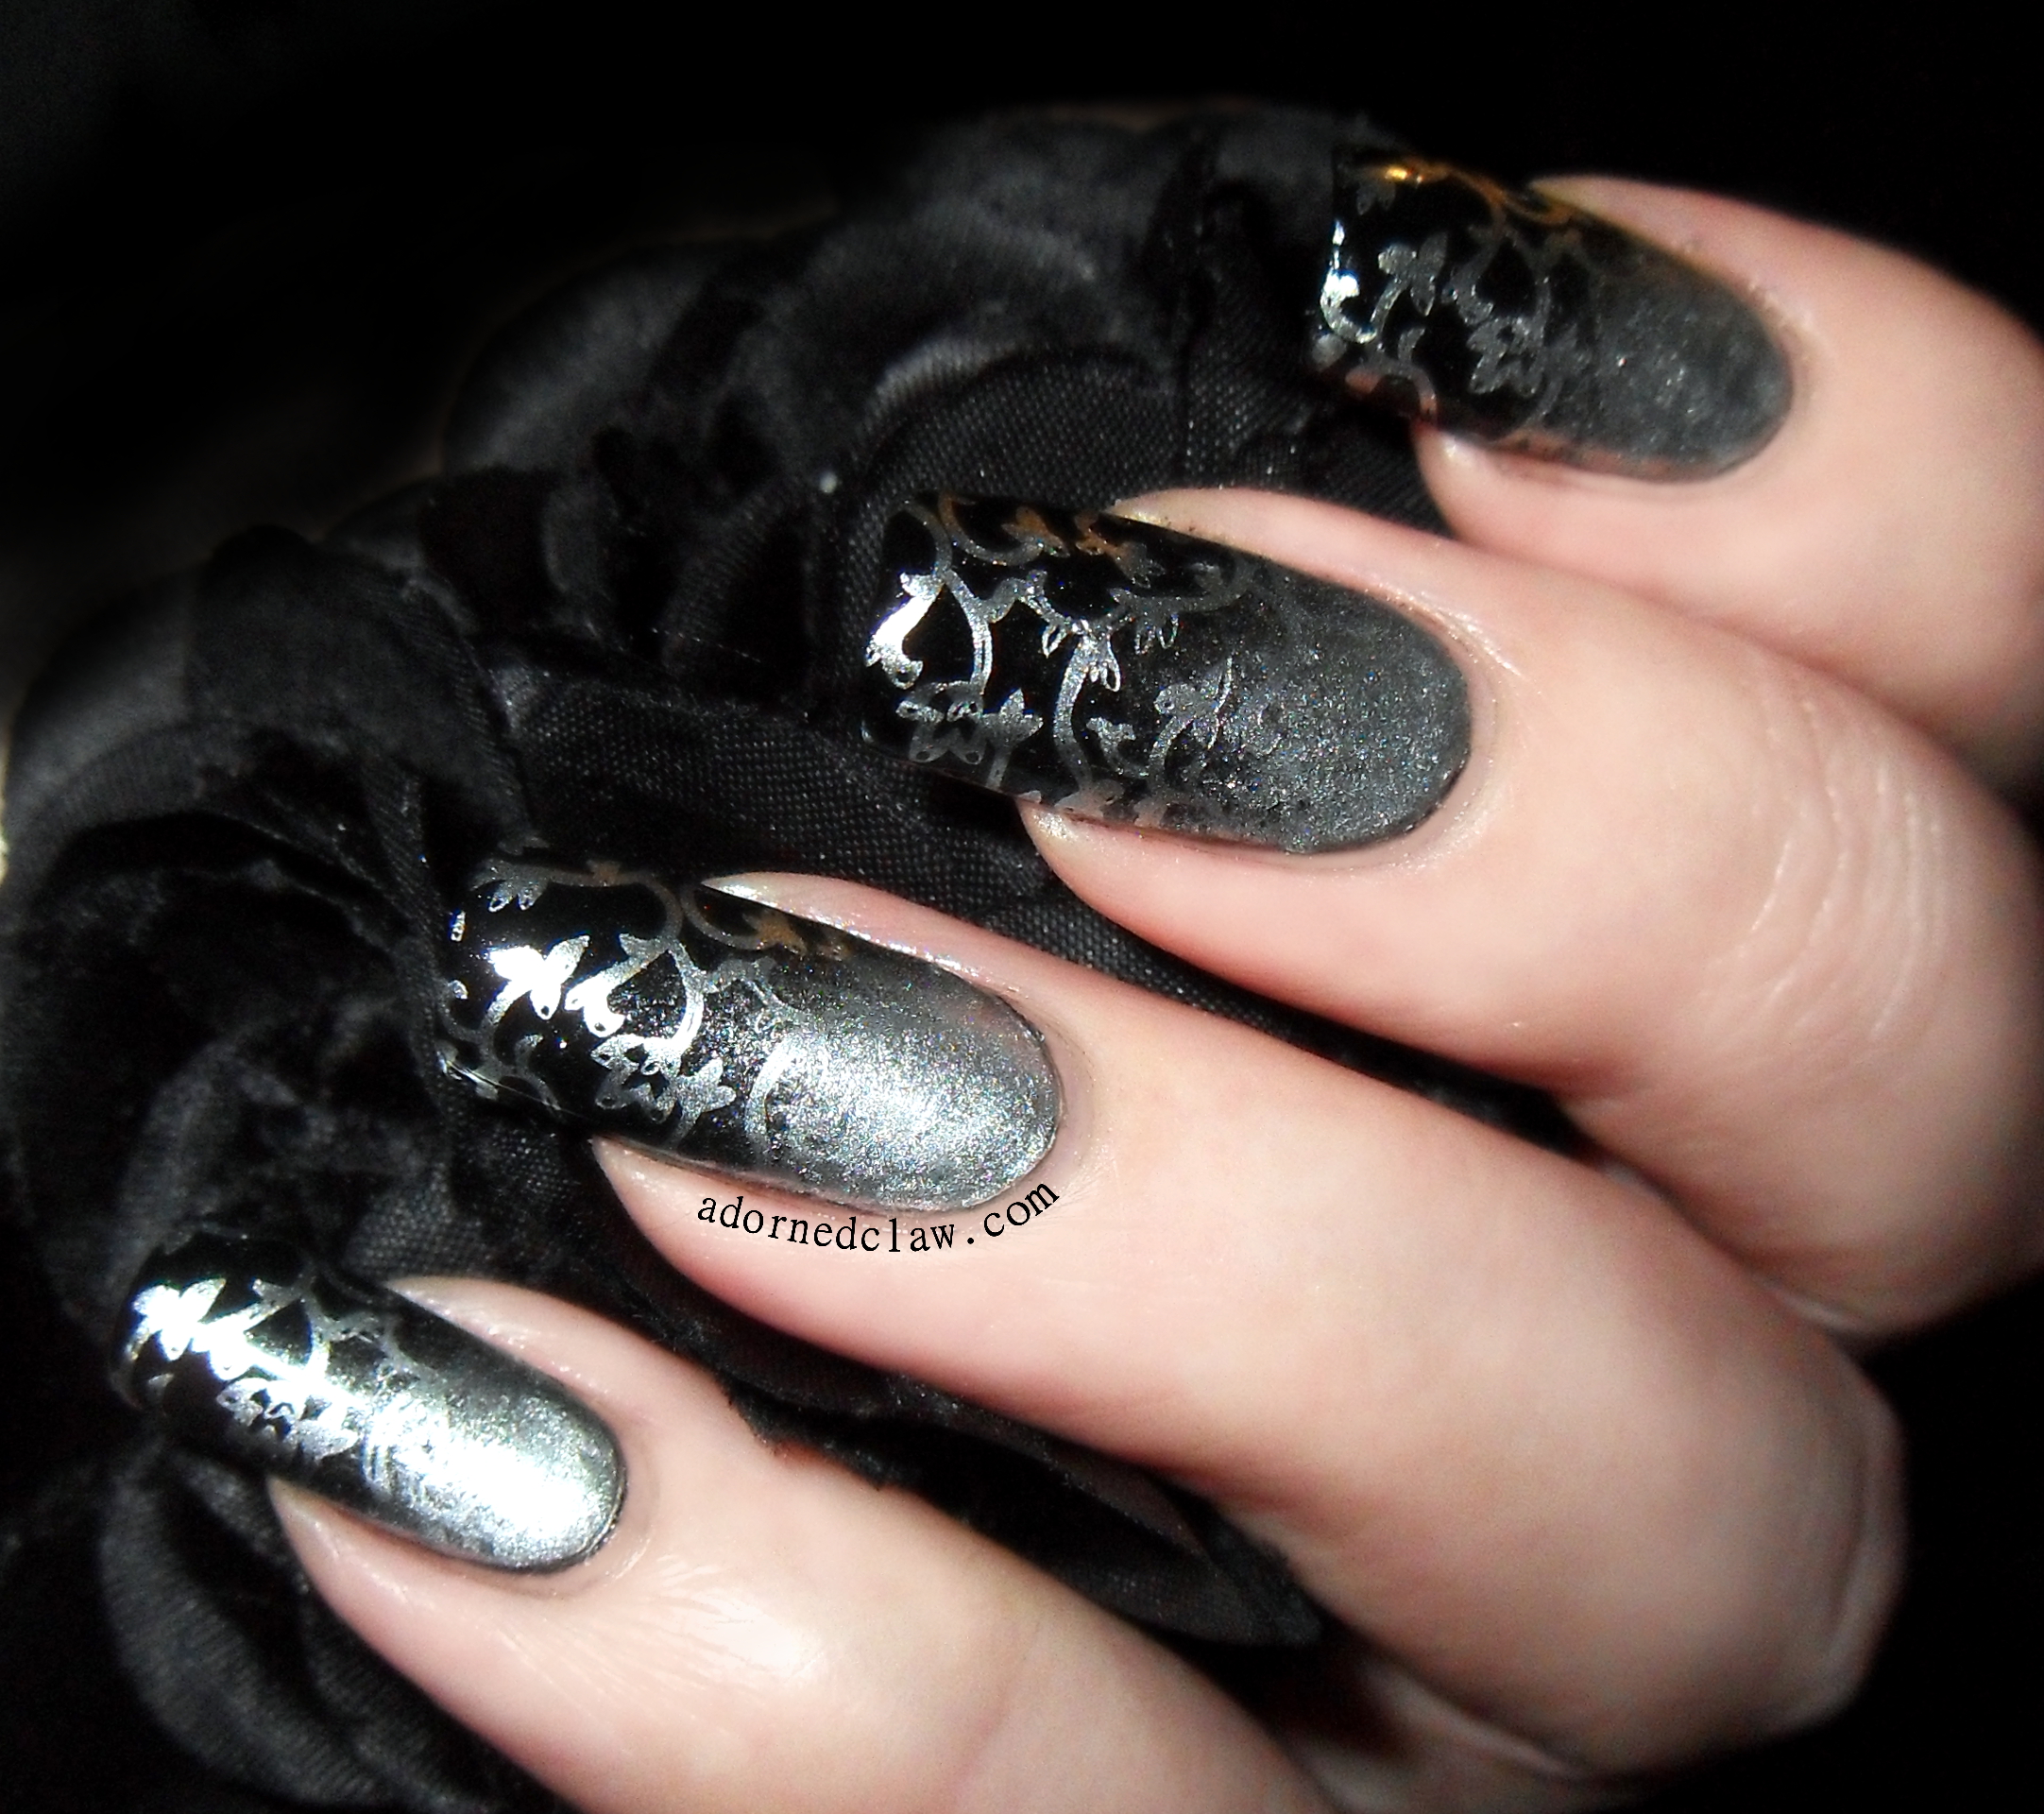
For my monster eye nails I used

  • Revlon – Stiletto
  • Illamasqua – poke
  • Sally Hansen – Blue Streak
  • Barry M – Crystal Glaze
  • Seche Vite
  • Illamasqua – Matte Top Coat

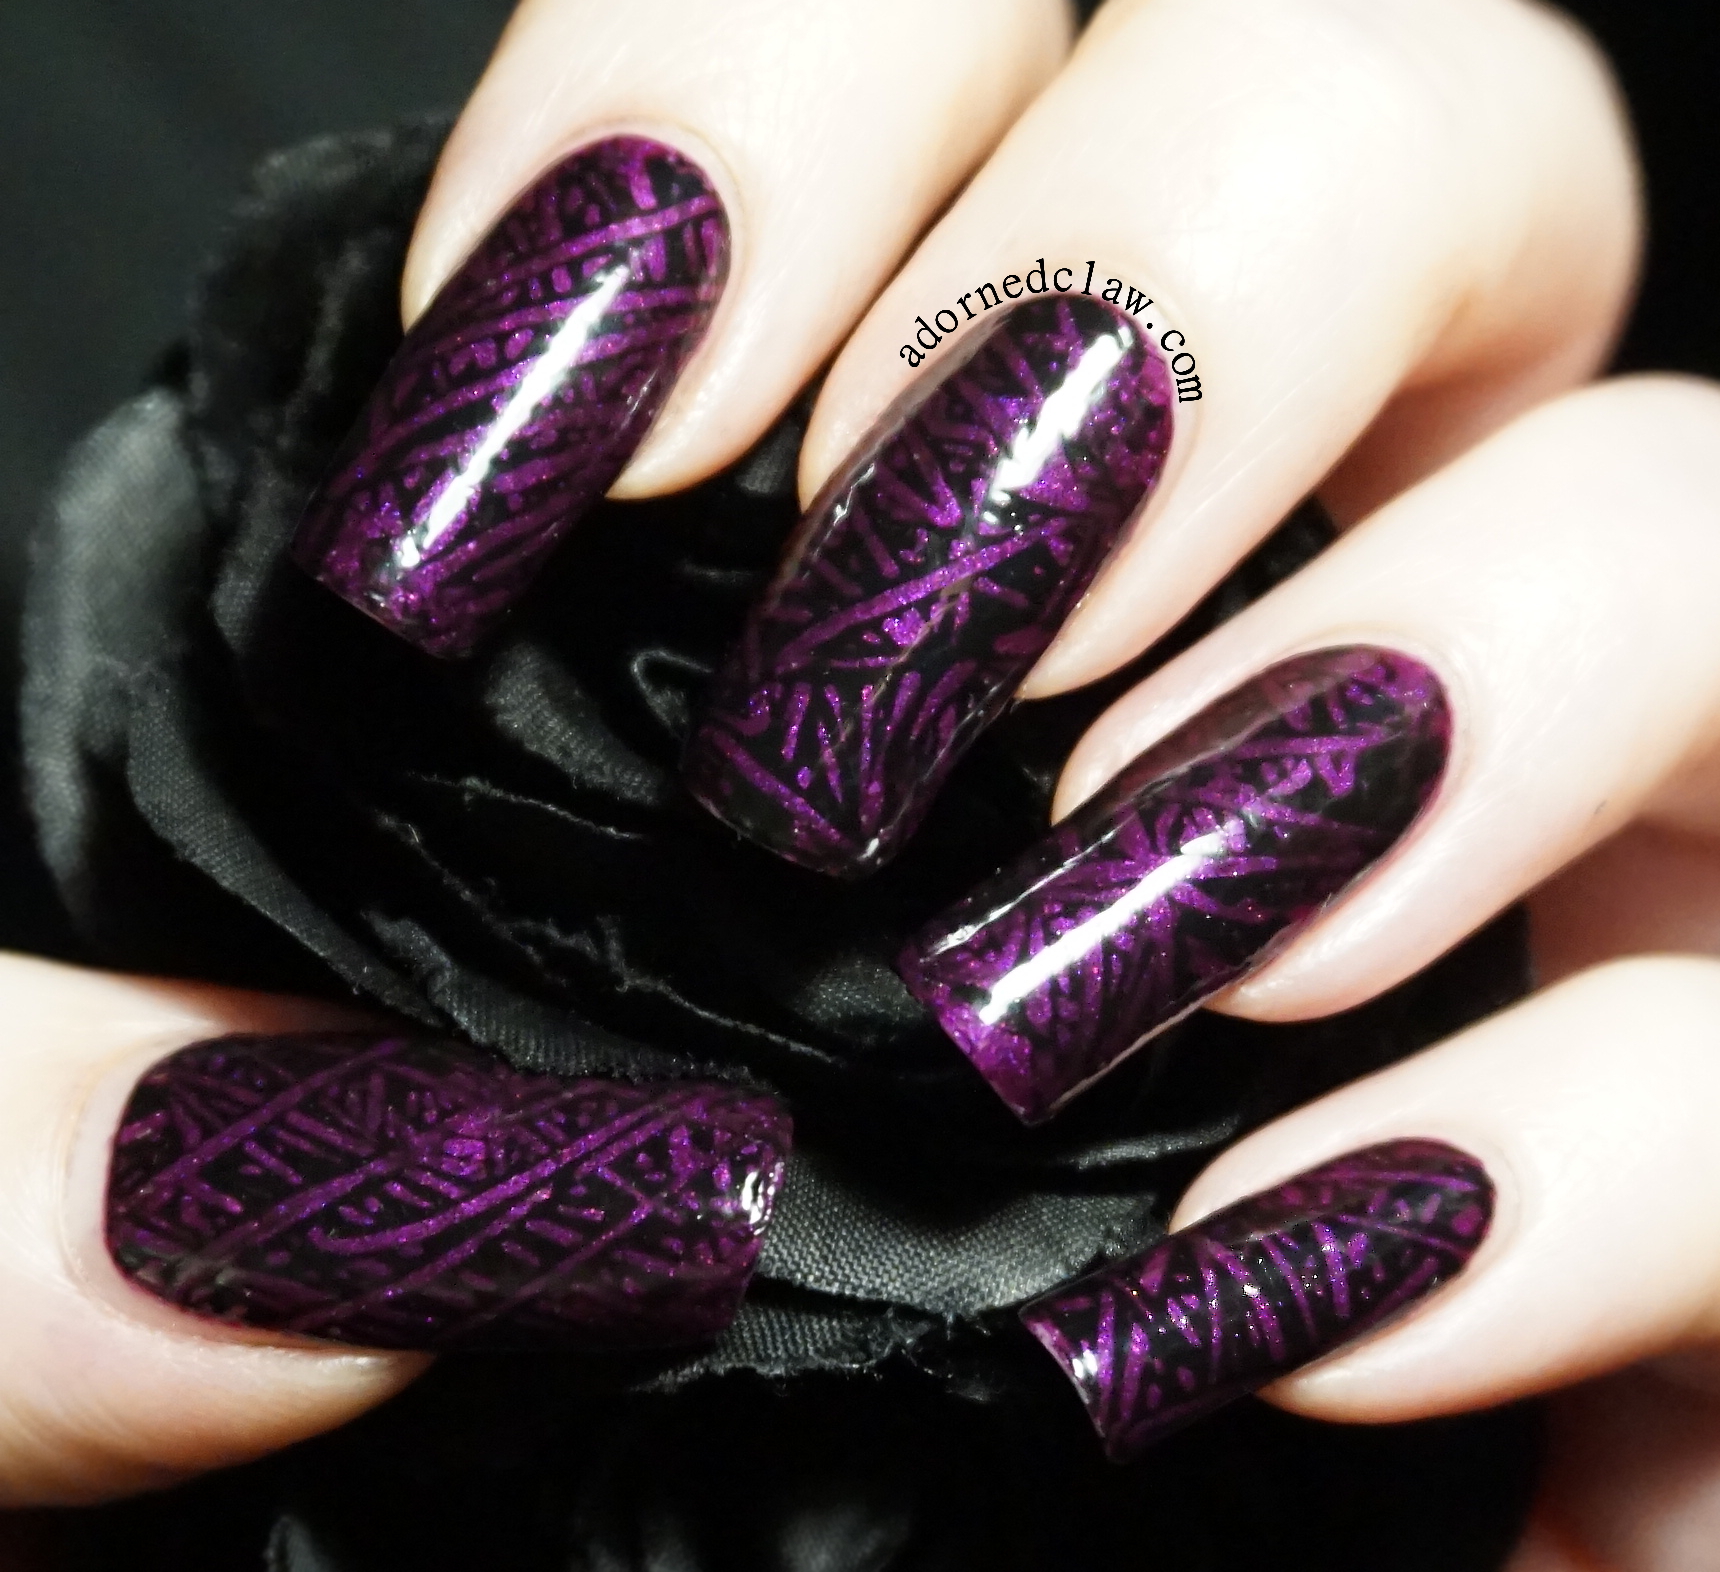
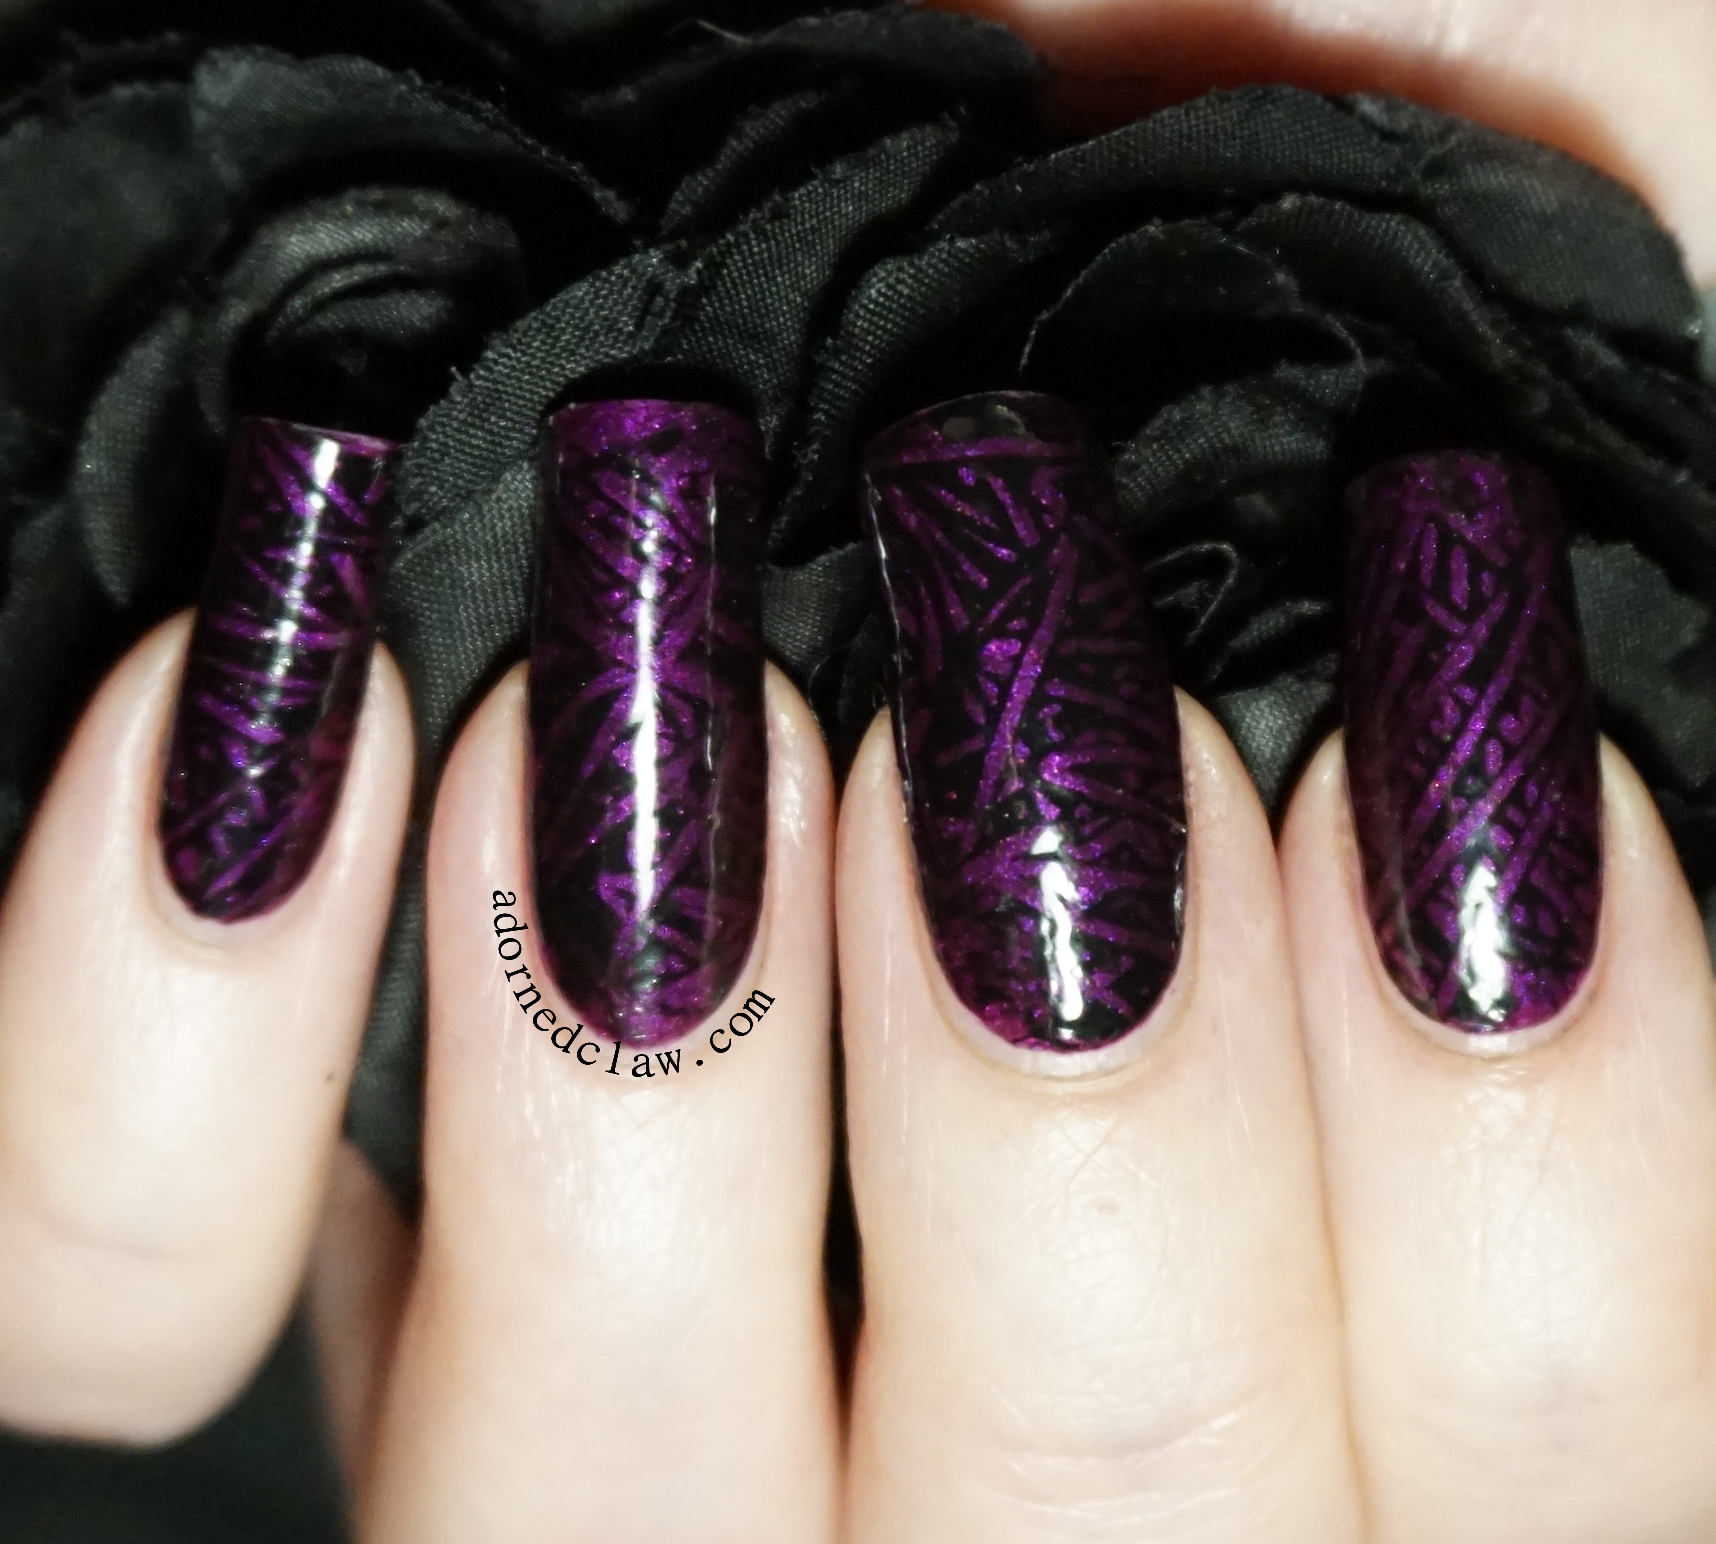
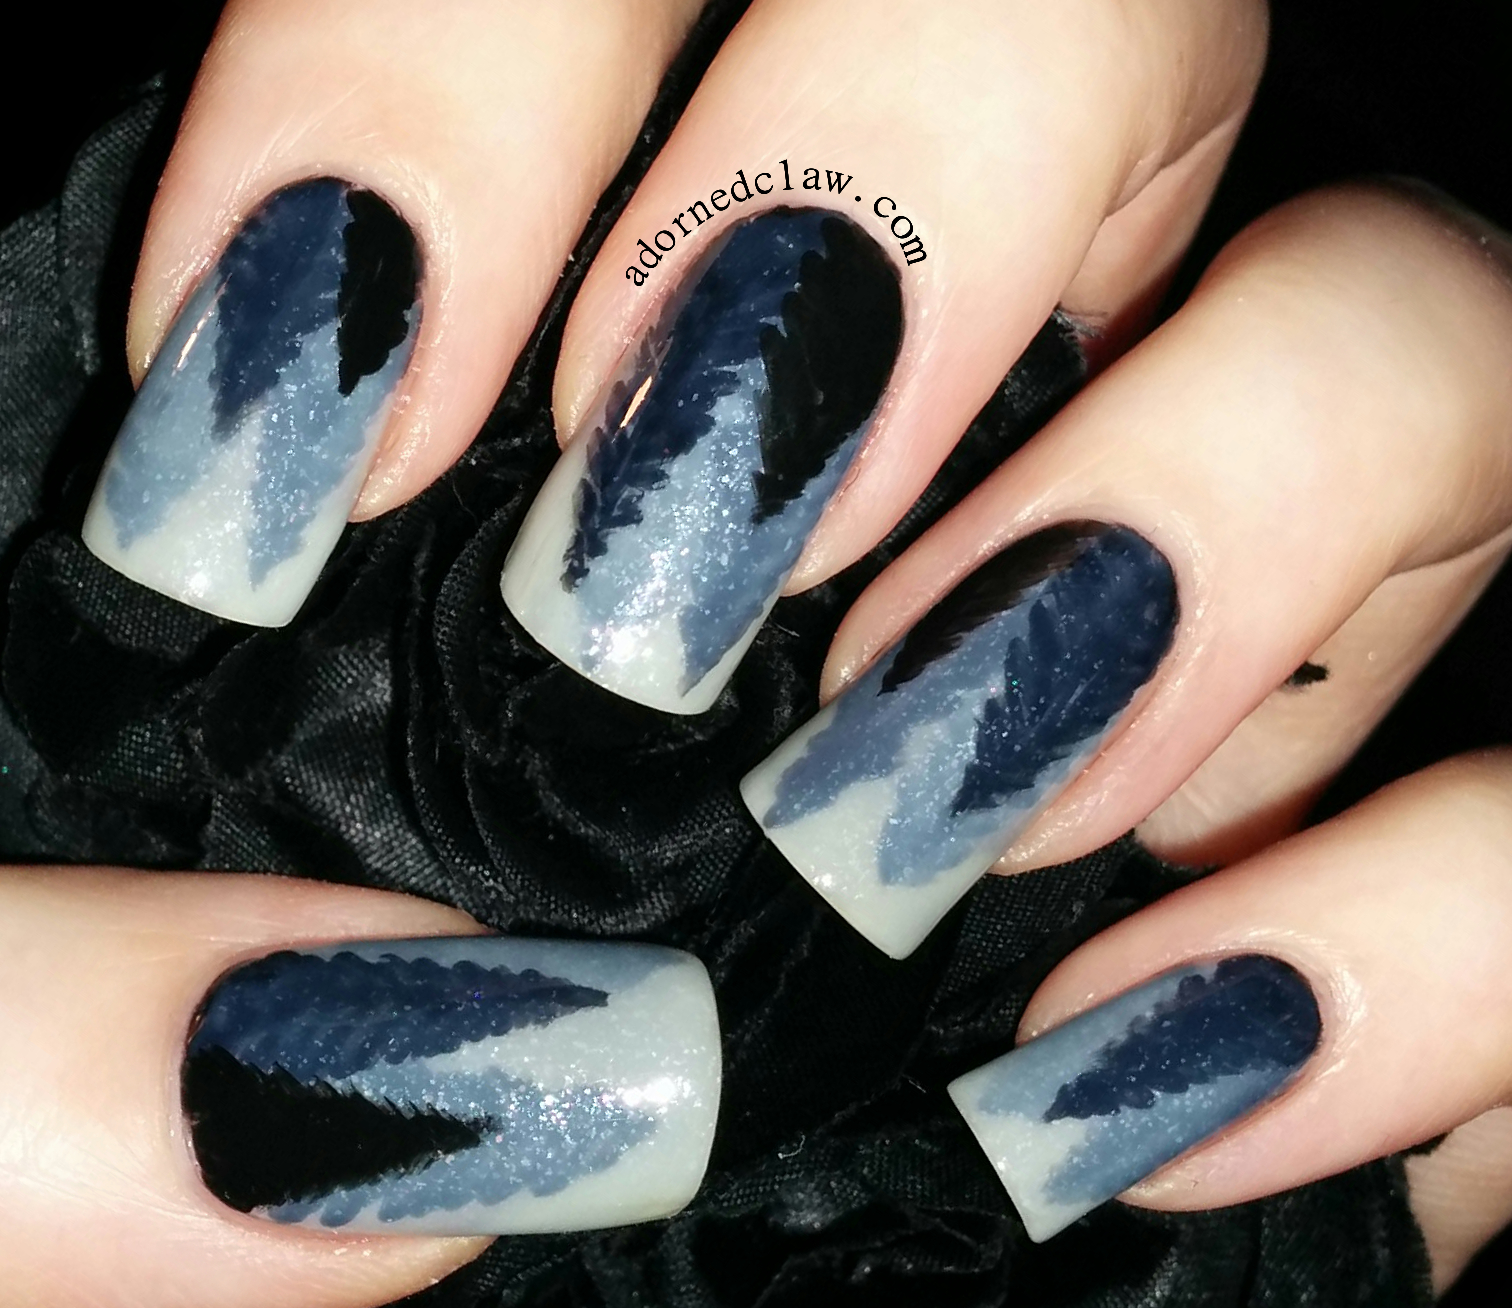
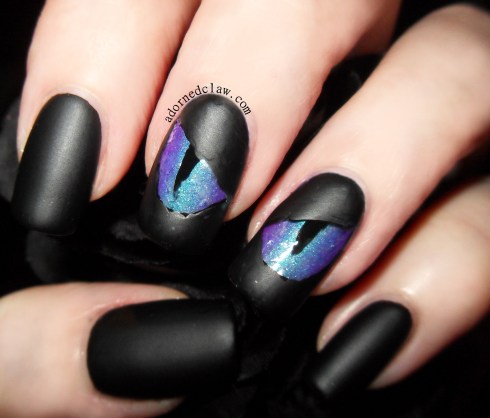
Thinking about it I didn’t really think through the steps for making the eyes. So I think they do look a little messy round the edges.

halloween monster eyes

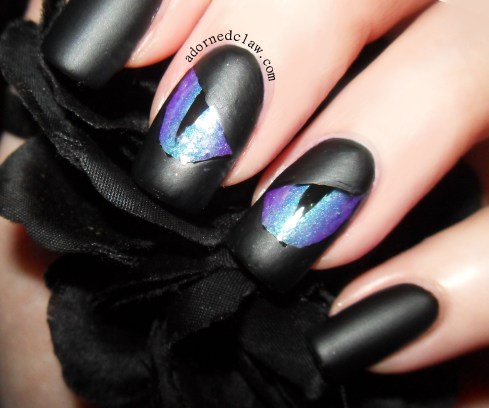
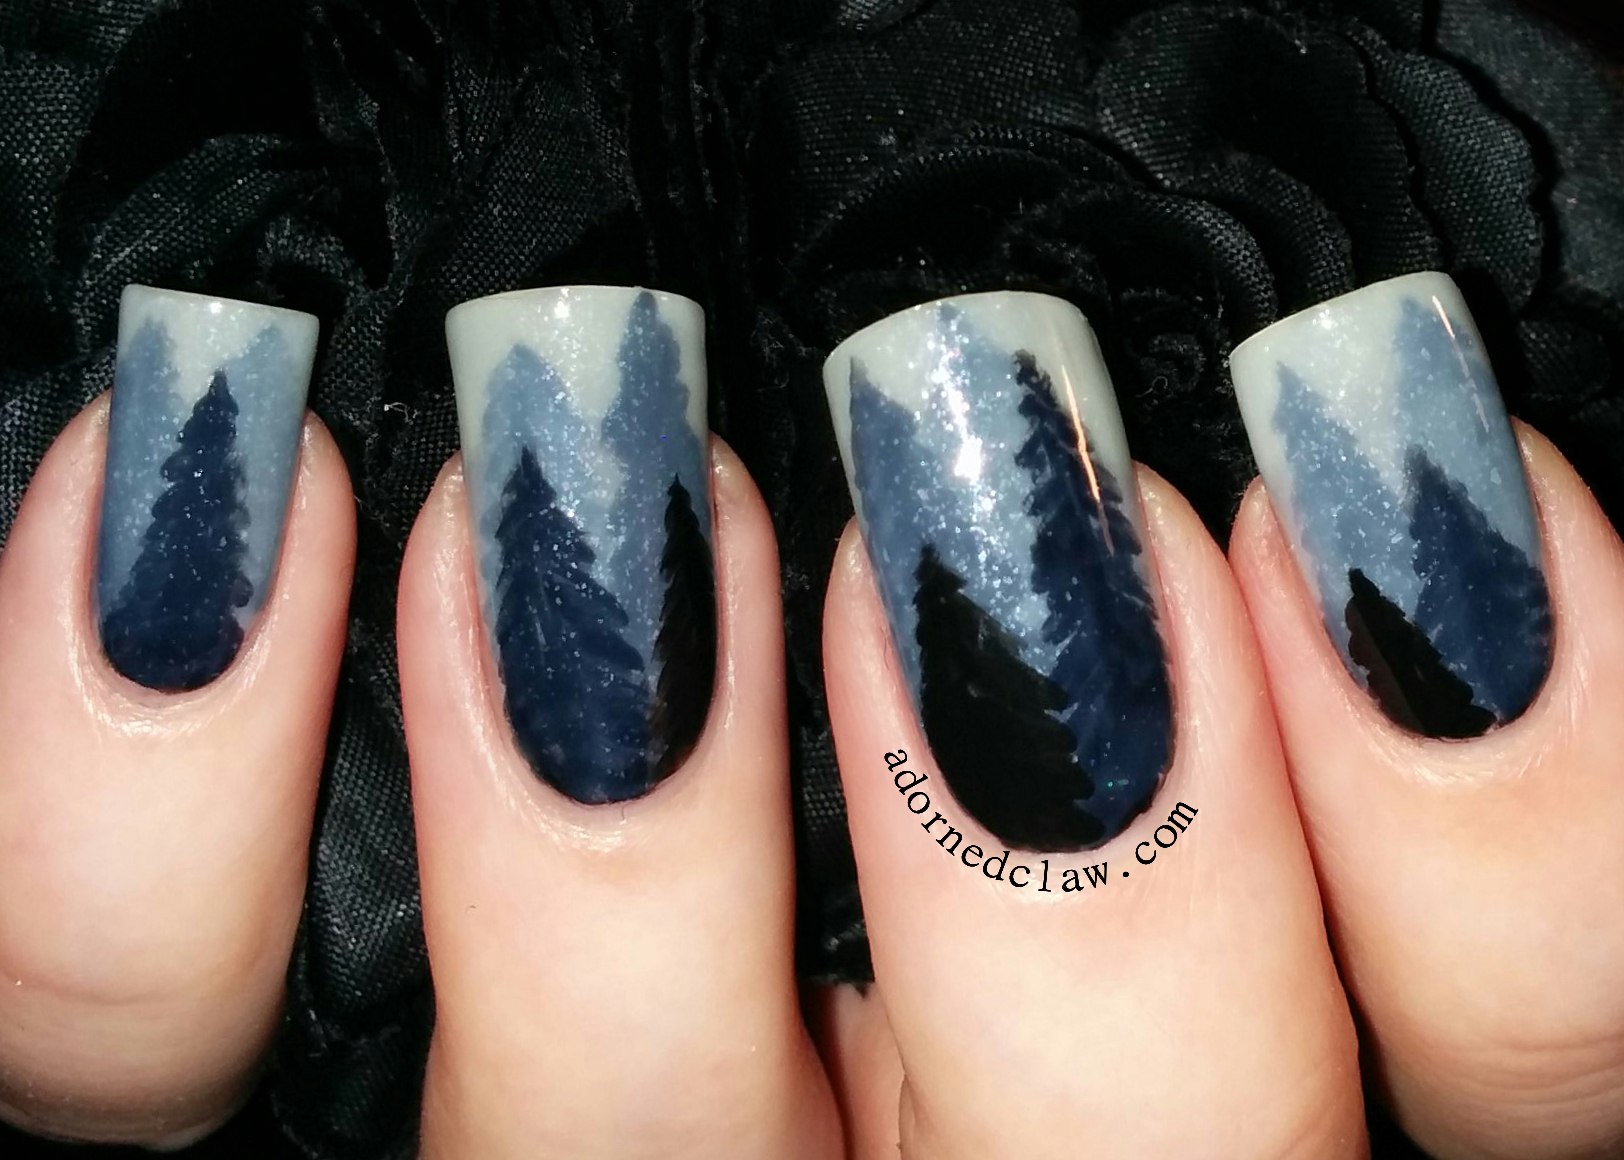
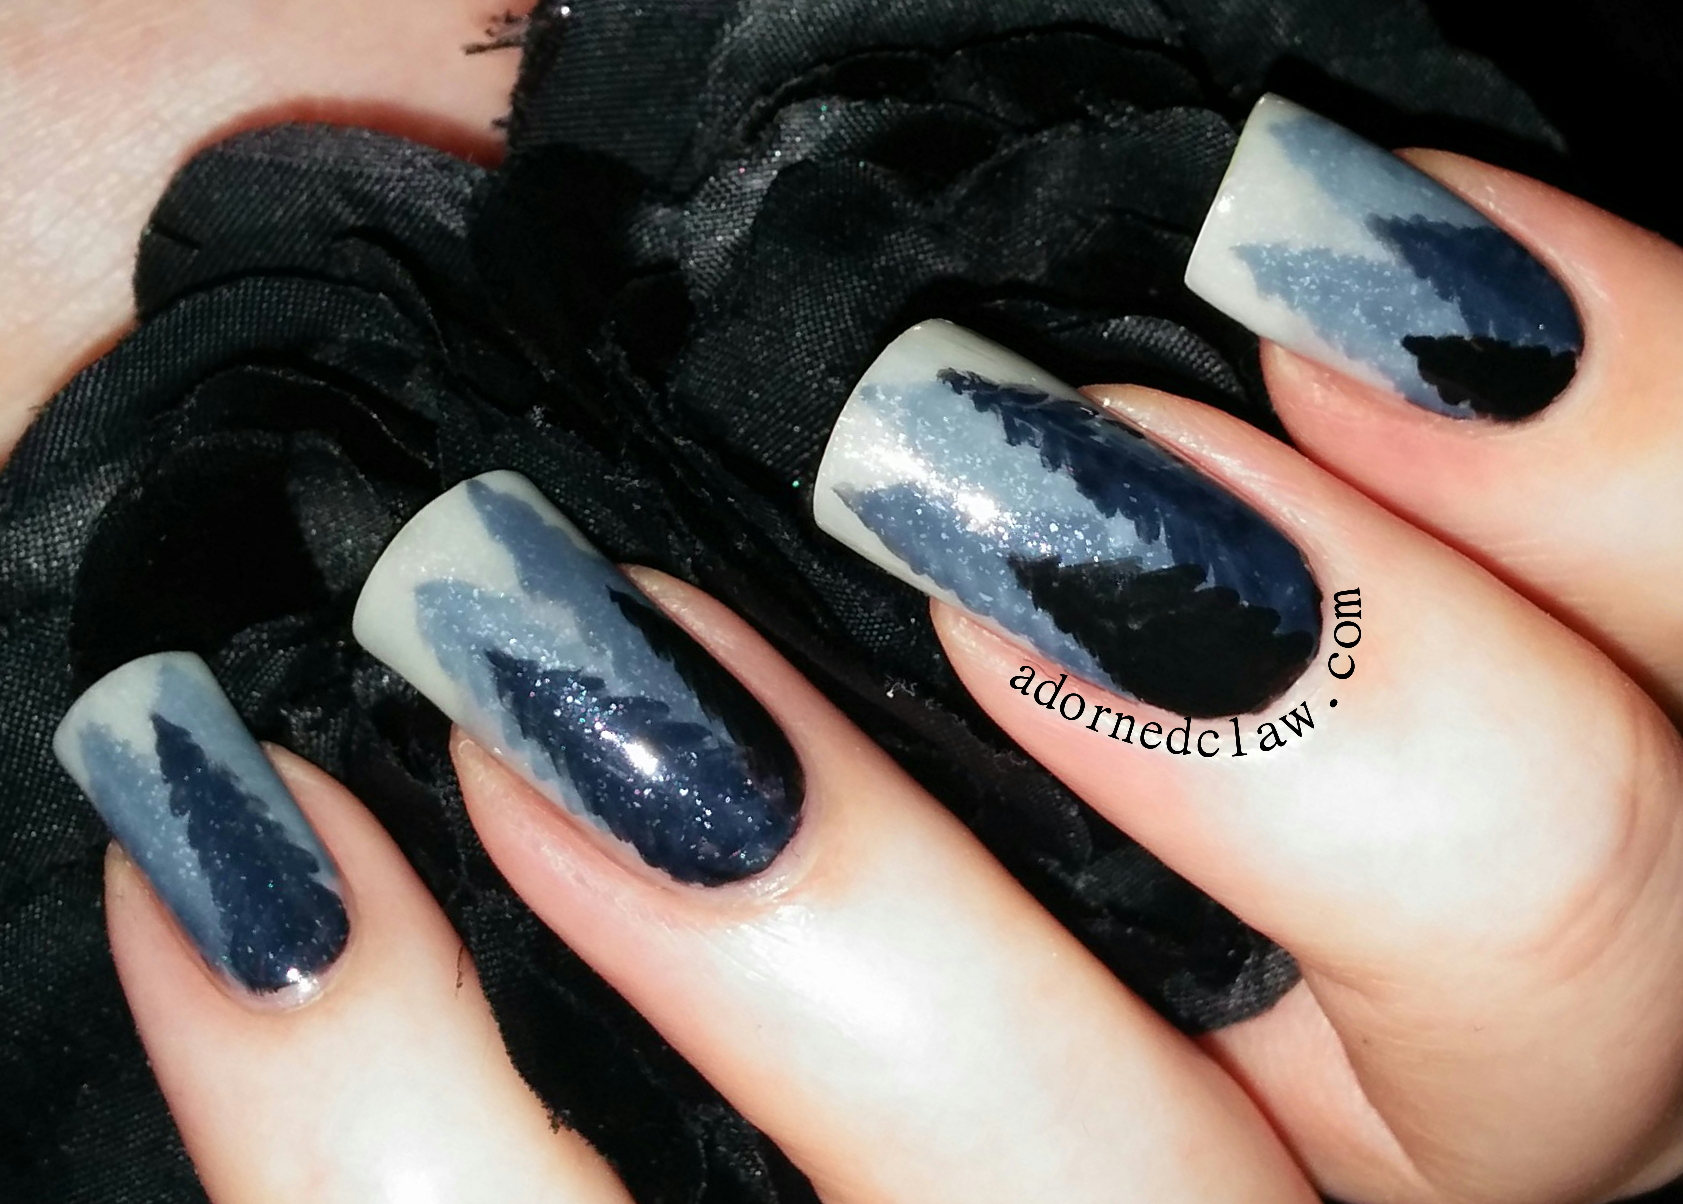
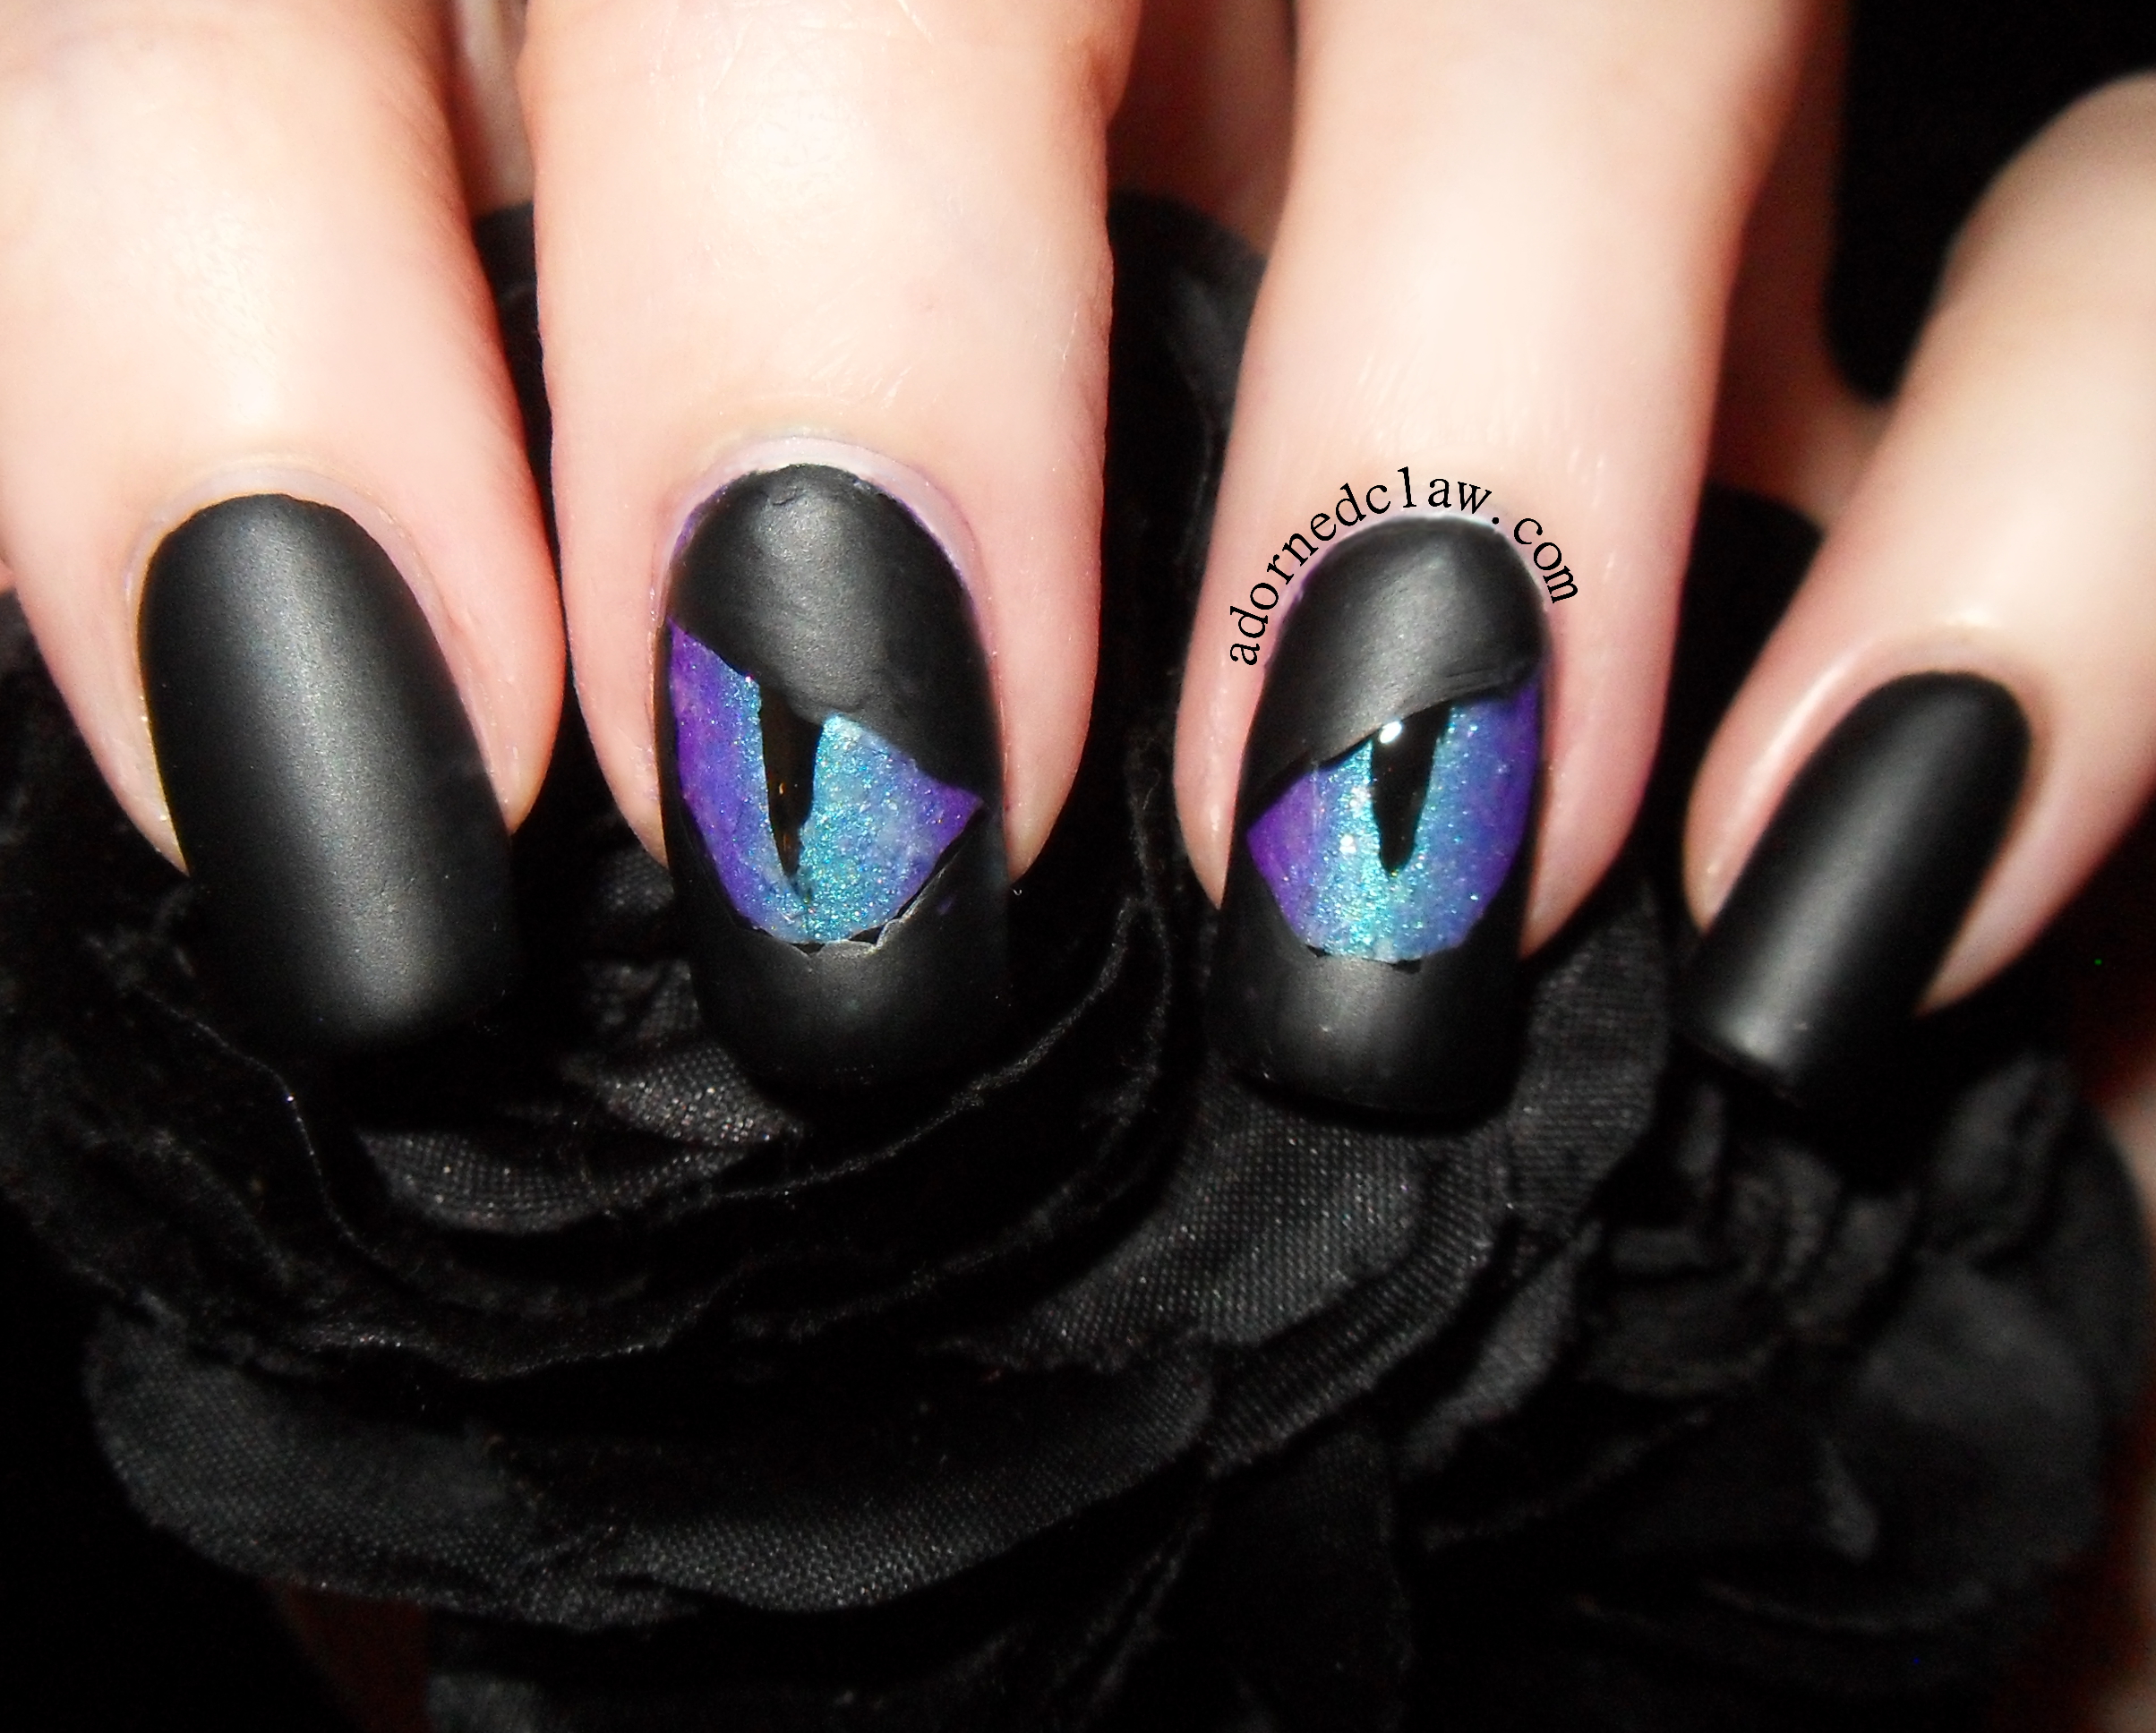
The gradient is Poke and Blue Streak with a coat of Crystal Glaze over the top, then with a thin brush I added the eye shape using Stiletto.

In hindsight I should have used tape or something to mask off the eyes, It would have made the edges of the matte topcoat look a lot cleaner.

candlewick green sandalwood vanilla wax melt

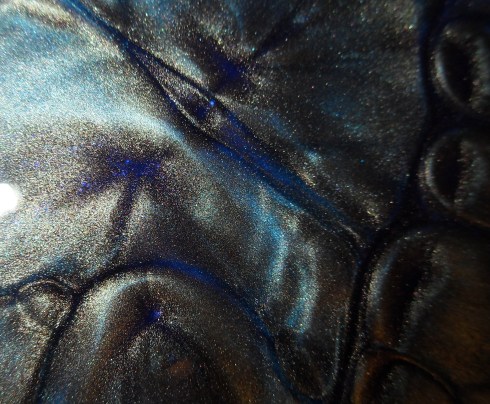
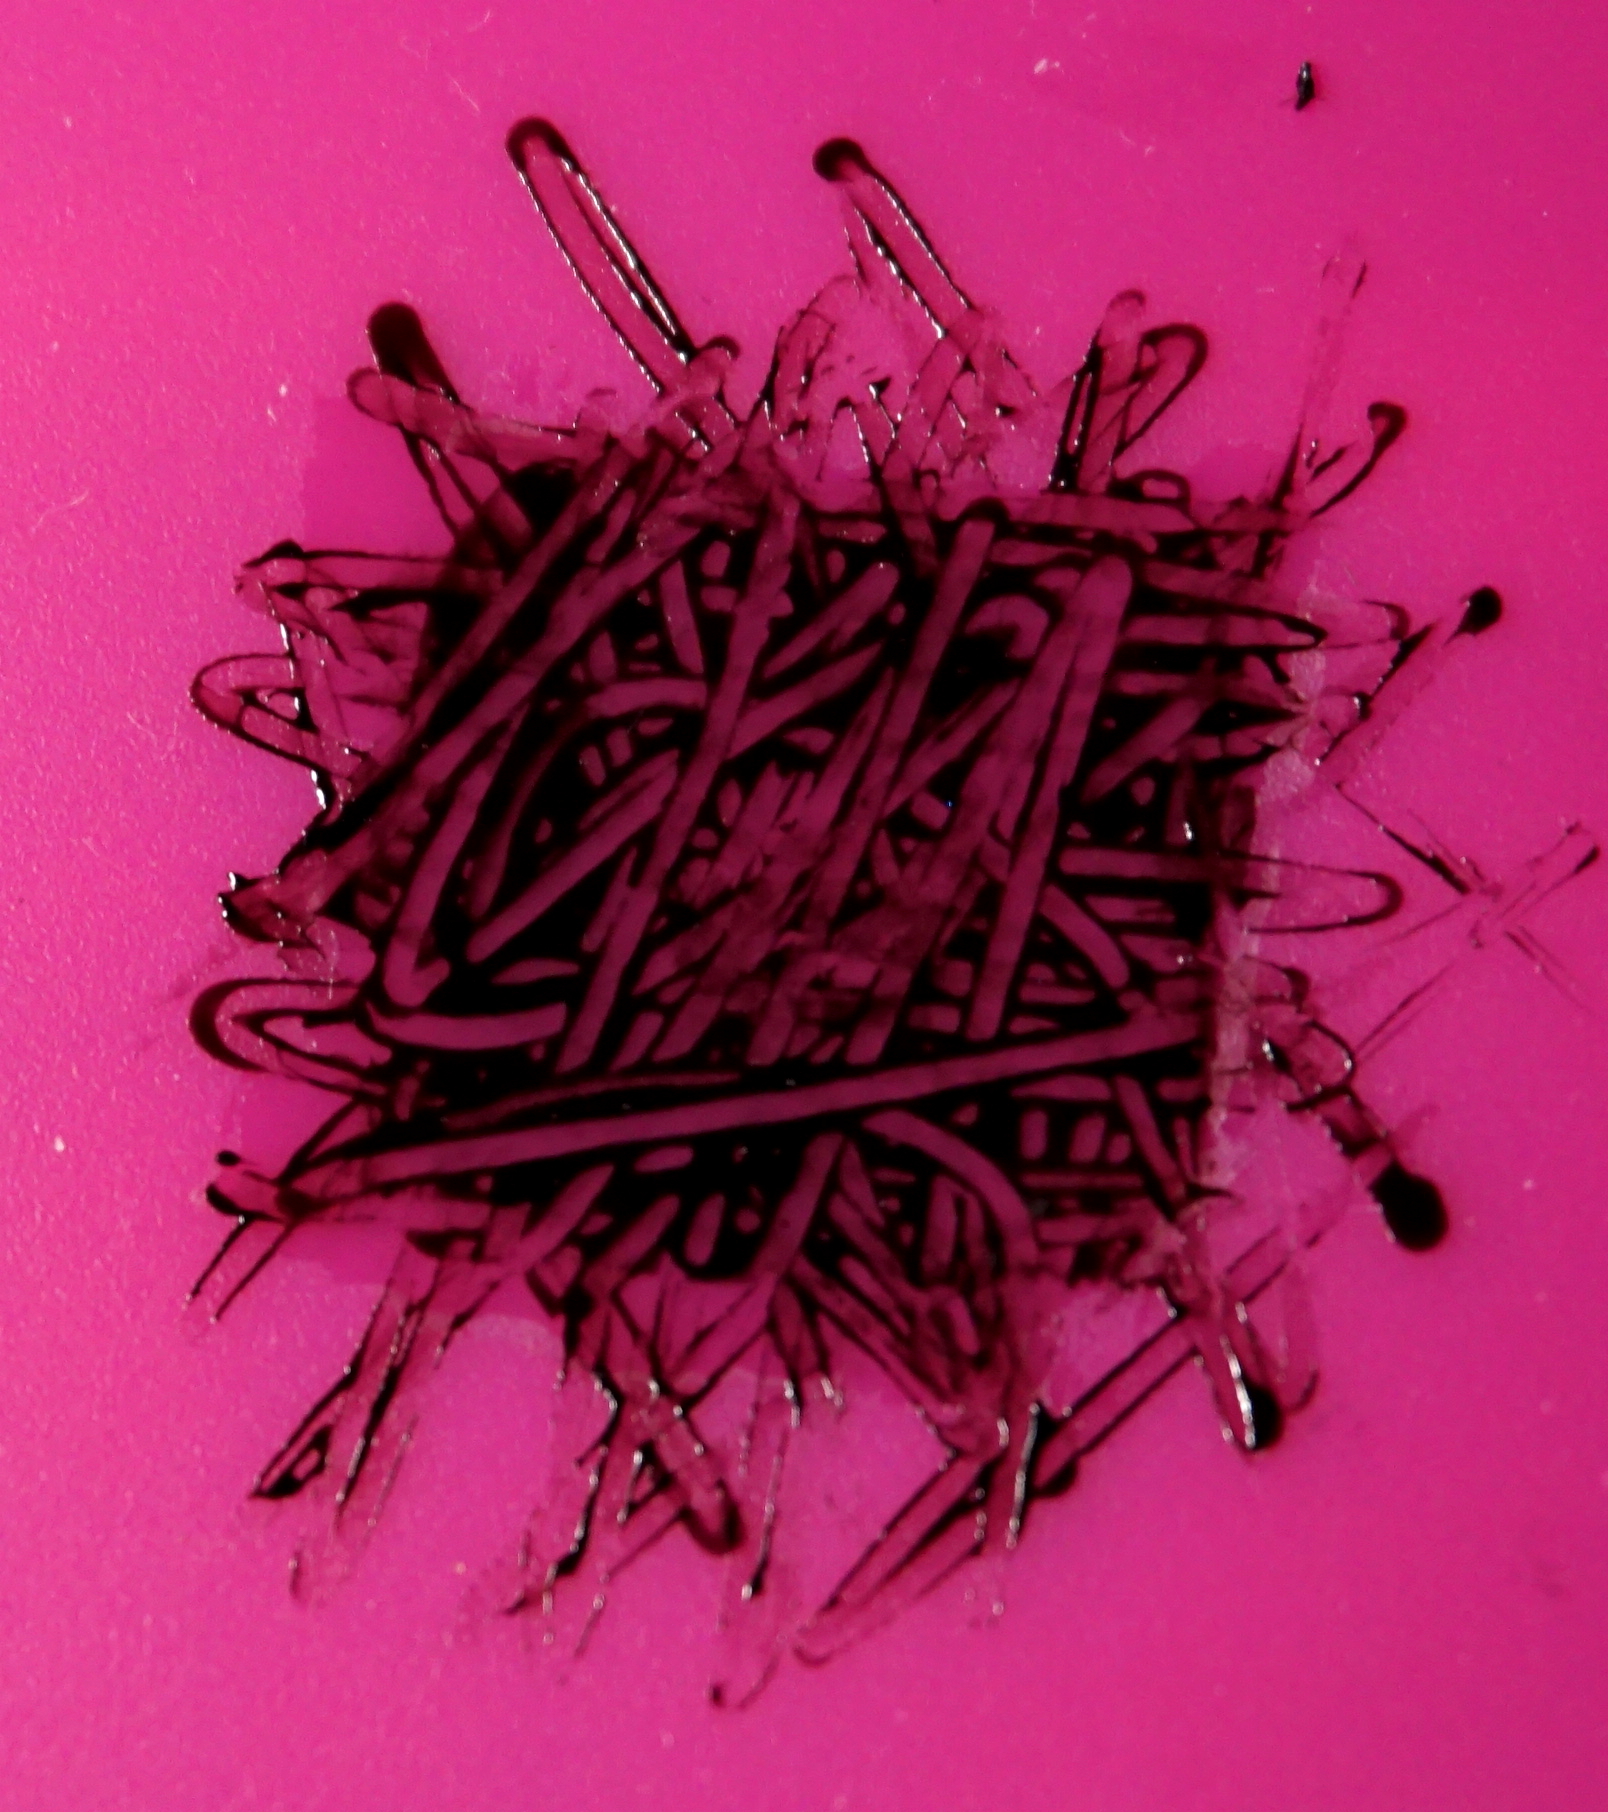
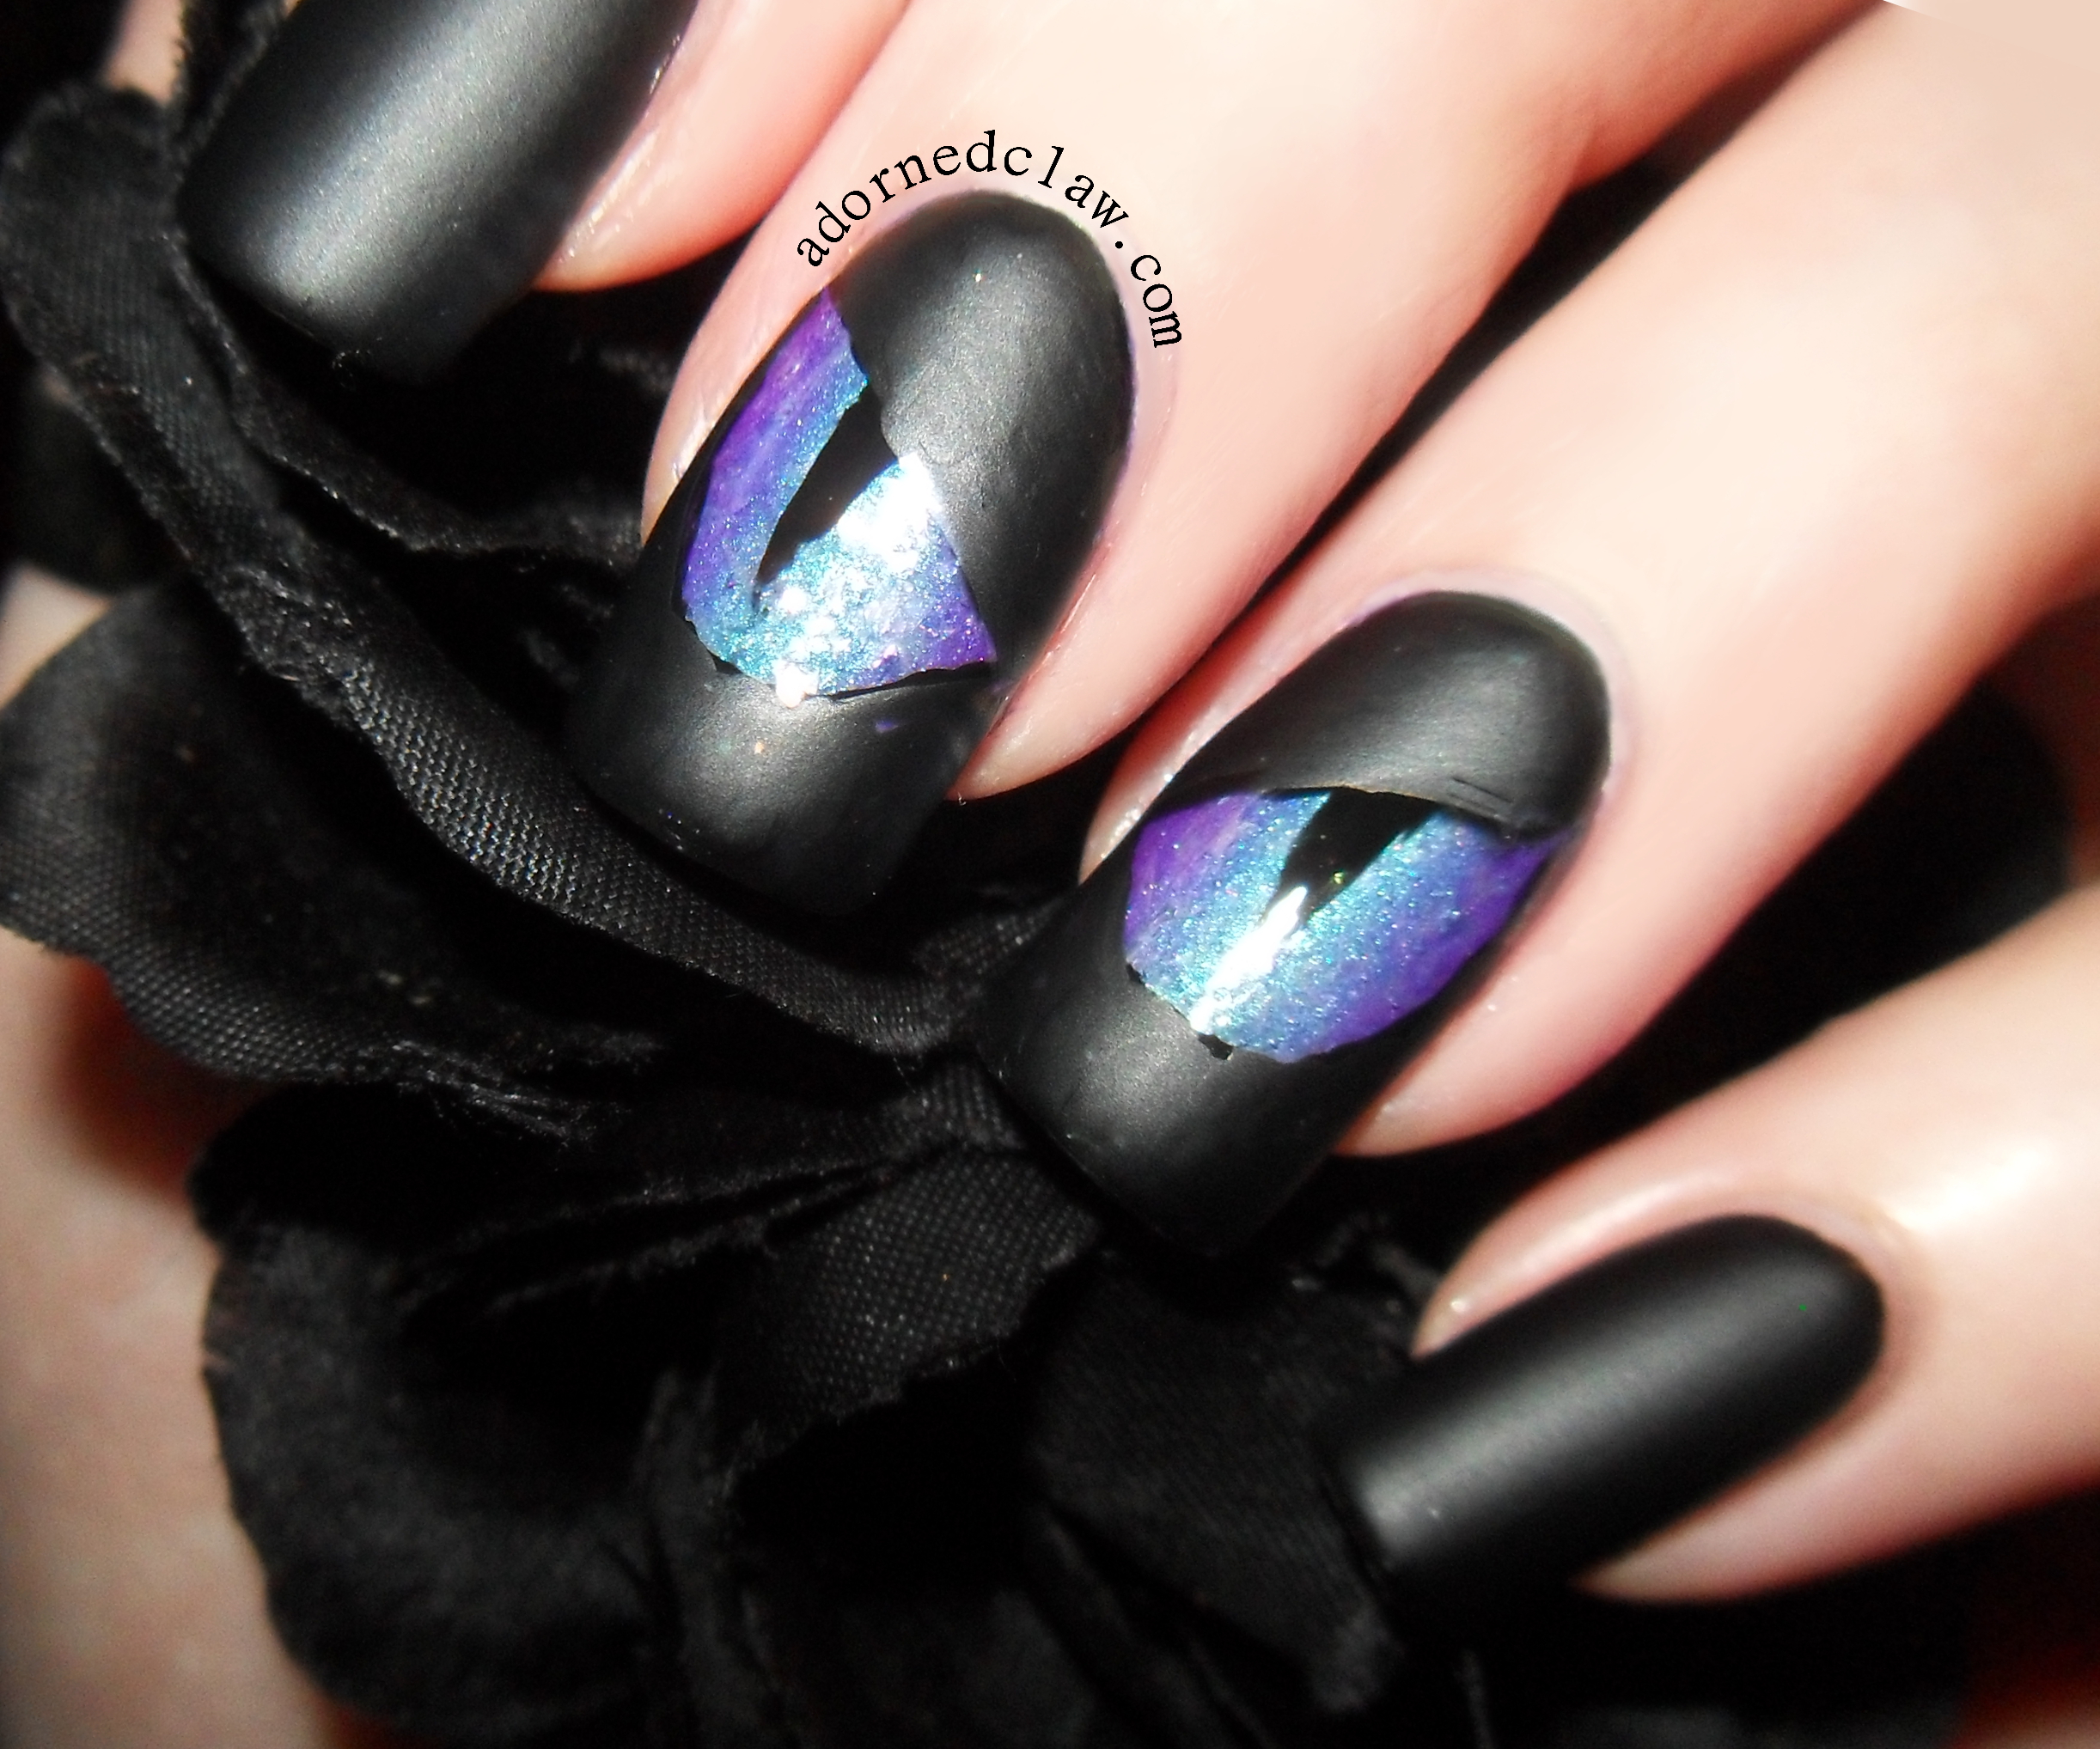
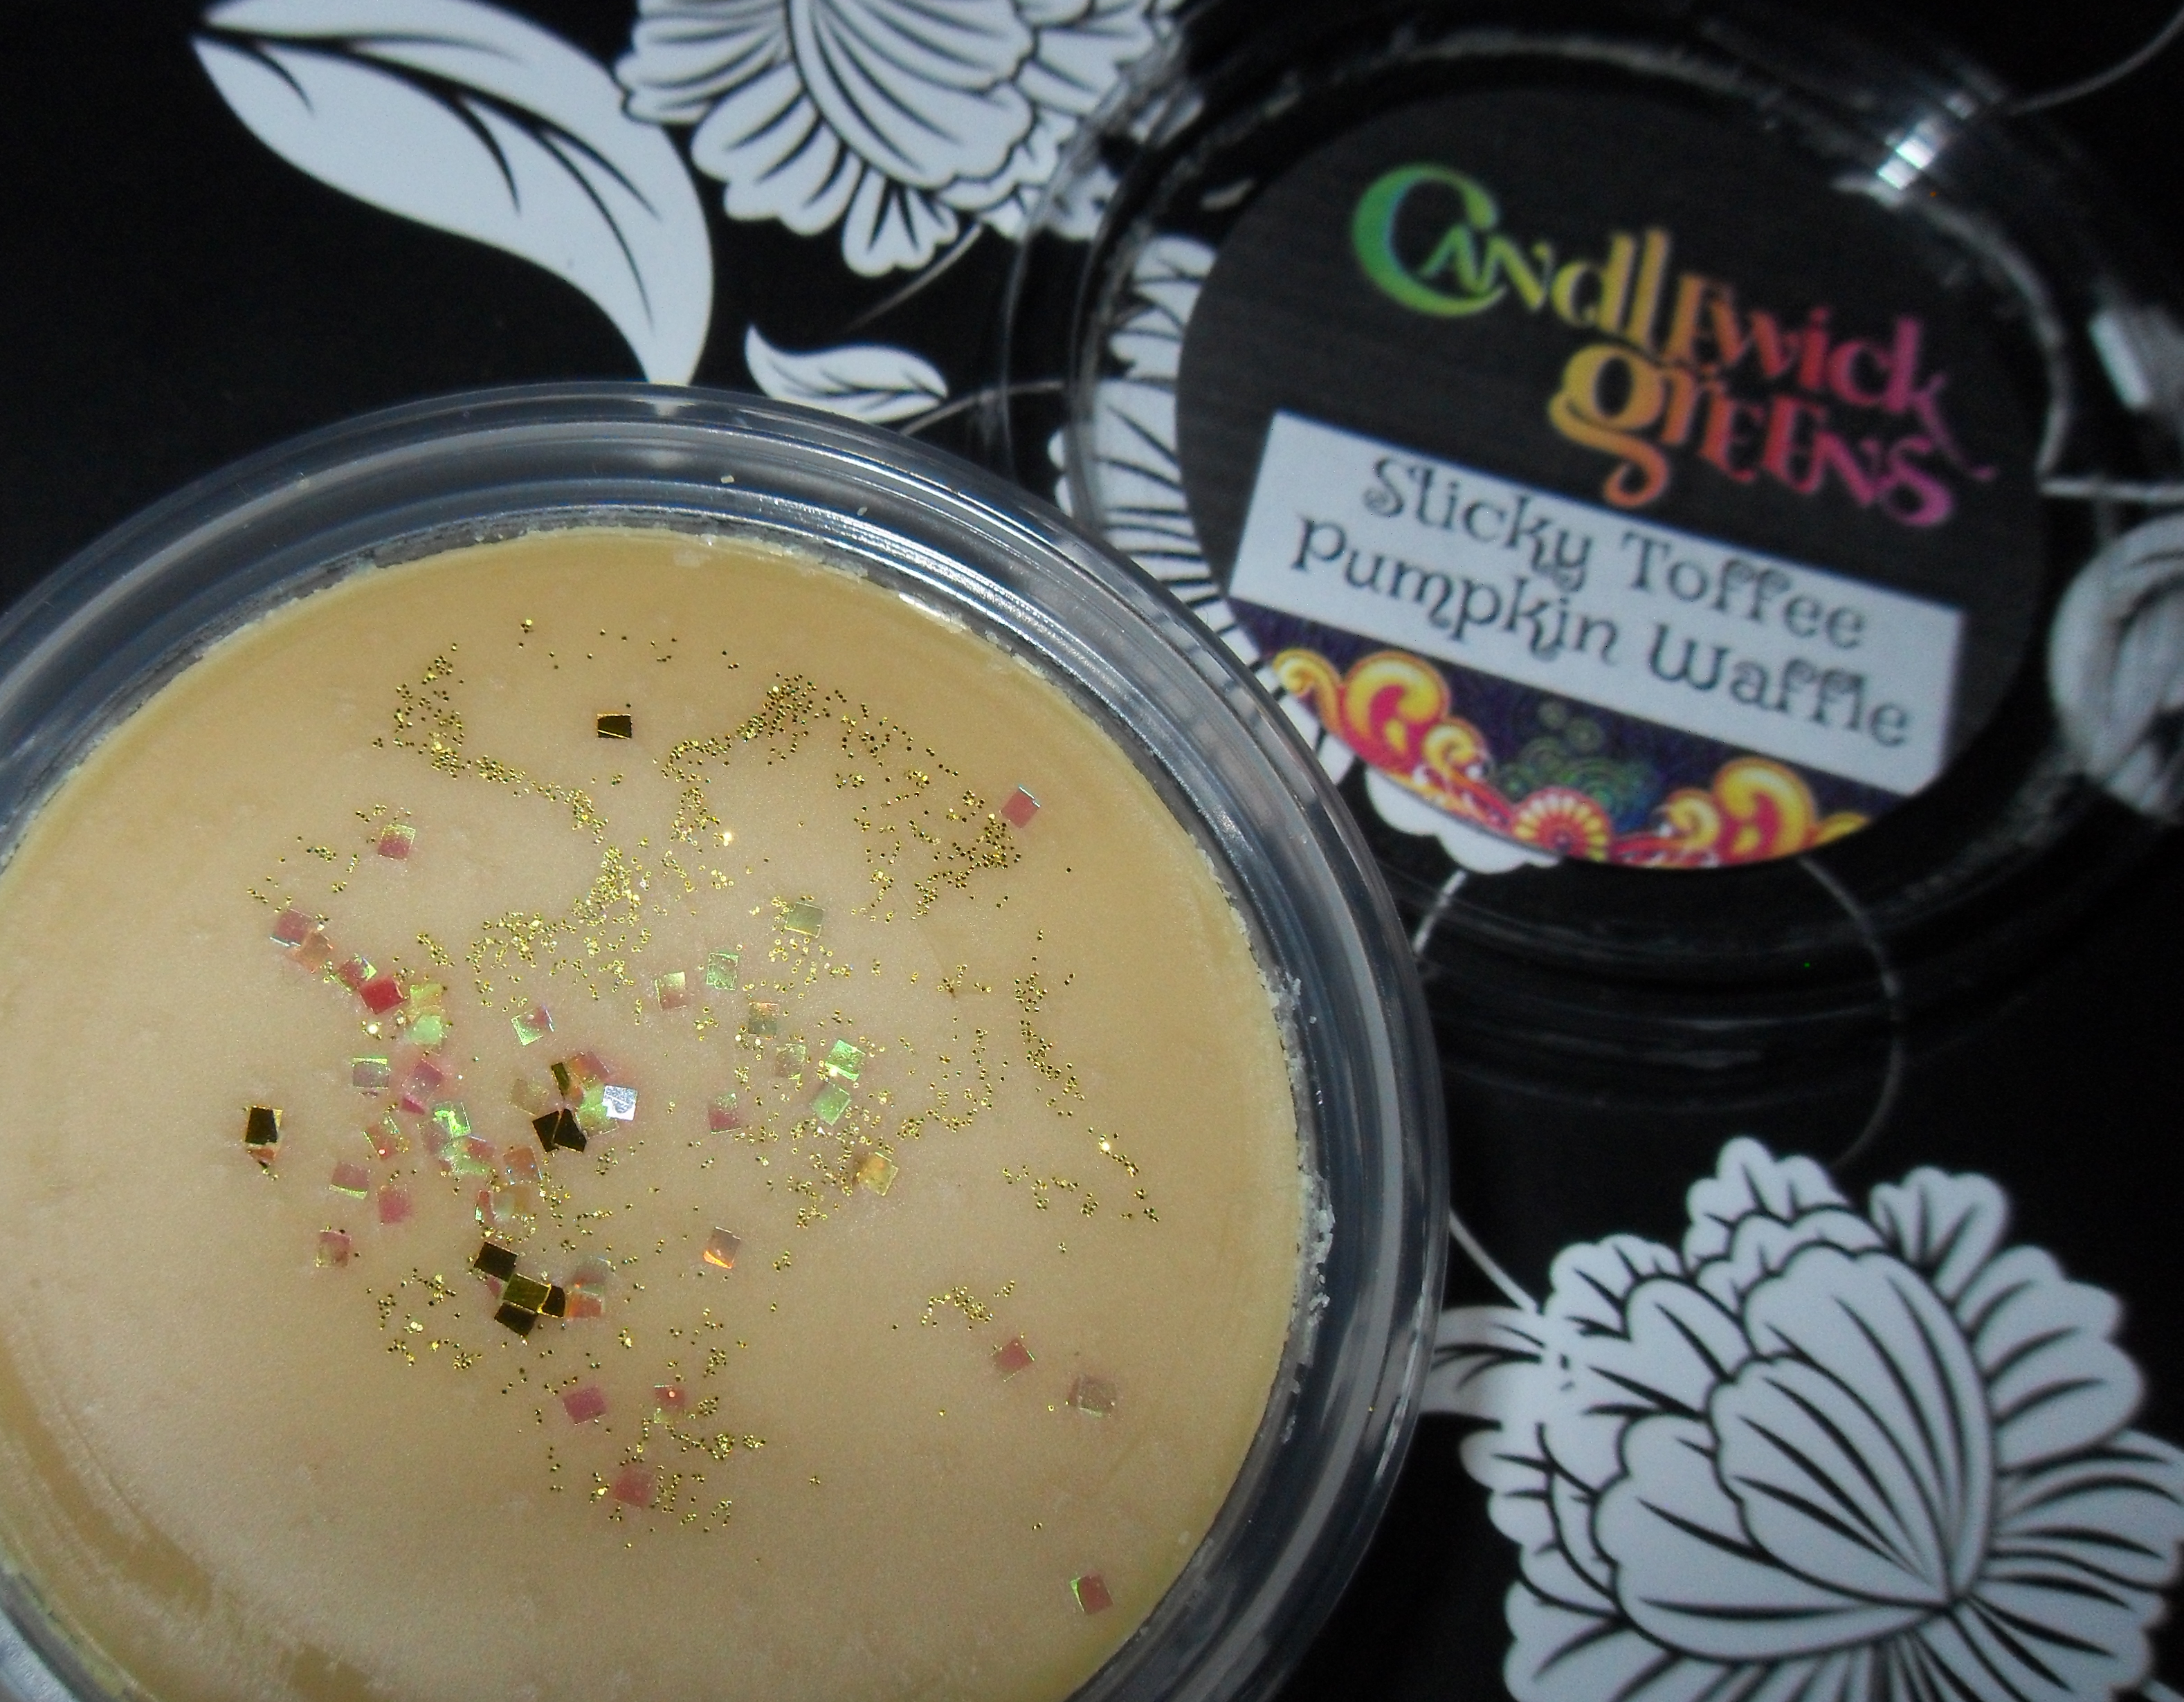
A quick question… Have you seen a nail polish that looks like the picture above? If you have please let me know, as I want something like this on my nails right now 🙂

As I’m sure you can tell the photograph isn’t nail polish, its wax! Which brings me on to the second part of my post!

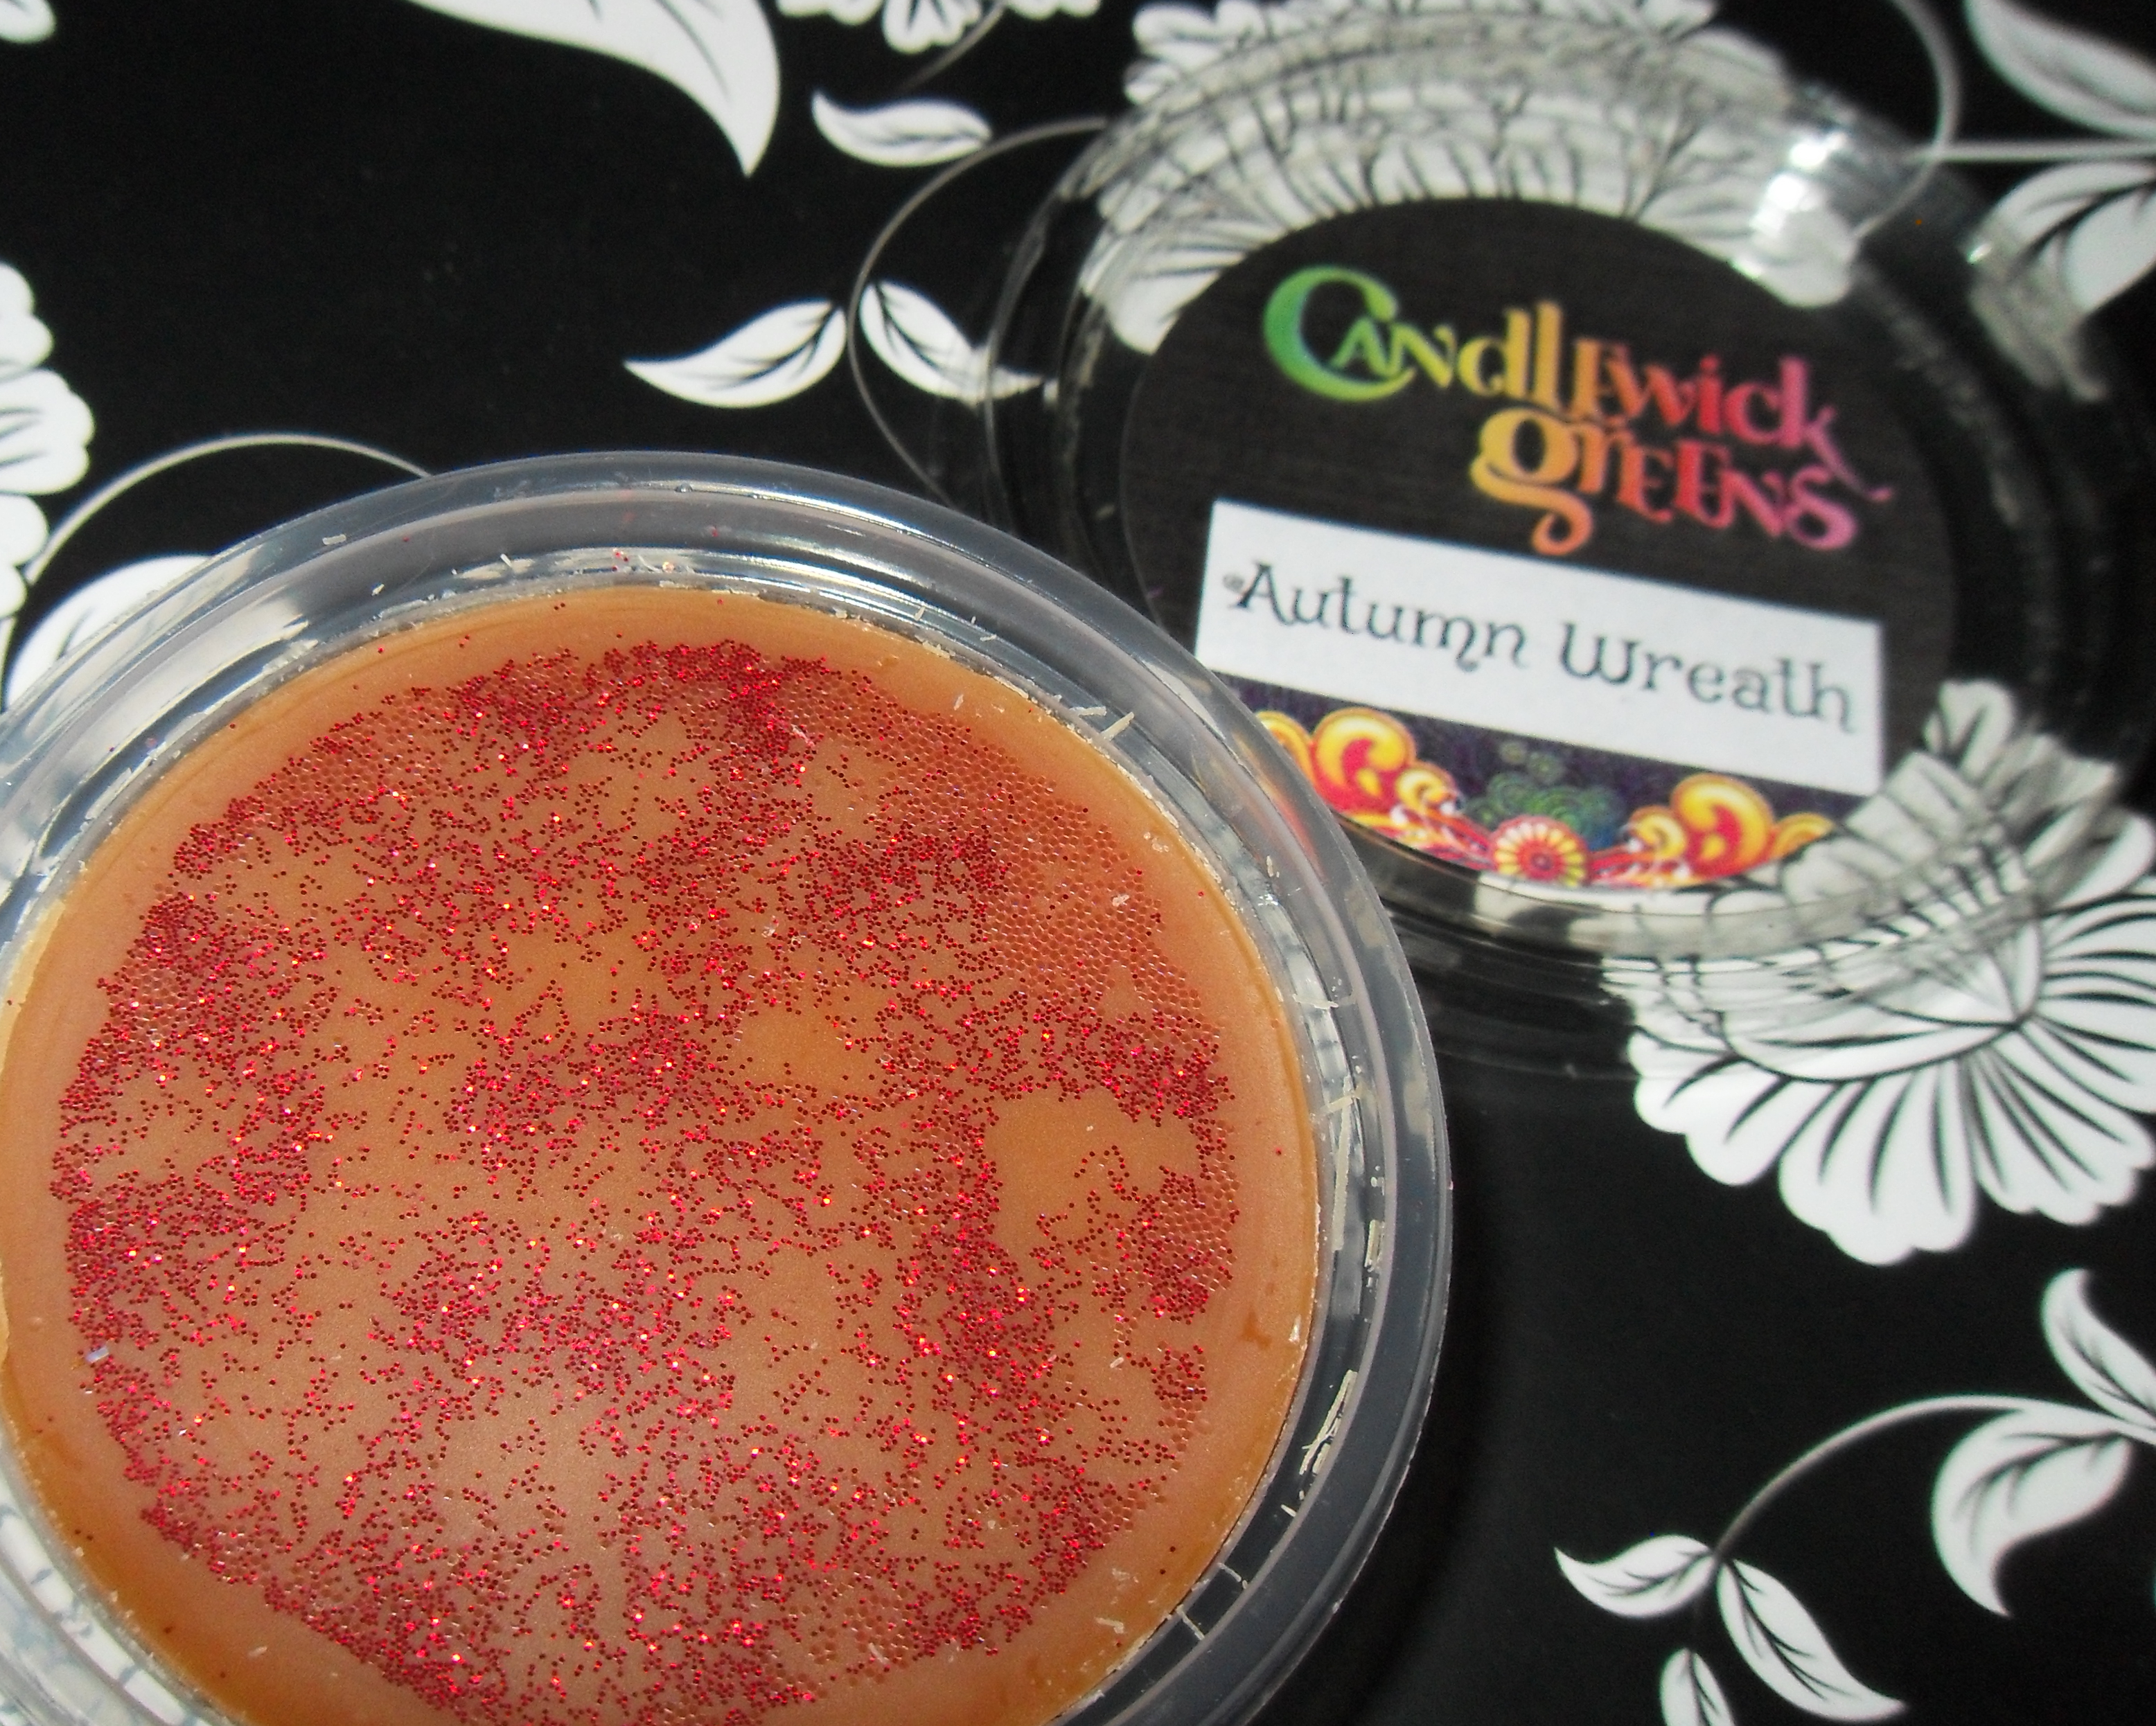
I want to show you some wax melts from a really lovely little company here in the UK. It’s not often that I come across wax melts that I’m really impressed with, but these honestly are amazing! Before I carry on I should let you know that I purchased these myself!

I have pet rats, at the moment I have 8 of the whiskery critters in my living room, and like any pets they can get really rather stinky, so I do end up looking for lovely room fragrances quite often.

These wax melts are so loaded with fragrance that one quarter of a pot is enough to scent the whole of my apartment all day!

If my nostrils could sing with happiness they would be, and not in a creepy old man nose whistle way!

The Candlewick Greens Shop is right here if you would like to have a look 🙂  http://www.candlewick-greens.appspot.com/index.html

candlewick green wax tart melt autumn wreath

Autumn Wreath is the melt I have in my warmer right now, it’s so nice, slightly spiced apples and crunchy leaves!

There is a facebook group here https://www.facebook.com/groups/740123009371304/?fref=ts

it’s the best place to fins out about the restocks and upcoming new scents 😀

candlewick green wax melt tart gingerbread latte

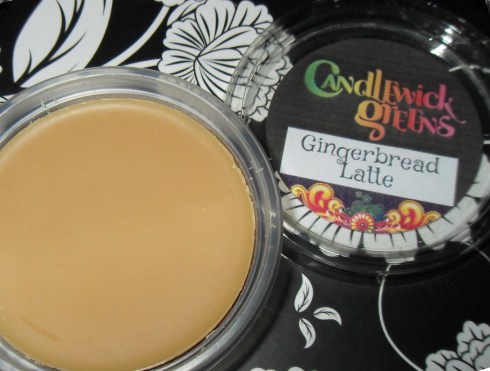
Gingerbread Latte smells just like the drink, I have found that some coffee/creamy scented candles and melts (from a well known brand that happens to start with the letter Y) have this nasty chemical plastic smell. But not these, they smell heavenly!

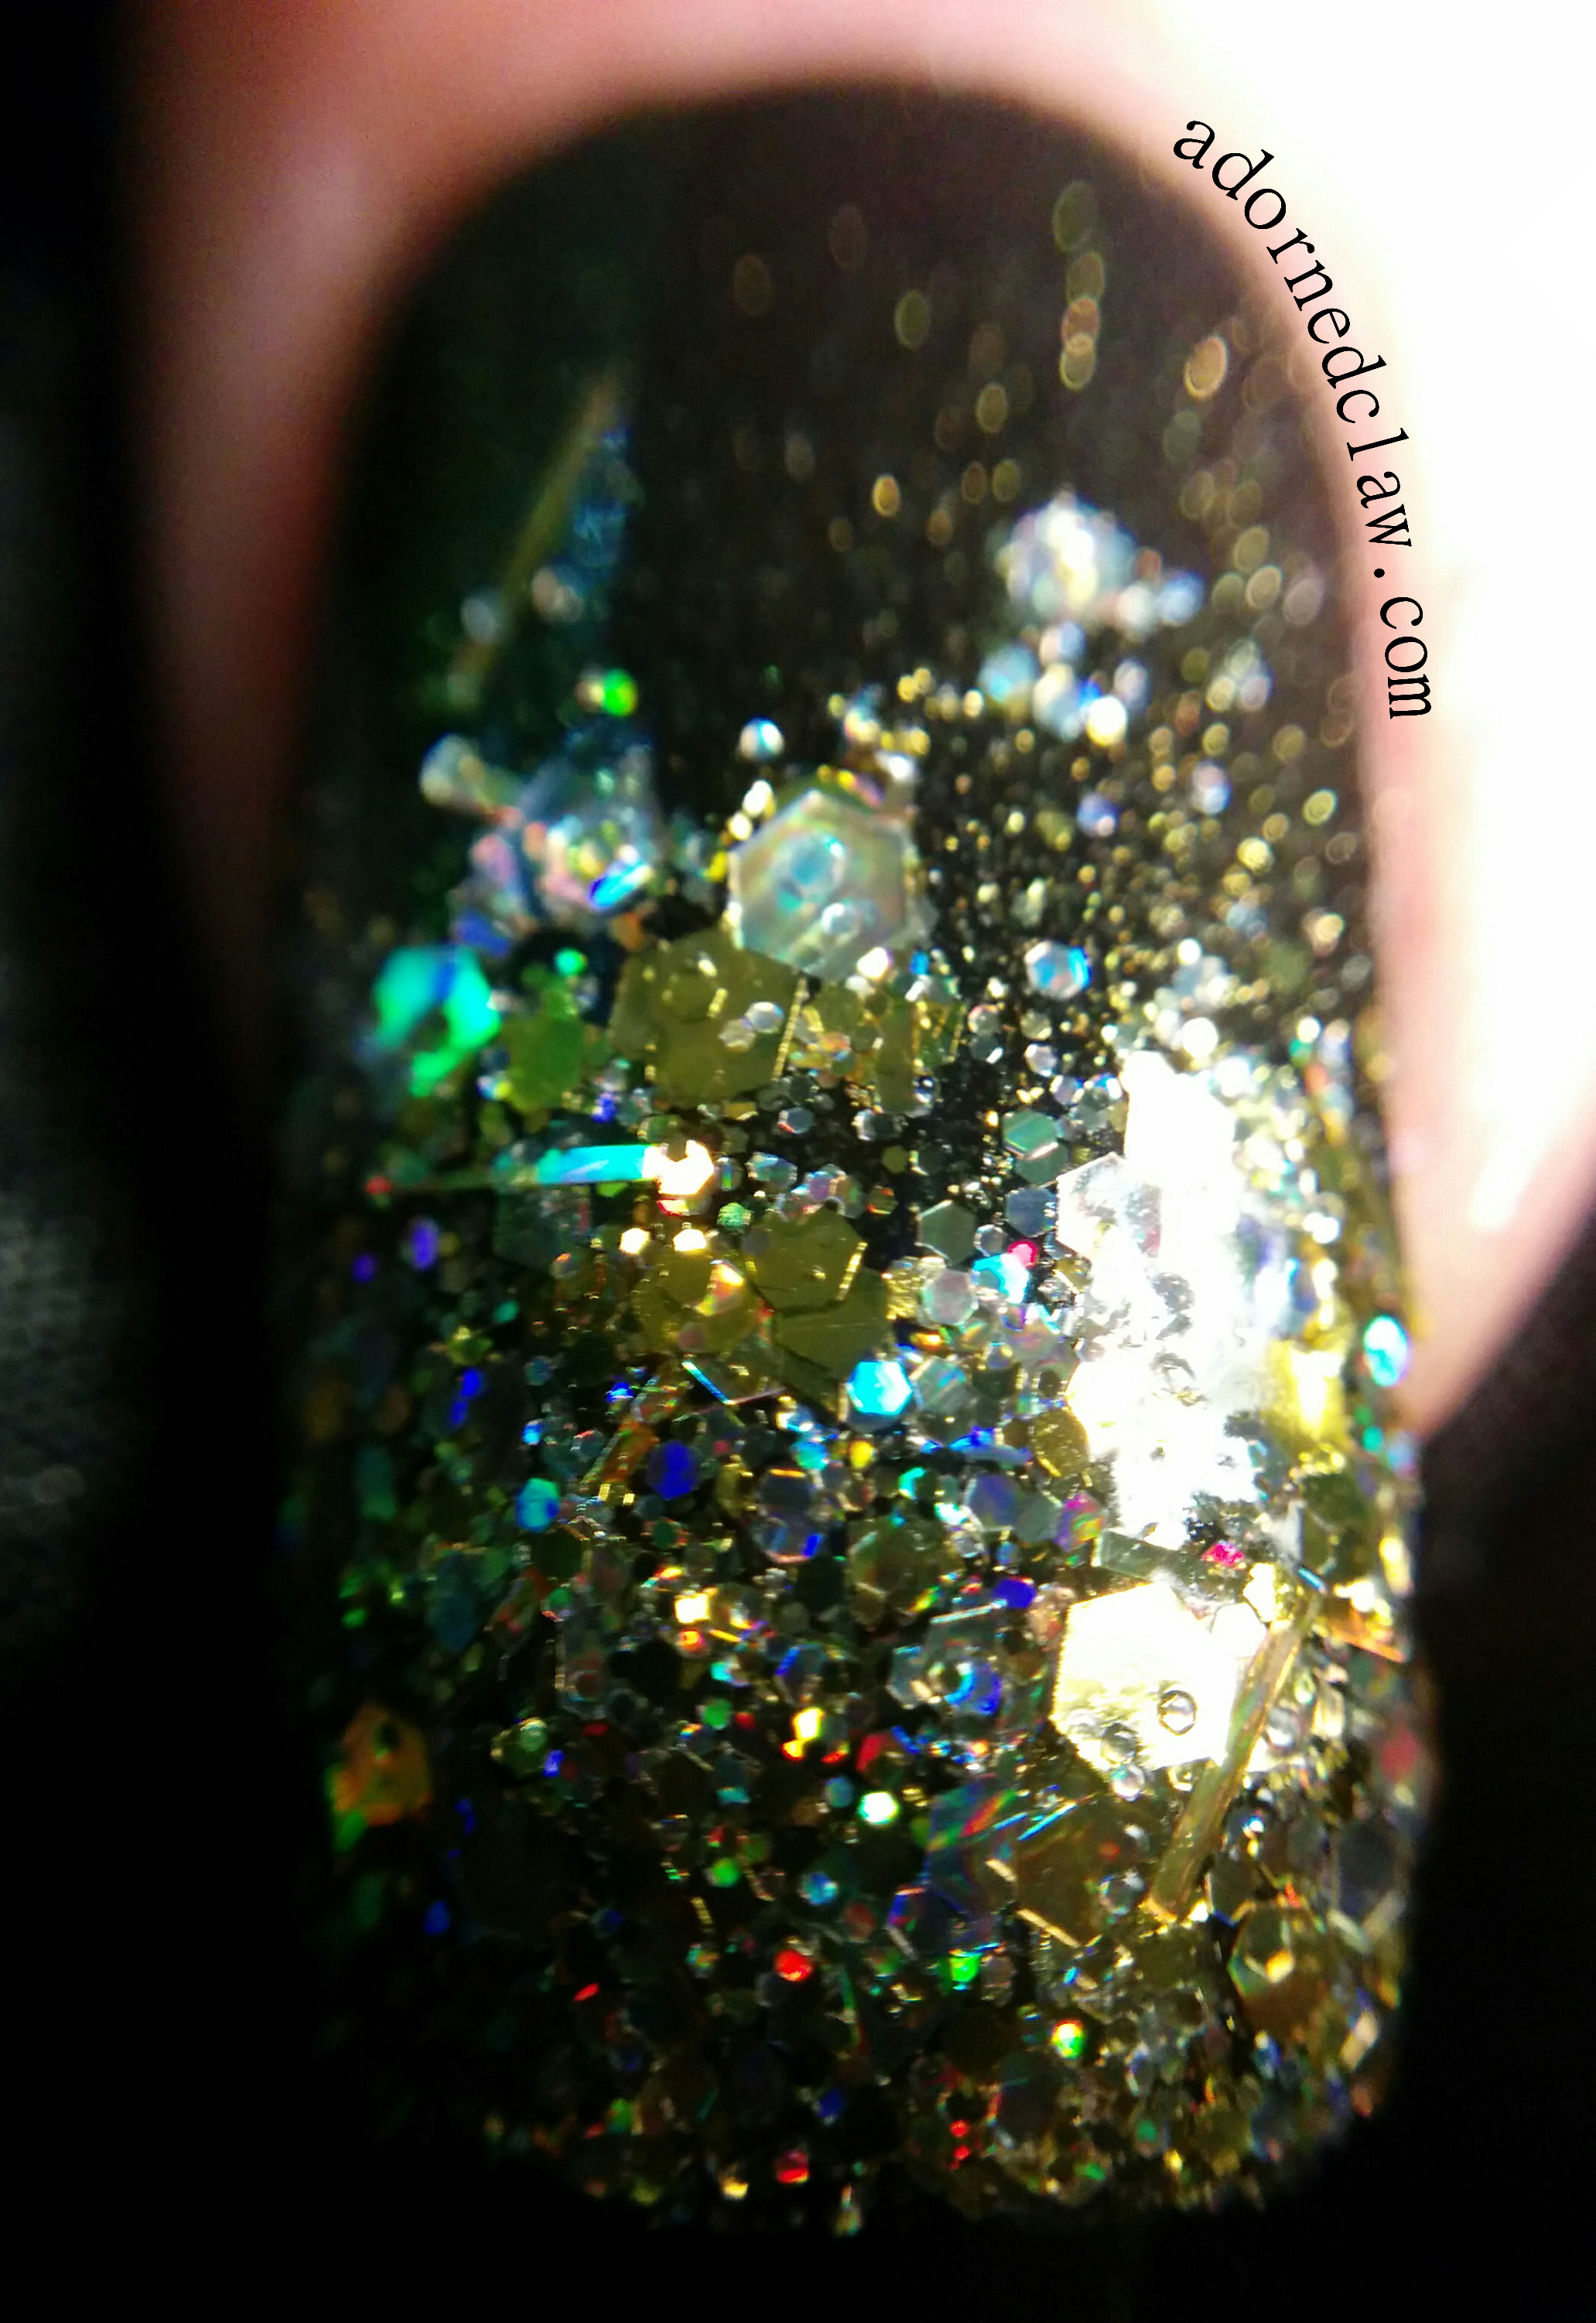
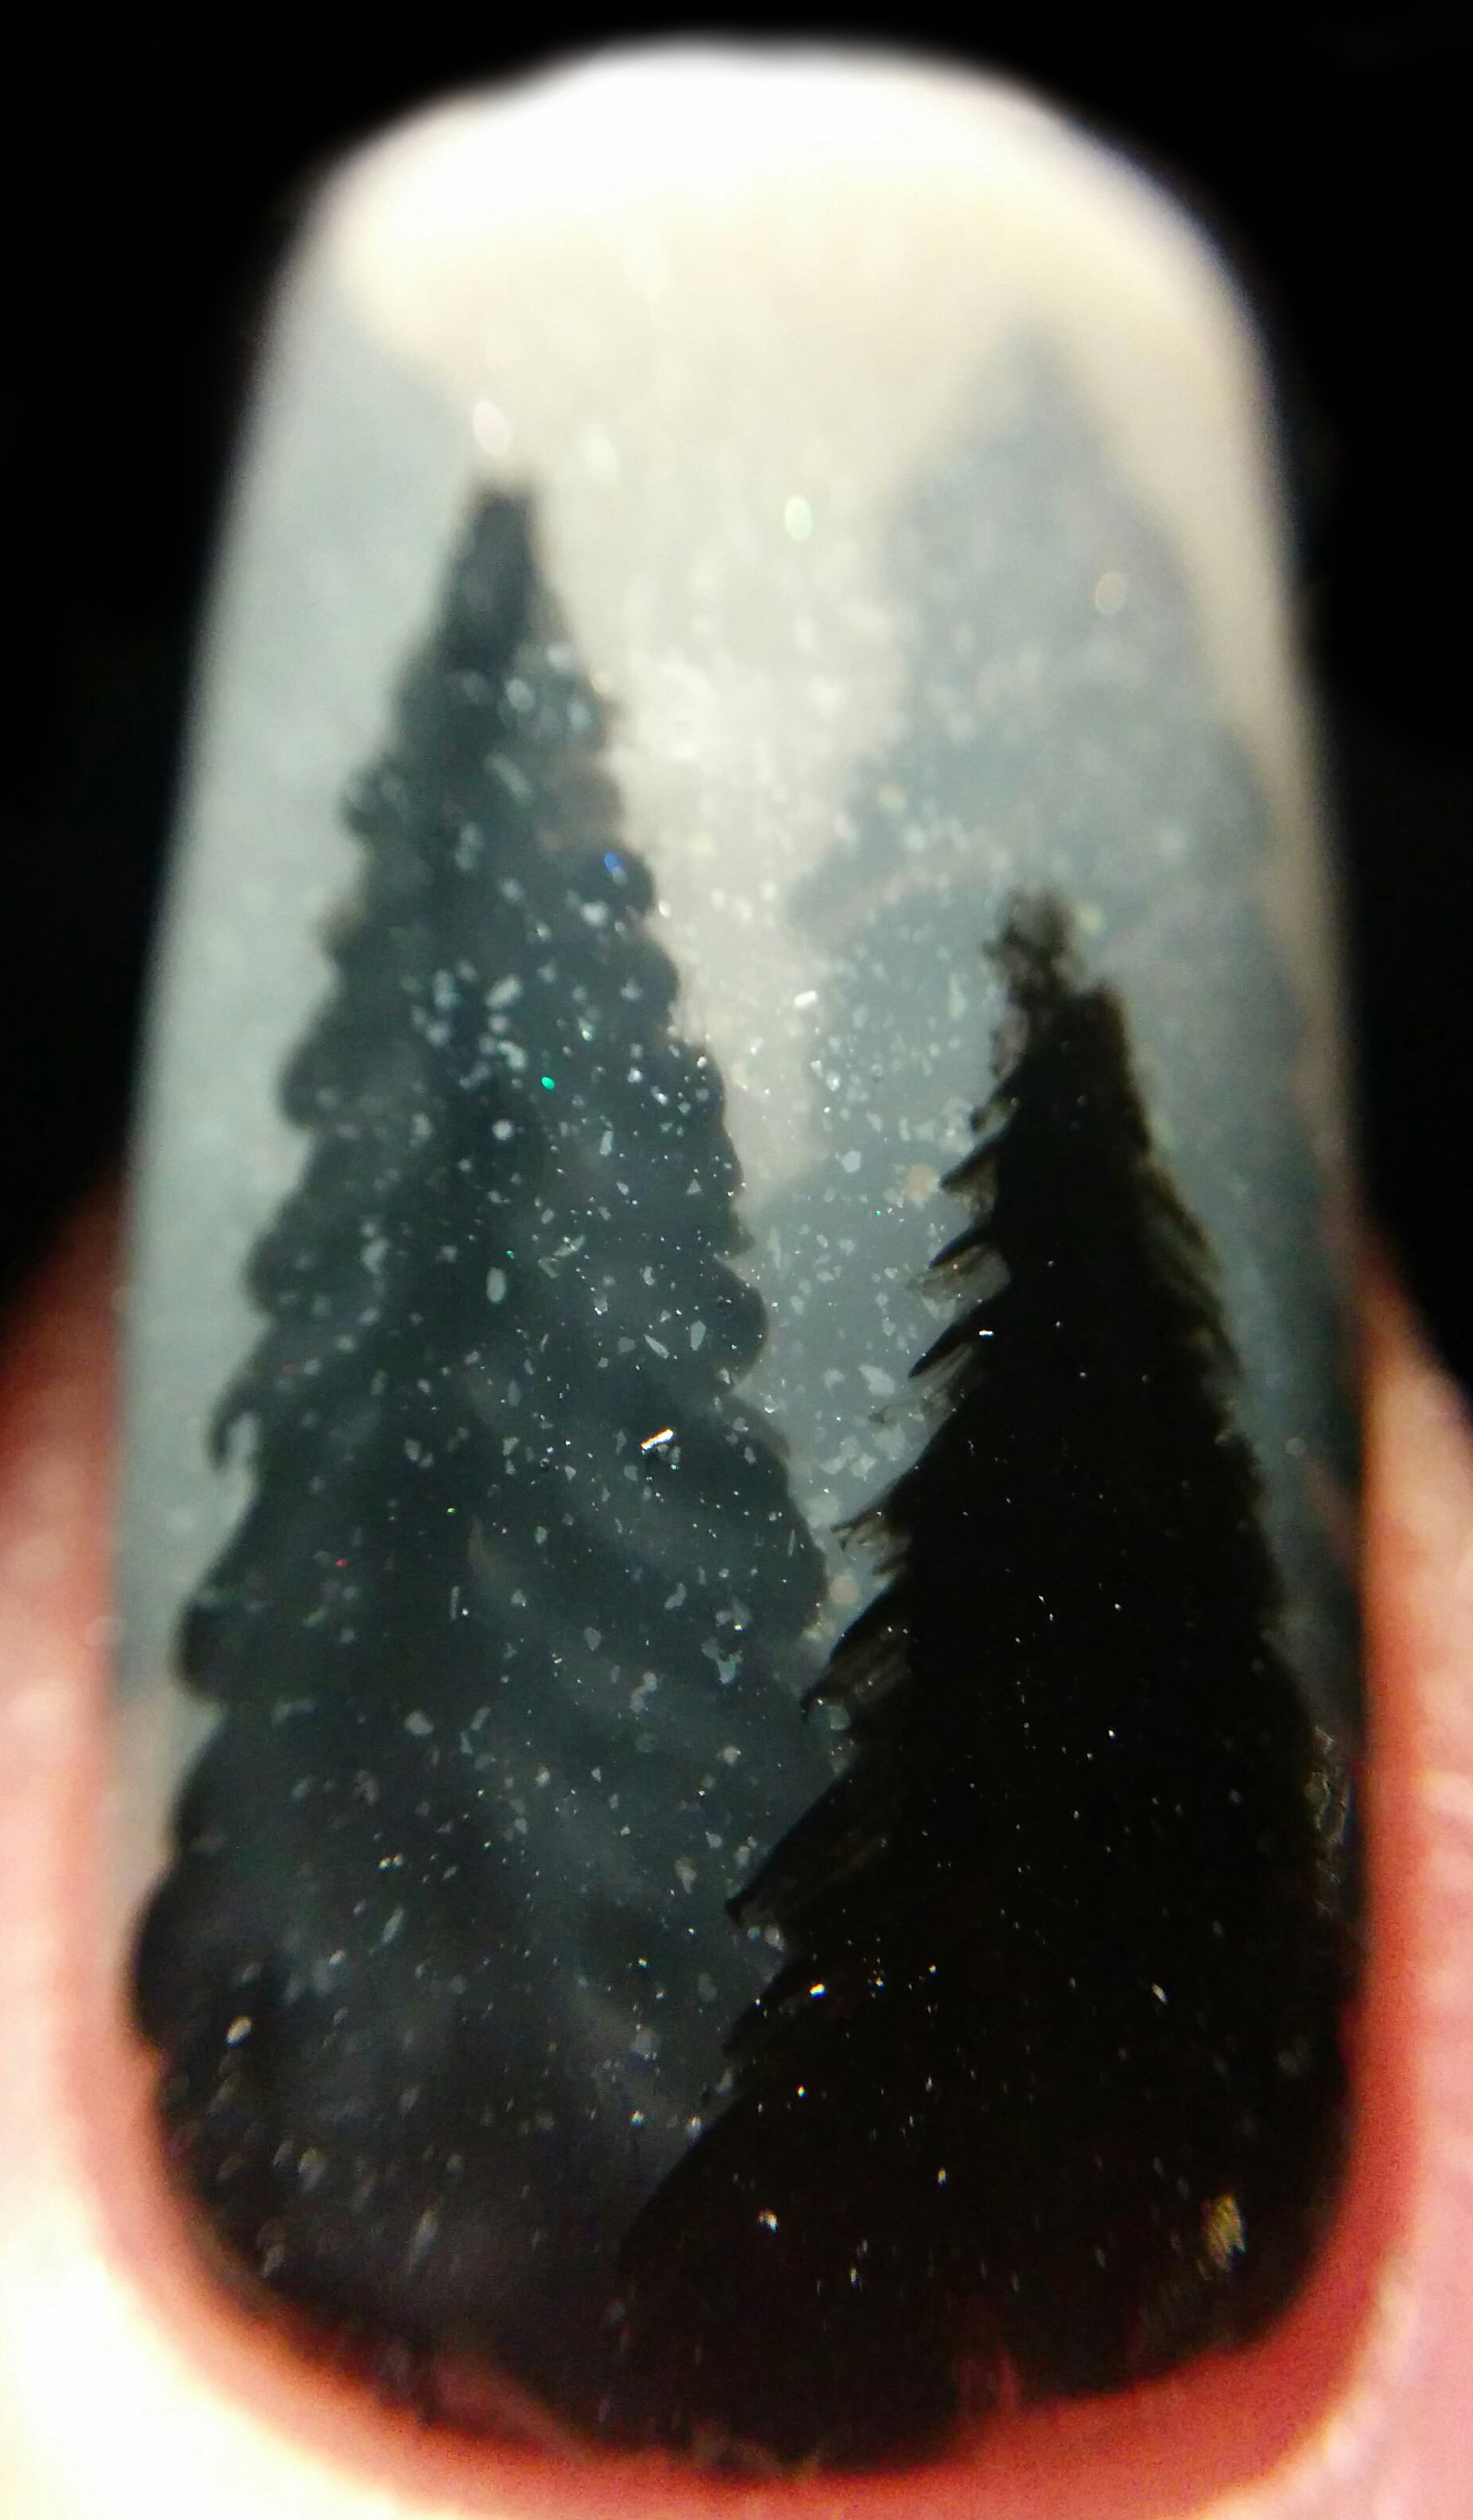
Another wonderful thing about these wax melts is that most of them are covered in glitter and shimmers! Yay for glitter 😀

The best way to order these lovely melts is through the ready to ship page. http://www.candlewick-greens.appspot.com/readytoship.html

candlewick green wax melt sticky toffee pumpkin waffle

Sticky Toffee Pumpkin Waffle smells so amazing I want to eat it! But I’m sure it wouldn’t taste nearly as good lol!

Out of all the different scent collections on offer at candlewick Greens I have to say my favorite is the Mystical ones!

But I have found one little problem with the bakery scents… Being surrounded by wonderful cake smells makes me really hungry! 😀

Oh if you do make an order for some of this lovely wax (you really won’t be disappointed) if you could leave a note with your order about finding out about them here that would be amazing! 😀


Born Pretty Stamping Plate BP-05 Review

*PRESS SAMPLE*

Hello! 😀

Silver and Black Stamped Gradient

Silver and Black Stamped Gradient

Today I have a Born Pretty stamping plate that has kindly been sent to me for review!

You can find BP-05 plate here!

BP-05-born-pretty-stamping-plate-review

BP-05

Plate BP-05 has a really eclectic bunch of images! That Owl is really cute, and I really like the vine and leaf patterns.

My first impression of the images is that the etching looks really sharp and quite deep! unlike some other plates in the same price range.

The smaller full nail images are (with the help of my ruler) 19mm by 15mm and the larger image (at the top) is 23mm by 15mm.

The plate is 55mm across, so the plate is the same size as BM plates.

BP-05 back

BP-05 back

The Back of the plate has a durable paper backing.

bp-05 born pretty

edge

And the edge of the plate has been finished really nicely. Its not sharp at all! For me this is actually really important, I’m forever accidentally cutting or scratching my fingertips on the sharp edges of plates! 😦

China Glaze I'd Melt For You and Laval Black

China Glaze I’d Melt For You and Laval Black

I decided to try out the swirly vine pattern from this plate, partly because I think it’s a really pretty image and partly because it’s a bold design that wouldn’t loose too much detail over the gradient.

And the gradient is because my nails are longer than the stamp image… Oops! 😀

I used China Glaze I’d Melt For You and Laval Black for the gradient, this mani looks really thick, because for some reason my sponge decided to disintegrate a bit on the last coat and left annoying sponge turds all over the place Gah! :/ So after a bit of tweezering some swearing and around 3 coats of Seche Vite later my nails where ready for stamping.

I used some more I’d Melt For You for the stamping along with my squishy marshmallow stamp head. The image itself is really sharp and it transferred to my nails really cleanly. one final coat of topcoat and it was all done! 🙂

Born Pretty BP-05

Gradient!

And don’t forget the code RPG10 will get you 10% off in the born pretty shop!

http://www.bornprettystore.com/