Tag Archives: blue

Born Pretty Nail Foil and Glue!

*Press Sample*

Hallo!

Born Pretty Nail Foil and Glue Review

I have finally recovered from another fit of the ills! Yay!

So here are a couple of products from Born Pretty Store that have been kindly sent to me for review!

Born Pretty Nail Foil and Glue Review

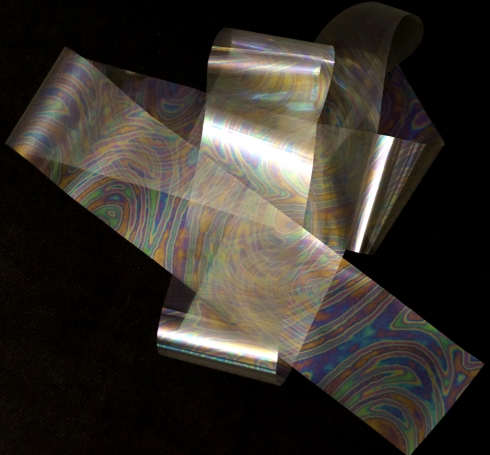
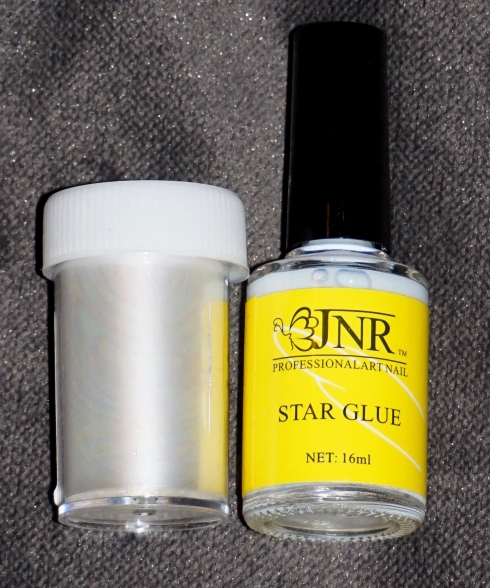
The Foils are available here for this review I am using pattern number 165. And the glue is available here.

If you use the code RPG10 over at Born Pretty Store you’ll get 10% off all non sale items! 😀

Born Pretty Nail Foil and Glue Review

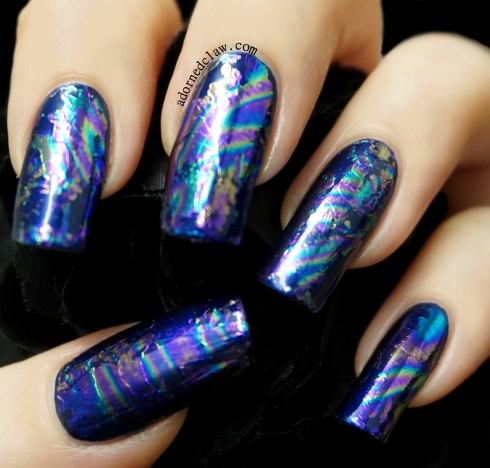
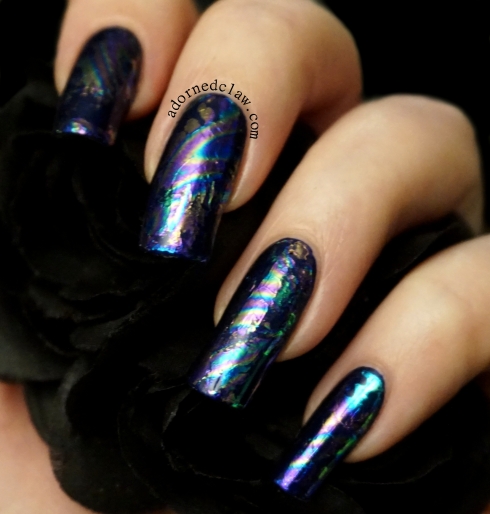
Look at those colours! It’s so pretty!

This is the first time I have ever tried using nail foils and I’m hoping that with some practice I’ll get better at applying them!

The glue was a bit of a challenge, it kept pooling up and not drying evenly, after applying it, re applying it, swearing, sticking my fingers together then swearing some more, I came to the conclusion that the glue needed something to adhere to. I found Matte topcoat worked surprisingly well!

I also found that I needed to leave the glue a little longer than it suggested on the bottle, it was closer to 1.30/2 minutes rather than the suggested 30 seconds to one minute, I think the humidity and temperature had a lot to do with it.

Born Pretty Nail Foil and Glue Review

I was really surprised about how much of the nail foil you get in the little plastic pot, I don’t think I’ll be running out any time soon. 🙂

Something I do feel like I have to mention is that the foil (number 165) is not holographic, it’s iridescent!

Born Pretty Nail Foil and Glue Review

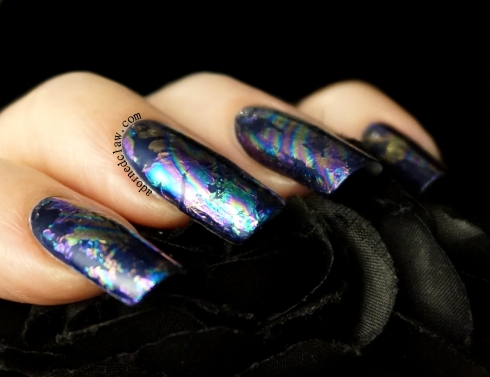
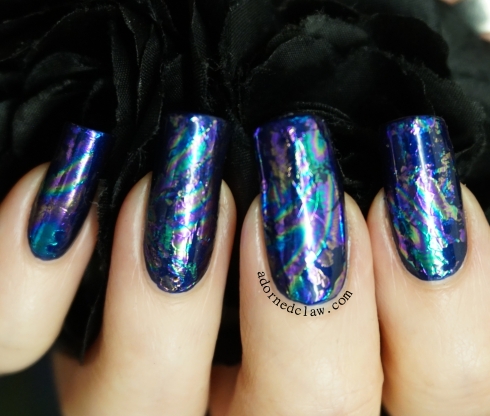
I applied the matte topcoat, glue and foil starting with my little finger, (which was pretty much perfect) as I worked towards my thumb it got more and more patchy, I really don’t know why, I was doing exactly the same thing on each nail!

Born Pretty Nail Foil and Glue Review

The base colour I used for this mani is the lovely dark blue Queen Of Scots from A England, and the topcoat is Nails Inc 2 in 1.

Born Pretty Nail Foil and Glue Review

I’m definitely going to practice with this nail foil a bit more! 🙂


Dark Stripes

Hello! 🙂

Dark Striped Nail Art

Here are my dark and stripy nails! This has been adorning my finger nails all weekend 🙂

Dark Striped Nail Art

I created the gradient with two polishes from Morgan Taylor. Rebel With A Cause and New Year New Blue.

Then I added the striping tape and it took ages! And I failed miserably at getting the tape even remotely spaced correctly on my dominant hand so I gave up after one nail and have been pottering about all weekend feeling very uneven lol!

The black I used is A England Camelot. then finished it off with a layer of Seche Vite!

Dark Striped Nail Art

here is a (bonus lol) photo with the flash to show the colours a little more 🙂


Franken Polish!!!

Hello! I hope you are having a lovely start to the week! 🙂

While I was ill I made five Franken Polishes!

If you haven’t come across the term “Franken Polish” before, basically it’s mixing polishes you already own to make something new and unique!

Pile of nail polish

I’m hoping it was because I was ill and full of medication, (rather than being scatterbrained and disorganized) but I didn’t actually write down which polishes I used…  But I did leave them all in a box…

I’ve mostly worked out which ones I mixed together, but the ratio of polishes, I have no idea :/ It’s a mystery!

Purple shimmer franken polish

The first one is this purple shimmery polish, this one is definitely made from a mix of Prosperity from Illamasqua, Little Misfit from Morgan Taylor and a few drops of one of the Jade Holographic polishes.

I have been asking myself one question while I have been trying these. “If I had brought this polish, would I be happy with it?”

This one is definitely a yes! Purple is one of my favorite nail polish colours ever, it’s pretty much one coat, (I did use two for this swatch) and it dries to a satin finish, and the slight holographic sparkle stops it from looking flat and dull.

I’m really happy with this one 😀

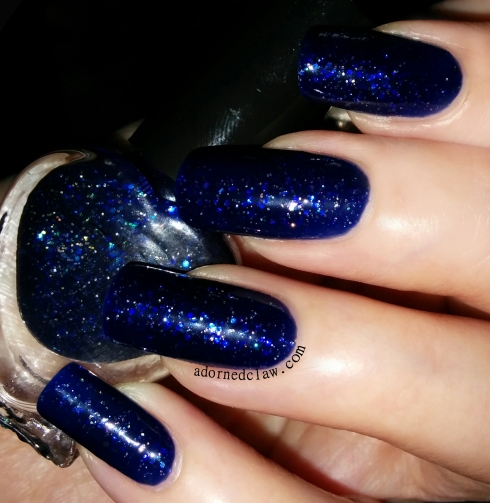
The next polish is this glittery dark blue jelly.
blue jelly glitter franken polish

After a close inspection of the bottle, this polish looks to be a combination of Blue Dahlia from Estee Lauder, Rimmel London – Finishing Touch Glitter Topcoat, Barielle Shades – Stardust, Filthy Gorgeous – Rock Chick and Maybelline Express Finish – Flash Cosmic.

This is such a pretty blue polish! It’s a shame it doesn’t apply very well… Hopefully all it needs is a drop or two of thinner. As is is right now, I have to say it’s like trying to paint my nails with lumpy jam!

The colour and glitter are really pretty but if I had brought this, I would send it back!

Next up is this dark silver/black holographic polish.

black silver holographic franken polish

The ingredients in this one was actually quite easy to work out. just two polishes in this one, Sally Hansen – Pure Midnight and Jade – Estasy.

It’s a really pretty sheer scattered holo polish (I’m really pleased with this one)

would I be happy with this if I had brought it? with out a doubt yes!

grey gold glitter franken polish

I don’t know what I was thinking when I made this grey one… I like grey polish, but I really don’t like this…

It’s made from Illamasqua – Raindrops, Bettina – Iron, Different Dimension – Light Year and Daring Digits – Batman

On their own each of these polishes are lovely, but when combined they become a thing of horror. HORROR!

Some of this polish dries the moment it’s applied to the nail, so the first coat was lovely, fast drying, really good amount of glitter. The second coat appears to re liquefy the first coat and changes the consistency to something resembling scrambled egg. Ugh!

This photo is from the second time I tried it, I left half an hour between the two coats and it was still a bit lumpy. I added two layers of Seche Vite to try and even it out lol

I hope that I never receive anything like this from a polish company.  It needs a stake through it and burying at a crossroad!

pink shimmer franken polish

Here is the last one! This pink is (as far as I can tell) a mixture of Pink Raindrops and Collide both from Illamasqua and Glass Slipper from Sally Hansen.

Pink Raindrops from Illamasqua is one of the most disappointing nail polishes I have ever brought. but I’m sure I’ll find some use for it! (even if it is just mixing it with other ones)

This is another polish that I’m not convinced about, it applies really nicely, and it’s really sparkly, but that shade of pink, it’s really not a shade that I would be drawn to. Maybe I mixed this one in the dark lol

If this was a darker or more purple toned pink it would be lovely, it’s opaque in two coats and dried quickly so yes, I would be happy with it if I had brought it!

I think next time I make some franken polishes I’m definitely going to write everything down lol! 🙂

A England Houndstooth Nail art

Hey everyone 🙂

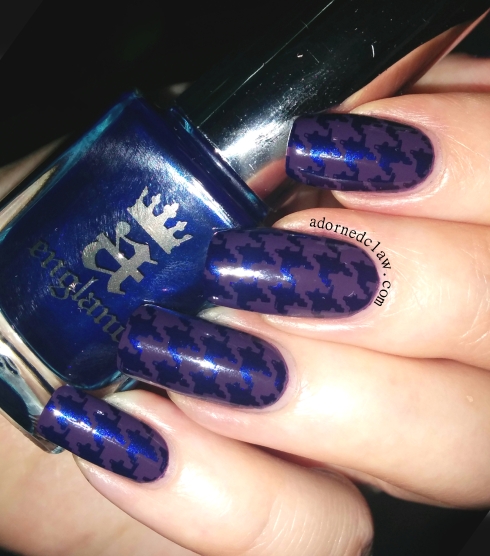
A England Houndstooth Nail Art

I wasn’t planning on posting anything today but… I just had to share this with you!

I picked up some A England polishes in the Gothic weekend promotion and they arrived this morning, so of course I had to have a play with them. I tend to swatch one nail so I can get a vague idea of what a polish will be like.

So, I try the lovely dark blue Queen Of Scots, this has to be the creamiest, highly pigmented polish I have tried in a long time! It’s lovely!  My next polish test is to see if it’s going to be good for stamping…

A England Houndstooth Nail Art

Just look at it! The purple is Elaine also from A England.

I would think that Queen Of Scots will be just as vibrant over black polish!

The houndstooth stamping image is from Moyou Pro XL 07

A England Houndstooth Nail Art

😀


Pick and Mix Blue Flowers

Hello! 🙂

blue white and silver flowers

blue white and silver flowers

For todays pick and mix challenge I have used both prompts! Pale Blue and Flowers! 😀

blue white and silver flowers

medium size dotting tool

For this look I used

  • Azure – Rimmel London
  • Tea Bird – Filthy Gorgeous
  • Snow Me White – Sinful Colors
  • Oyster Bar – Sally Hansen, Triple Shine
  • Matte Finisher – E.L.F
  • Seche Vite
  • Medium Dotting Tool
  • Fine Nail Art Brush

Over the two coats of azure, I applied Snow Me White to the tips of my nails, then I used Oyster Bar to cover the edge (I didn’t use any tip guides so the lines where a bit wobbly).

For the flowers I used a medium sized dotting tool with some more Azure and Snow Me white, then a little dot of Tea Bird in the center.

I then finished it off with a coat of Seche Vite, then when that had dried a coat of Matte Finisher.

blue white and silver flowers

Azure, Tea Bird, Oyster Bar and Snow Me White


Double Stamped and Leadlight Roses

Hello! 😀

Roses!

ILNP My Little Glacier and China Glaze I’d Melt For You

My nails today where a bit of an experiment! I was really at a loss about what to do for my post today.

So I closed my eyes and grabbed the first two polishes from my polish pile! Then I did the same with my box of stamping plates!

Leadlight Roses

Leadlight Roses

The polishes are My Little Glacier (H) from ILNP and I’d Melt For You from China Glaze. I also used two of the tinted polishes I mixed a while ago, along with Konad special polish in black.  The stamping plate is MM07 from Messy Mansion.

I started with a couple of coats of My Little Glacier, then using the center leaf pattern from plate MM07. Here’s the link to the plate Messy Mansion MM07

Then using I’s Melt for you I added the barbed wire and the roses.  I used the dark purple and the dark blue tinted polishes to colour the roses here’s a link to the post if you want more information on how I mixed the Leadlight Polishes

Bonus Macro

Close up!

Bonus close up! 🙂

Holographic nail polish makes me so happy!

Messy Mansion MM07

I think I’m going to have to try randomly picking polishes and stamping plates again some time!