Tag Archives: NYC Evil

Not Another Springtime Mani!

Hey Everyone!

Gothic Gradient Nail Art

I am so thoroughly not in the mood for “spring” nails! Pastel, pastel shades everywhere!

It’s definitely Spring, the plants are growing, the birds are singing and my cherry tree is covered in lovely flowers.

But I still want to paint my nails black! 🙂

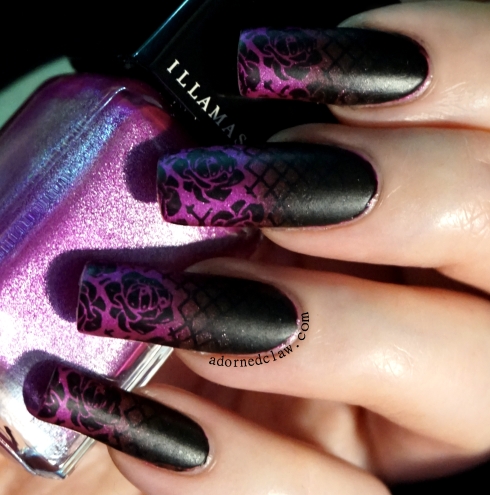
This mani has roses, that’s kind of springtime(ish) yeah?

Gothic Gradient Nail Art

The gradient is Seance from Illamasqua, and Evil from NYC, the image is from Moyou stamping plate Gothic 03 and Hit The Bottle Black as Night.

I finished it off with a coat of Seche Vite then a layer of Illamasqua matte topcoat.

Gothic Gradient Nail Art

I realized earlier (while I was doing a spot of gardening) That my nails are to long! This is a bit gross but I could probably grow a decent sized potato from the amount of soil I had to clear out from under them! It’s also becoming increasingly challenging to pick up small things lol!

I almost chopped them all off earlier, but, I thought it would be fun to try some other nail shapes before I do! 😀


Scribbled Nails!

Hey! 🙂

scribble nail art

Today I have another new to me technique to share with you all 🙂

scribble nail art

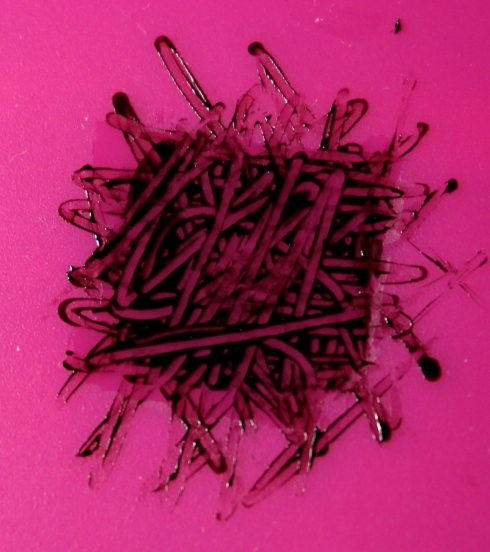
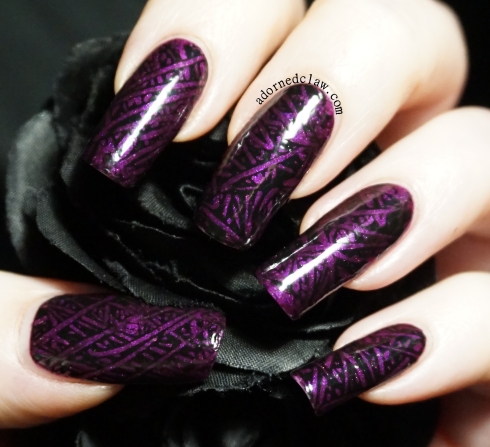
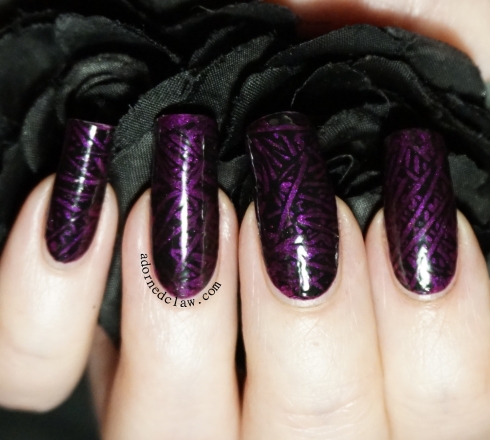
This really was incredibly easy to do! I started by painting a square of polish (on my lovely pink silicone baking sheet) then scribbling over it with my smallest dotting tool, you could probably use a toothpick or folded hair slide and get the same effect.

When it had dried I added a layer of topcoat to make the decal!

scribble nail art

The polish I used as the base for this nail art look is Barry M – Orchid, and for the scribbled decals I used NYC – Evil and Seche Vite.

scribble nail art

I came across this technique from catching a few seconds of a nail art compilation video I saw in a facebook group, I don’t know if the post was removed as when I went back to look I couldn’t find it again :/

So if by any chance you know who came up with this please let me know so I can properly give them credit! 😀


Purple Gradient with Bridal Nail BN05

Hello! 🙂

Purple and Black Gradient With BN05

Today I have this purple gradient to show you! This mani is from a few months ago, but I think it’s too pretty not to share 🙂

The image is from the Bridal Nail 05 stamping plate from Messy Mansion

The Bridal Nail images are not as wide as the MM (round plates) full nail designs these are 17mm x 23mm while the Bridal Nail Full Nail images are 14mm x 24mm. I found that they are a really nice size to work with!

Purple and Black Gradient With BN05

In no particular order I used

  • ILNP – My Private Rainbow
  • Hit The Bottle – Black
  • NYC – Evil
  • Sally Hansen – Grape Race
  • OPI – I Carol About You
  • Bridal Nail Stamping Plate 05
  • Seche Vite

I started with Grape Race over my usual topcoat then using Evil (I really dislike the name of this polish), I Carol About You and Grape Race, for the gradient.  It only took a couple of layers and dried really quickly.  Then a thin coat of My Private Rainbow and a layer of Seche Vite.

Then the stampy goodness using Hit The Bottle Black and BN05, another coat of Seche Vite, a bit of a clean up and it was all done!

Purple and Black Gradient With BN05


Rhinestone Spider!

*PRESS SAMPLE*

Hello! 😀

Rhinestone Spider Born Pretty

Rhinestone Spider

Today I have some cute Rhinestone spider nail gems that have been sent to me for review from BornPretty to show you.

Rhinestone Spider

SPIDERS!

You can find them right here! Born Pretty Rhinestone Spiders and if you use the code RPG10 you can get 10% off!

Rhinestone Spider

NYC 001 – Evil

The other things I used for this mani are

  • NYC – Evil
  • Color Club – Lumin-Iceant
  • Moyou Pro Collection XL stamping plate 05
  • Seche Vite

I started out with two coats of Evil, it’s a nice black cream but, that name! Evil! Who thought that one up? ugh!

I used Lumin-Iceant to stamp the spiderweb design from Moyou Pro 05 and topped it off with a coat of Seche Vite

When that had dried it was time to apply the spider, But I found this…

Rhinestone Spider

Not very flat at all!

The back of the spider wasn’t flat, it looks to be something to do with the manufacturing process.

So I decided to remove it using an old metal nail file, it only took a couple of minutes and it worked really well! Although it was a little bit fiddly to keep a good grip on the spider while filing as they are tiny!

Rhinestone Spider

Rhinestone Spider

Now I have a flat bottomed spider. I applied a thick coat of Seche Vite to my ring finger nail and positioned it on my nail using tweezers, and gently pressed it onto the nail until the topcoat had dried.

Rhinestone Spider

Rhinestone Spider

I think these little spiders are really cute, but I really like spiders! 😀