Tag Archives: Nina Ultra Pro French White

Stand Back! I’m Going To Do SCIENCE!

I’m not really going to do science, just some science inspired nails 😀

The plate I used today is from Messy Mansion, its plate MM25 and you can find it right here. 😀
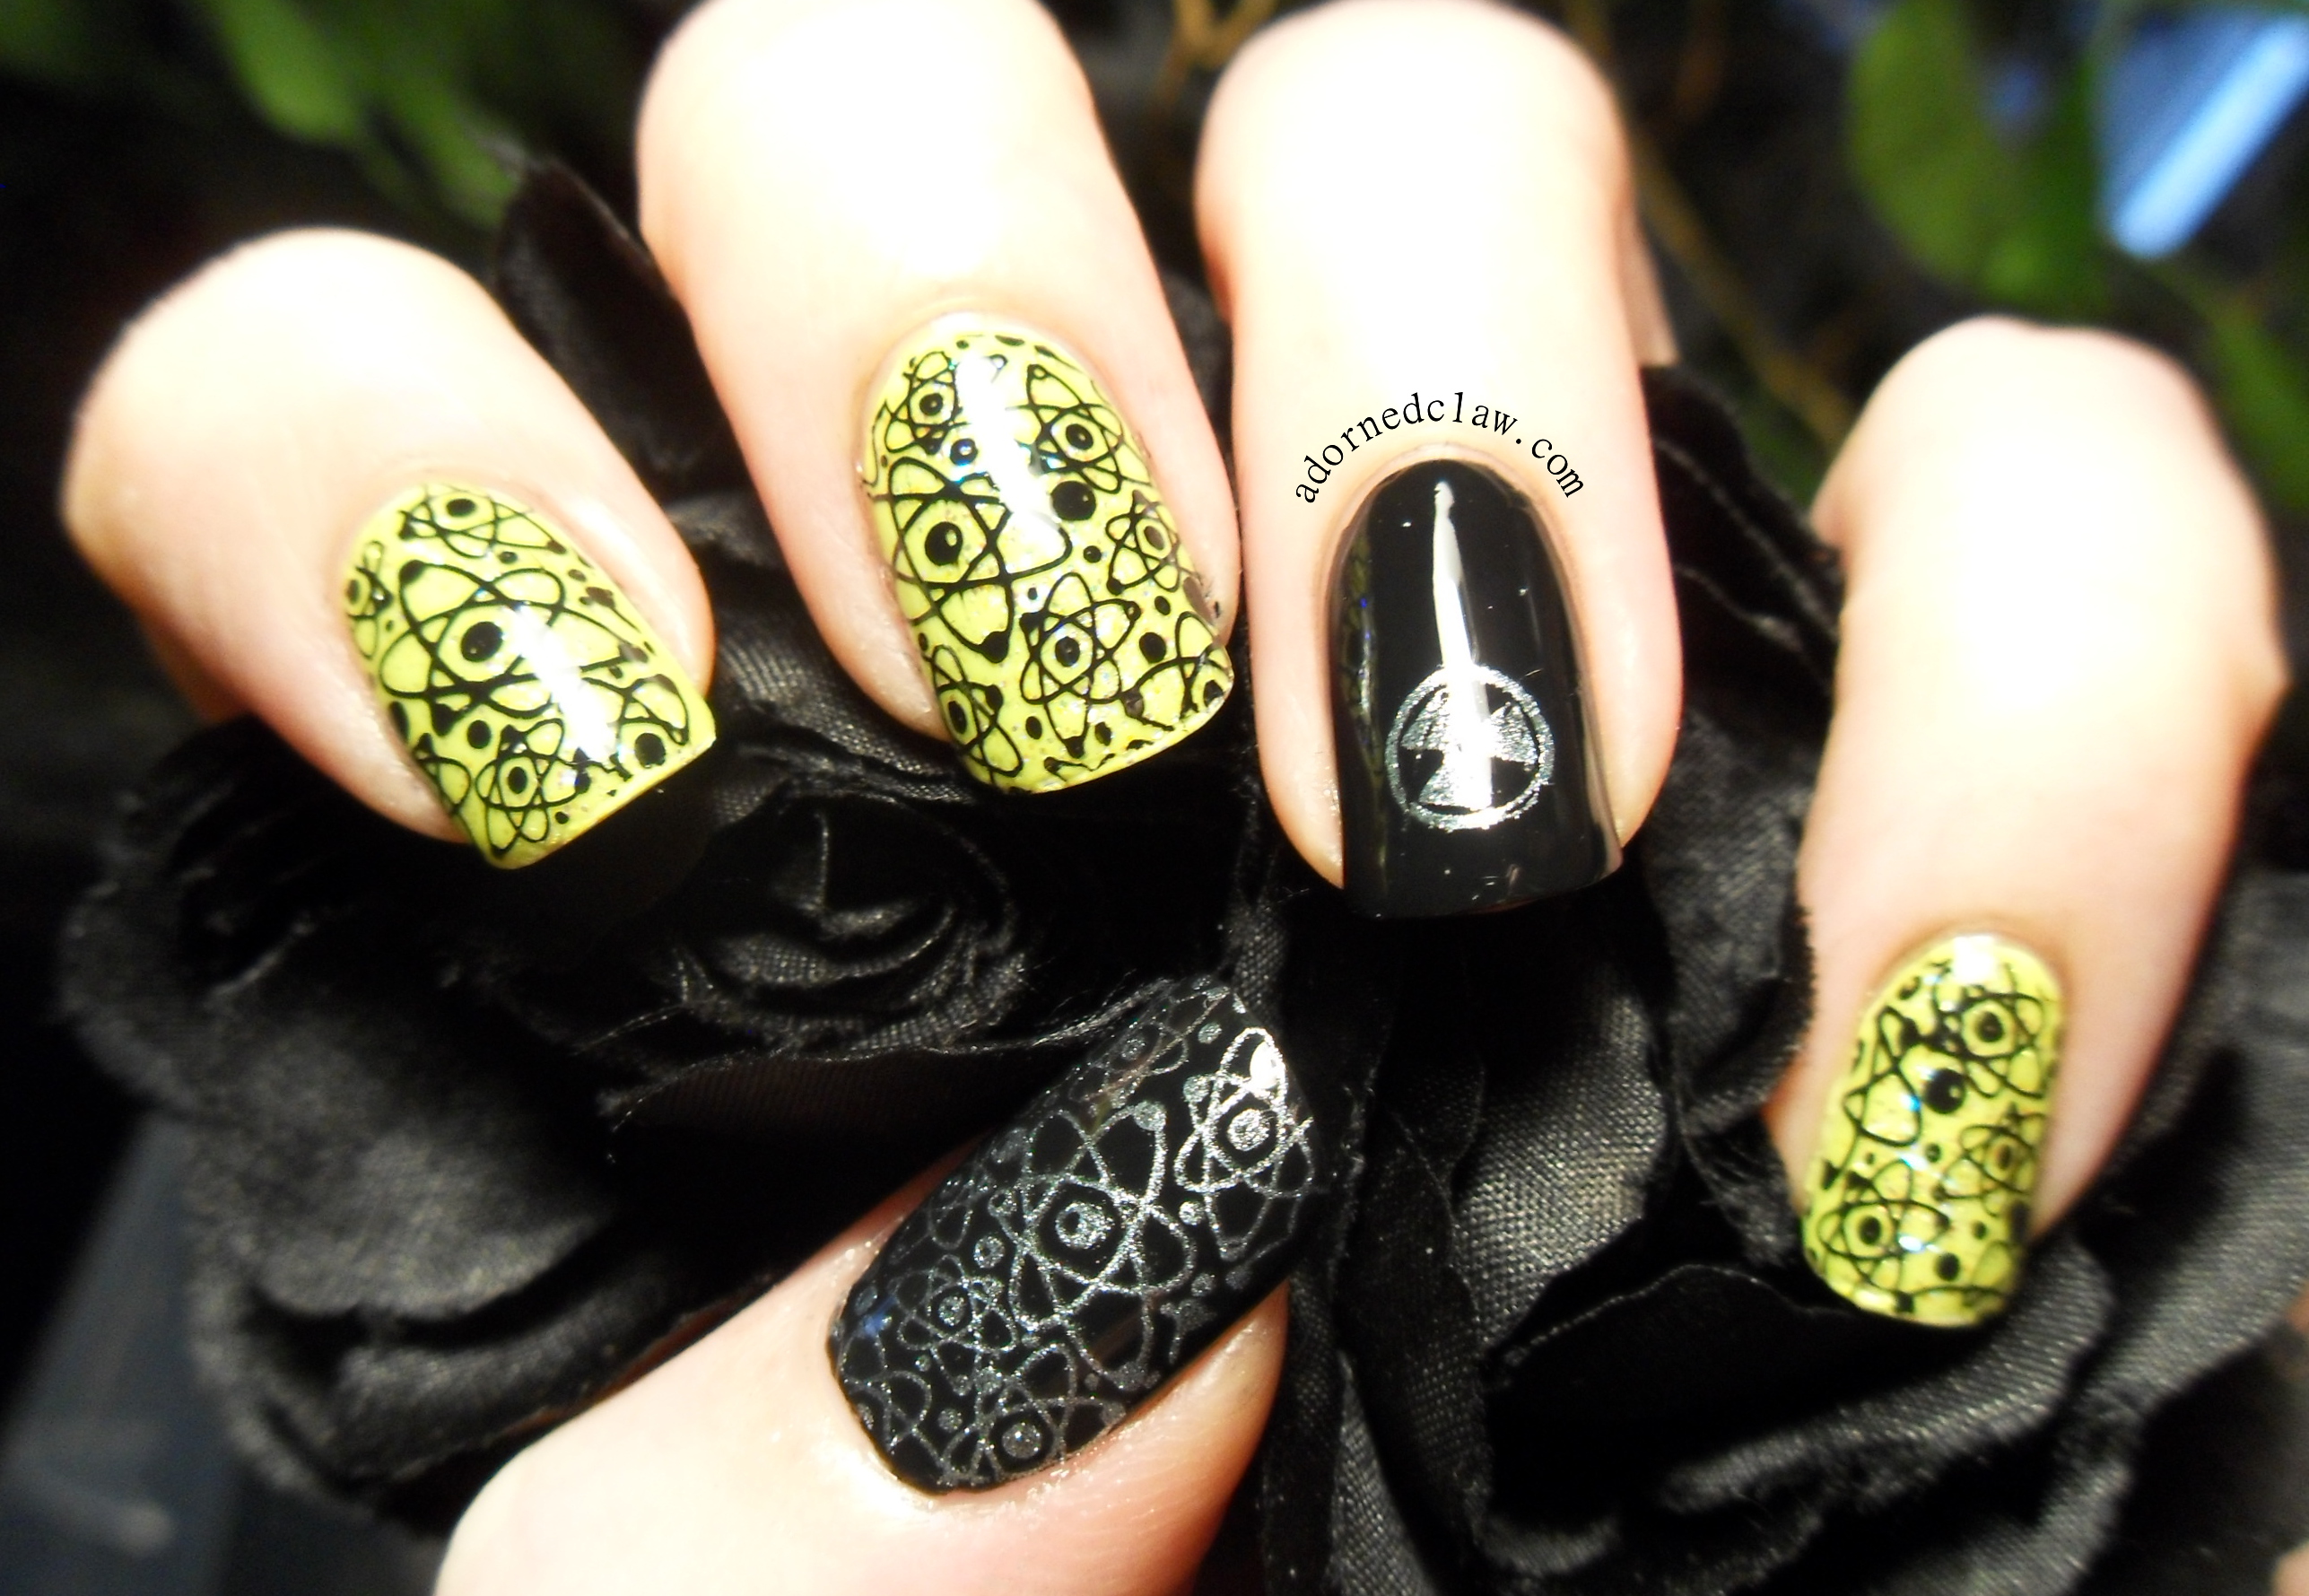
Science Nails

Science Nails!

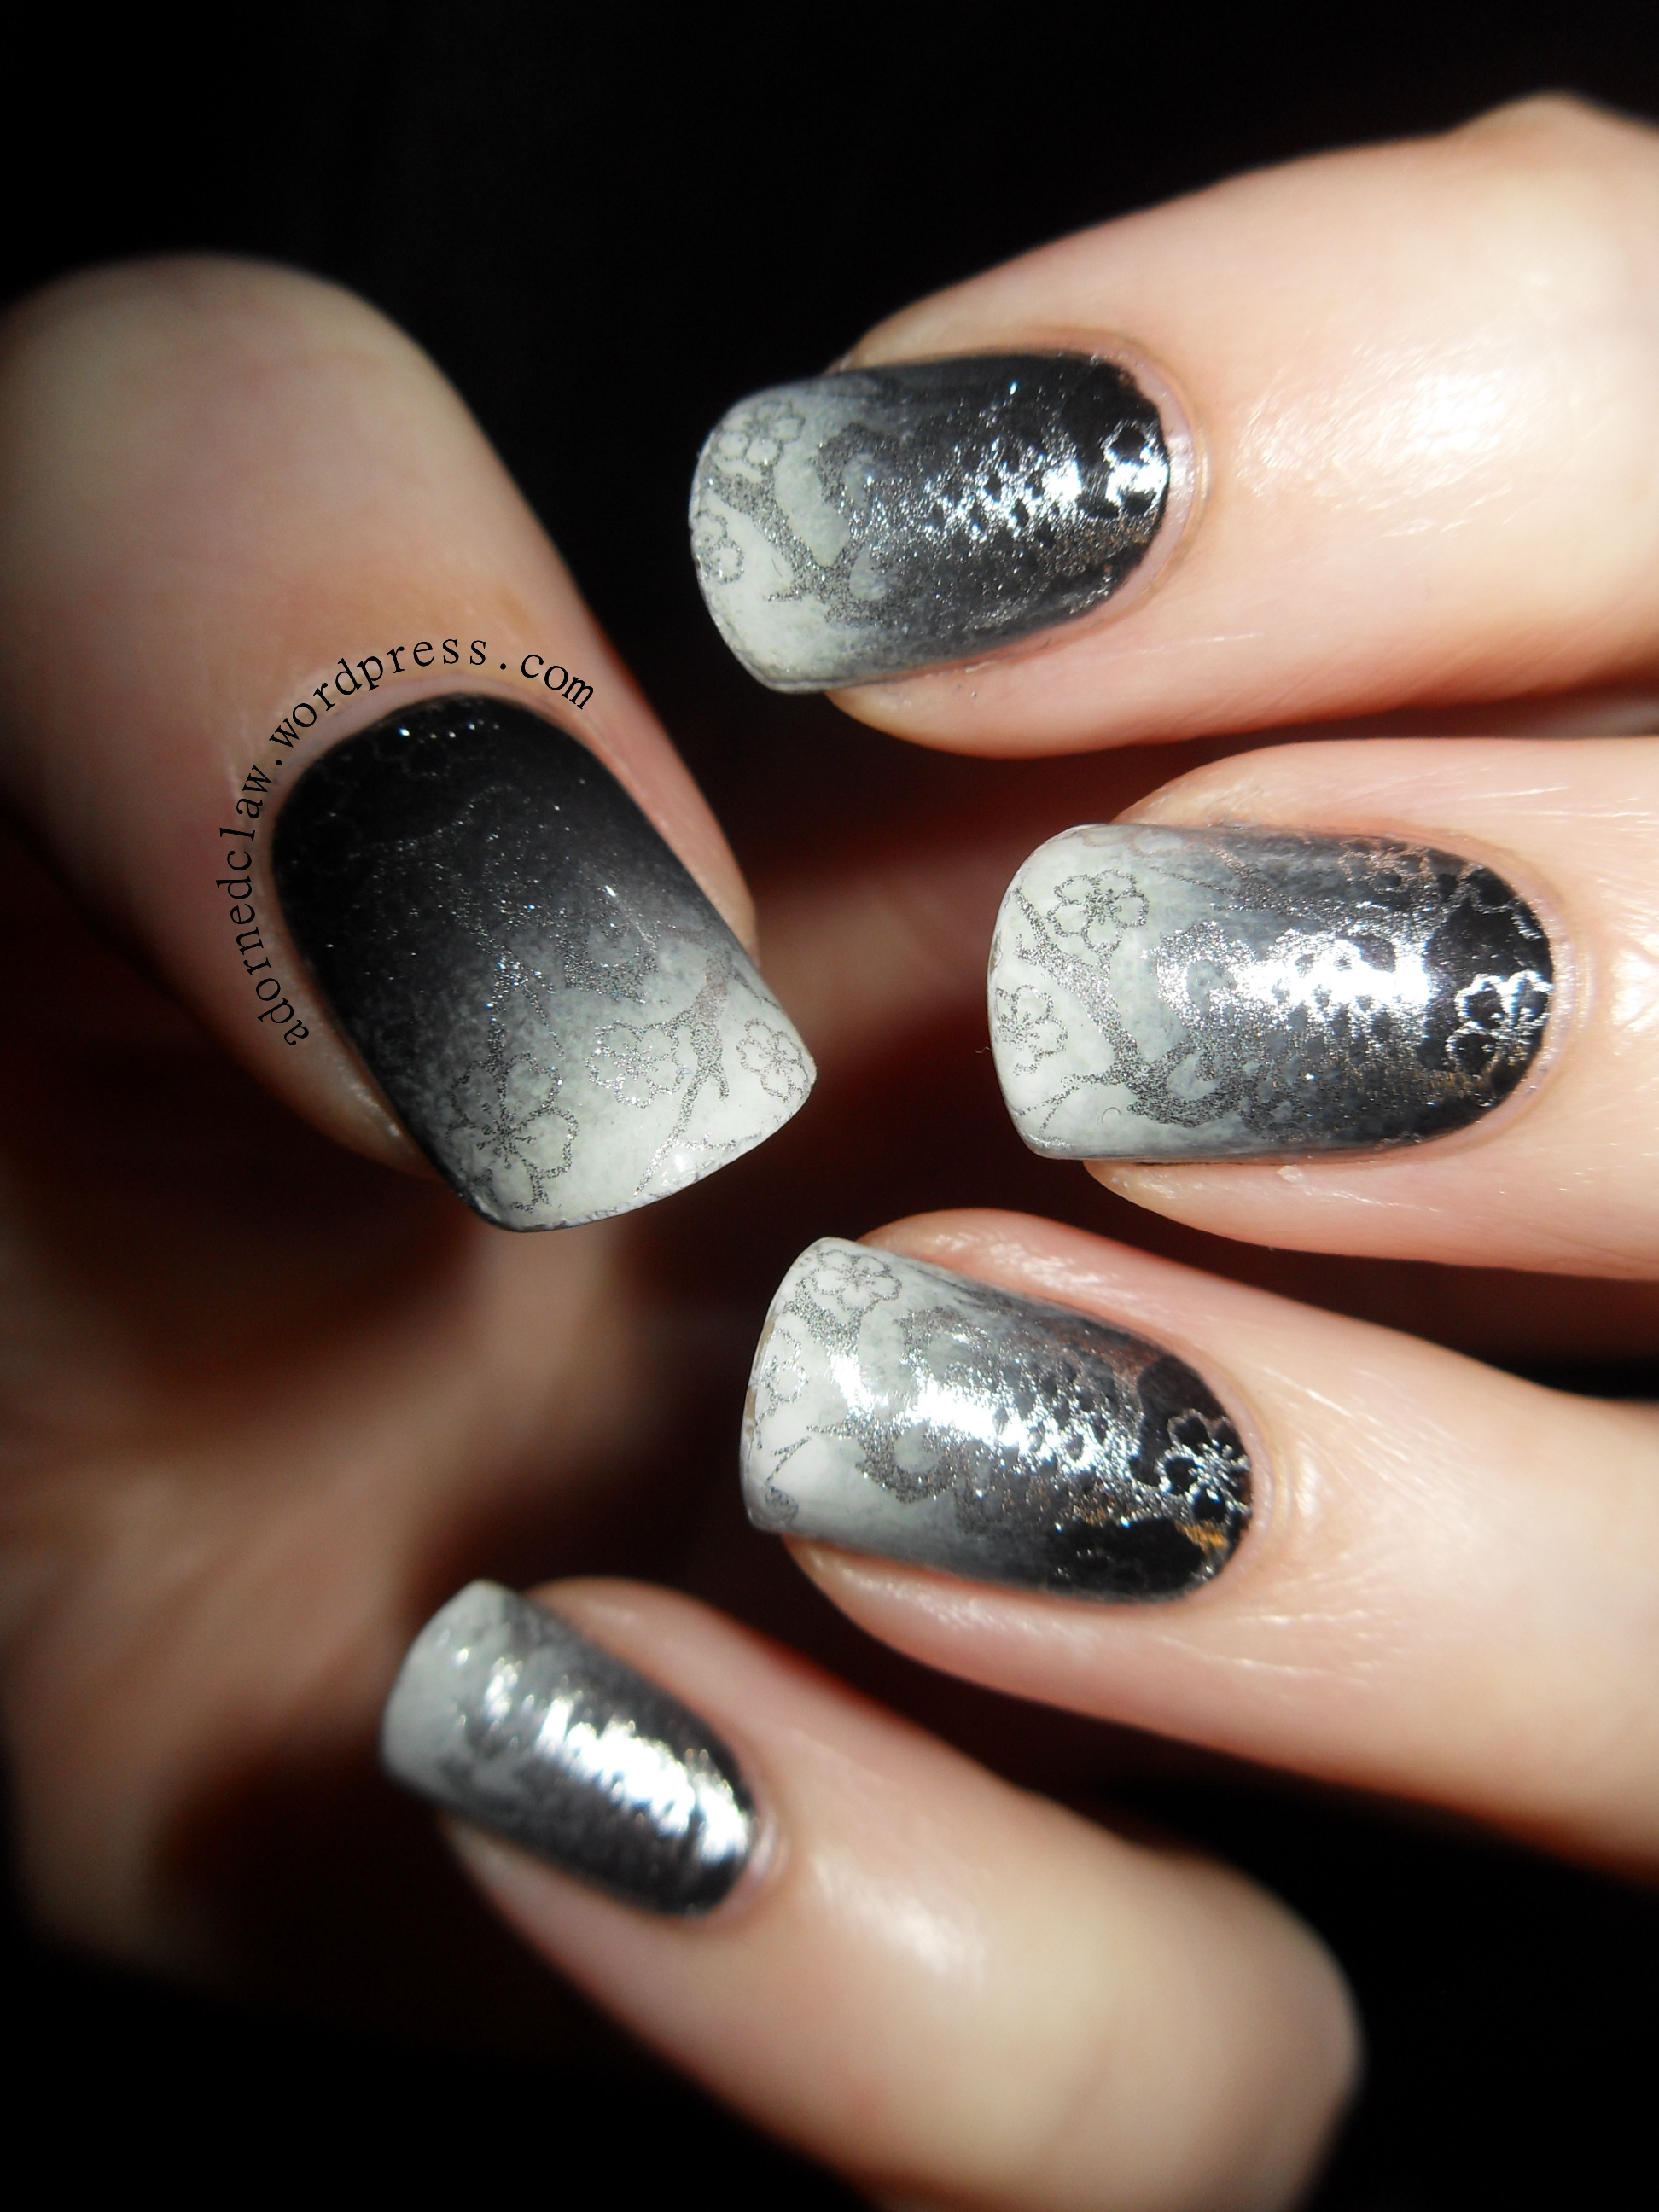
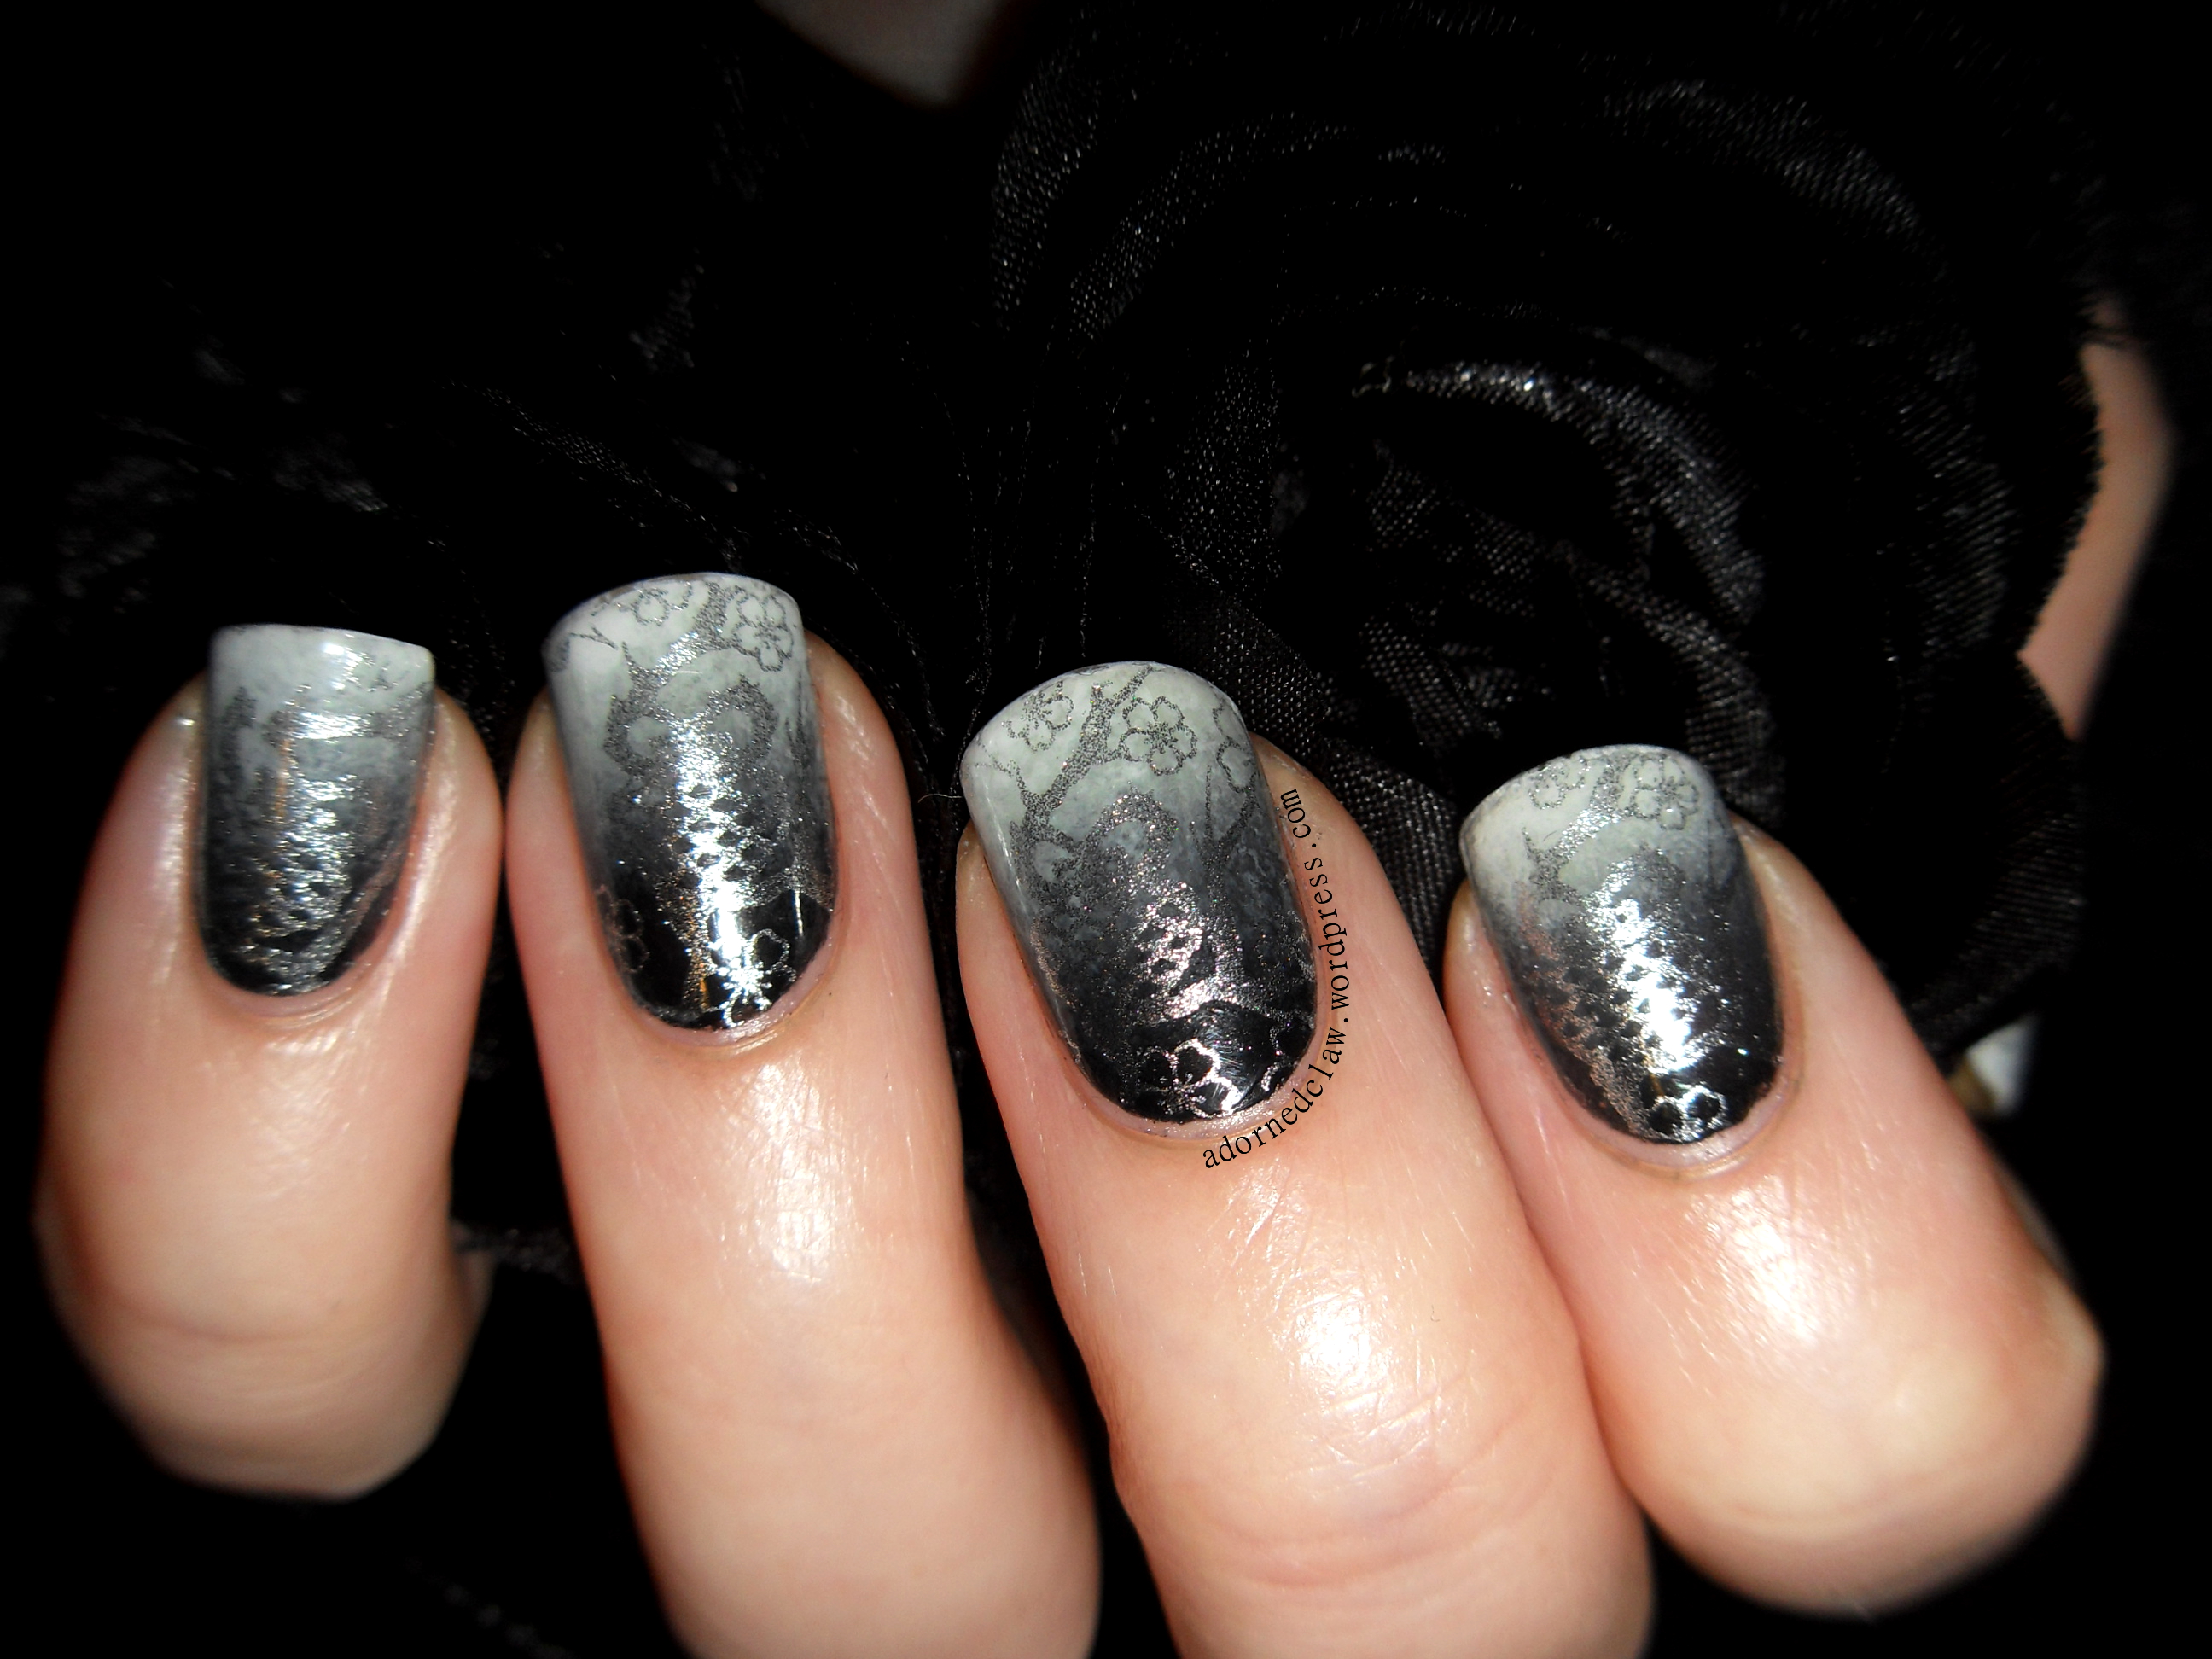
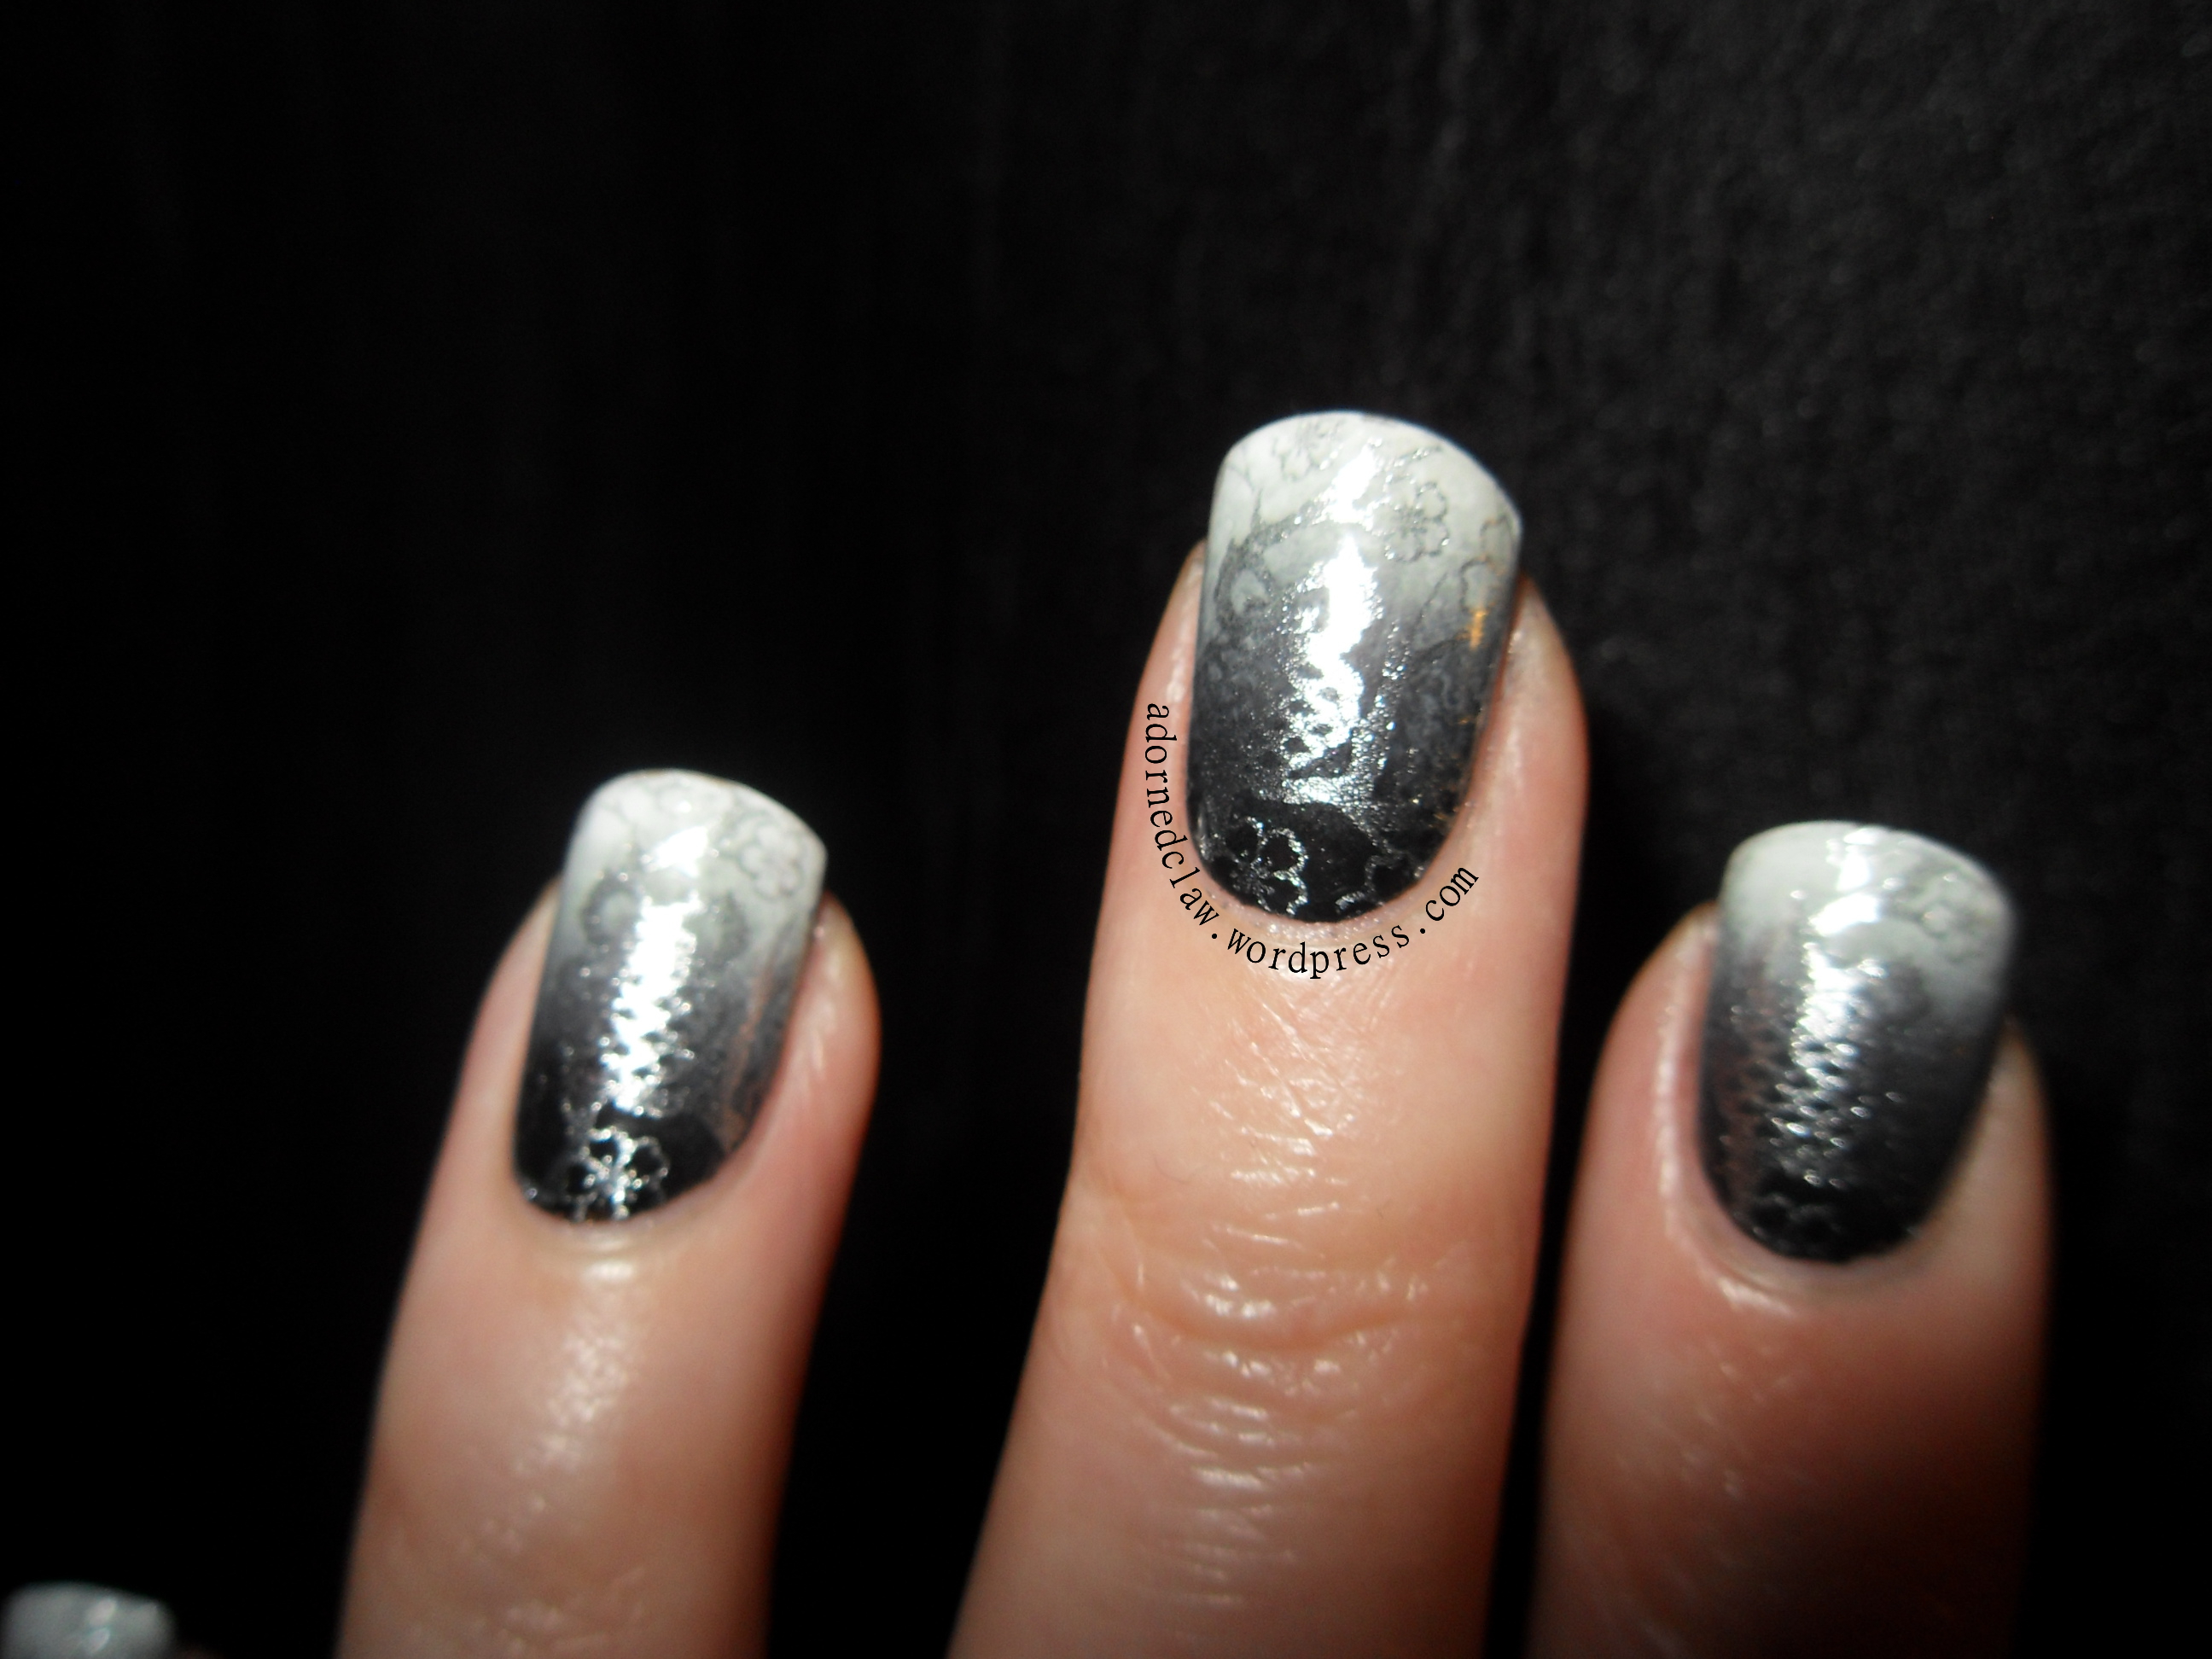
I started by painting my thumb and ring finger with two coats of Revlon Black Magic

On my other fingers I added a coat of French White from Nina Pro with two coats of Barry M Acid Yellow over the top,  I used the coat of white polish to make the yellow really glow!

When that was all dry I topped it off with a coat of Barielle Shades Stardust for some sparkles and then and then a thin layer of topcoat.
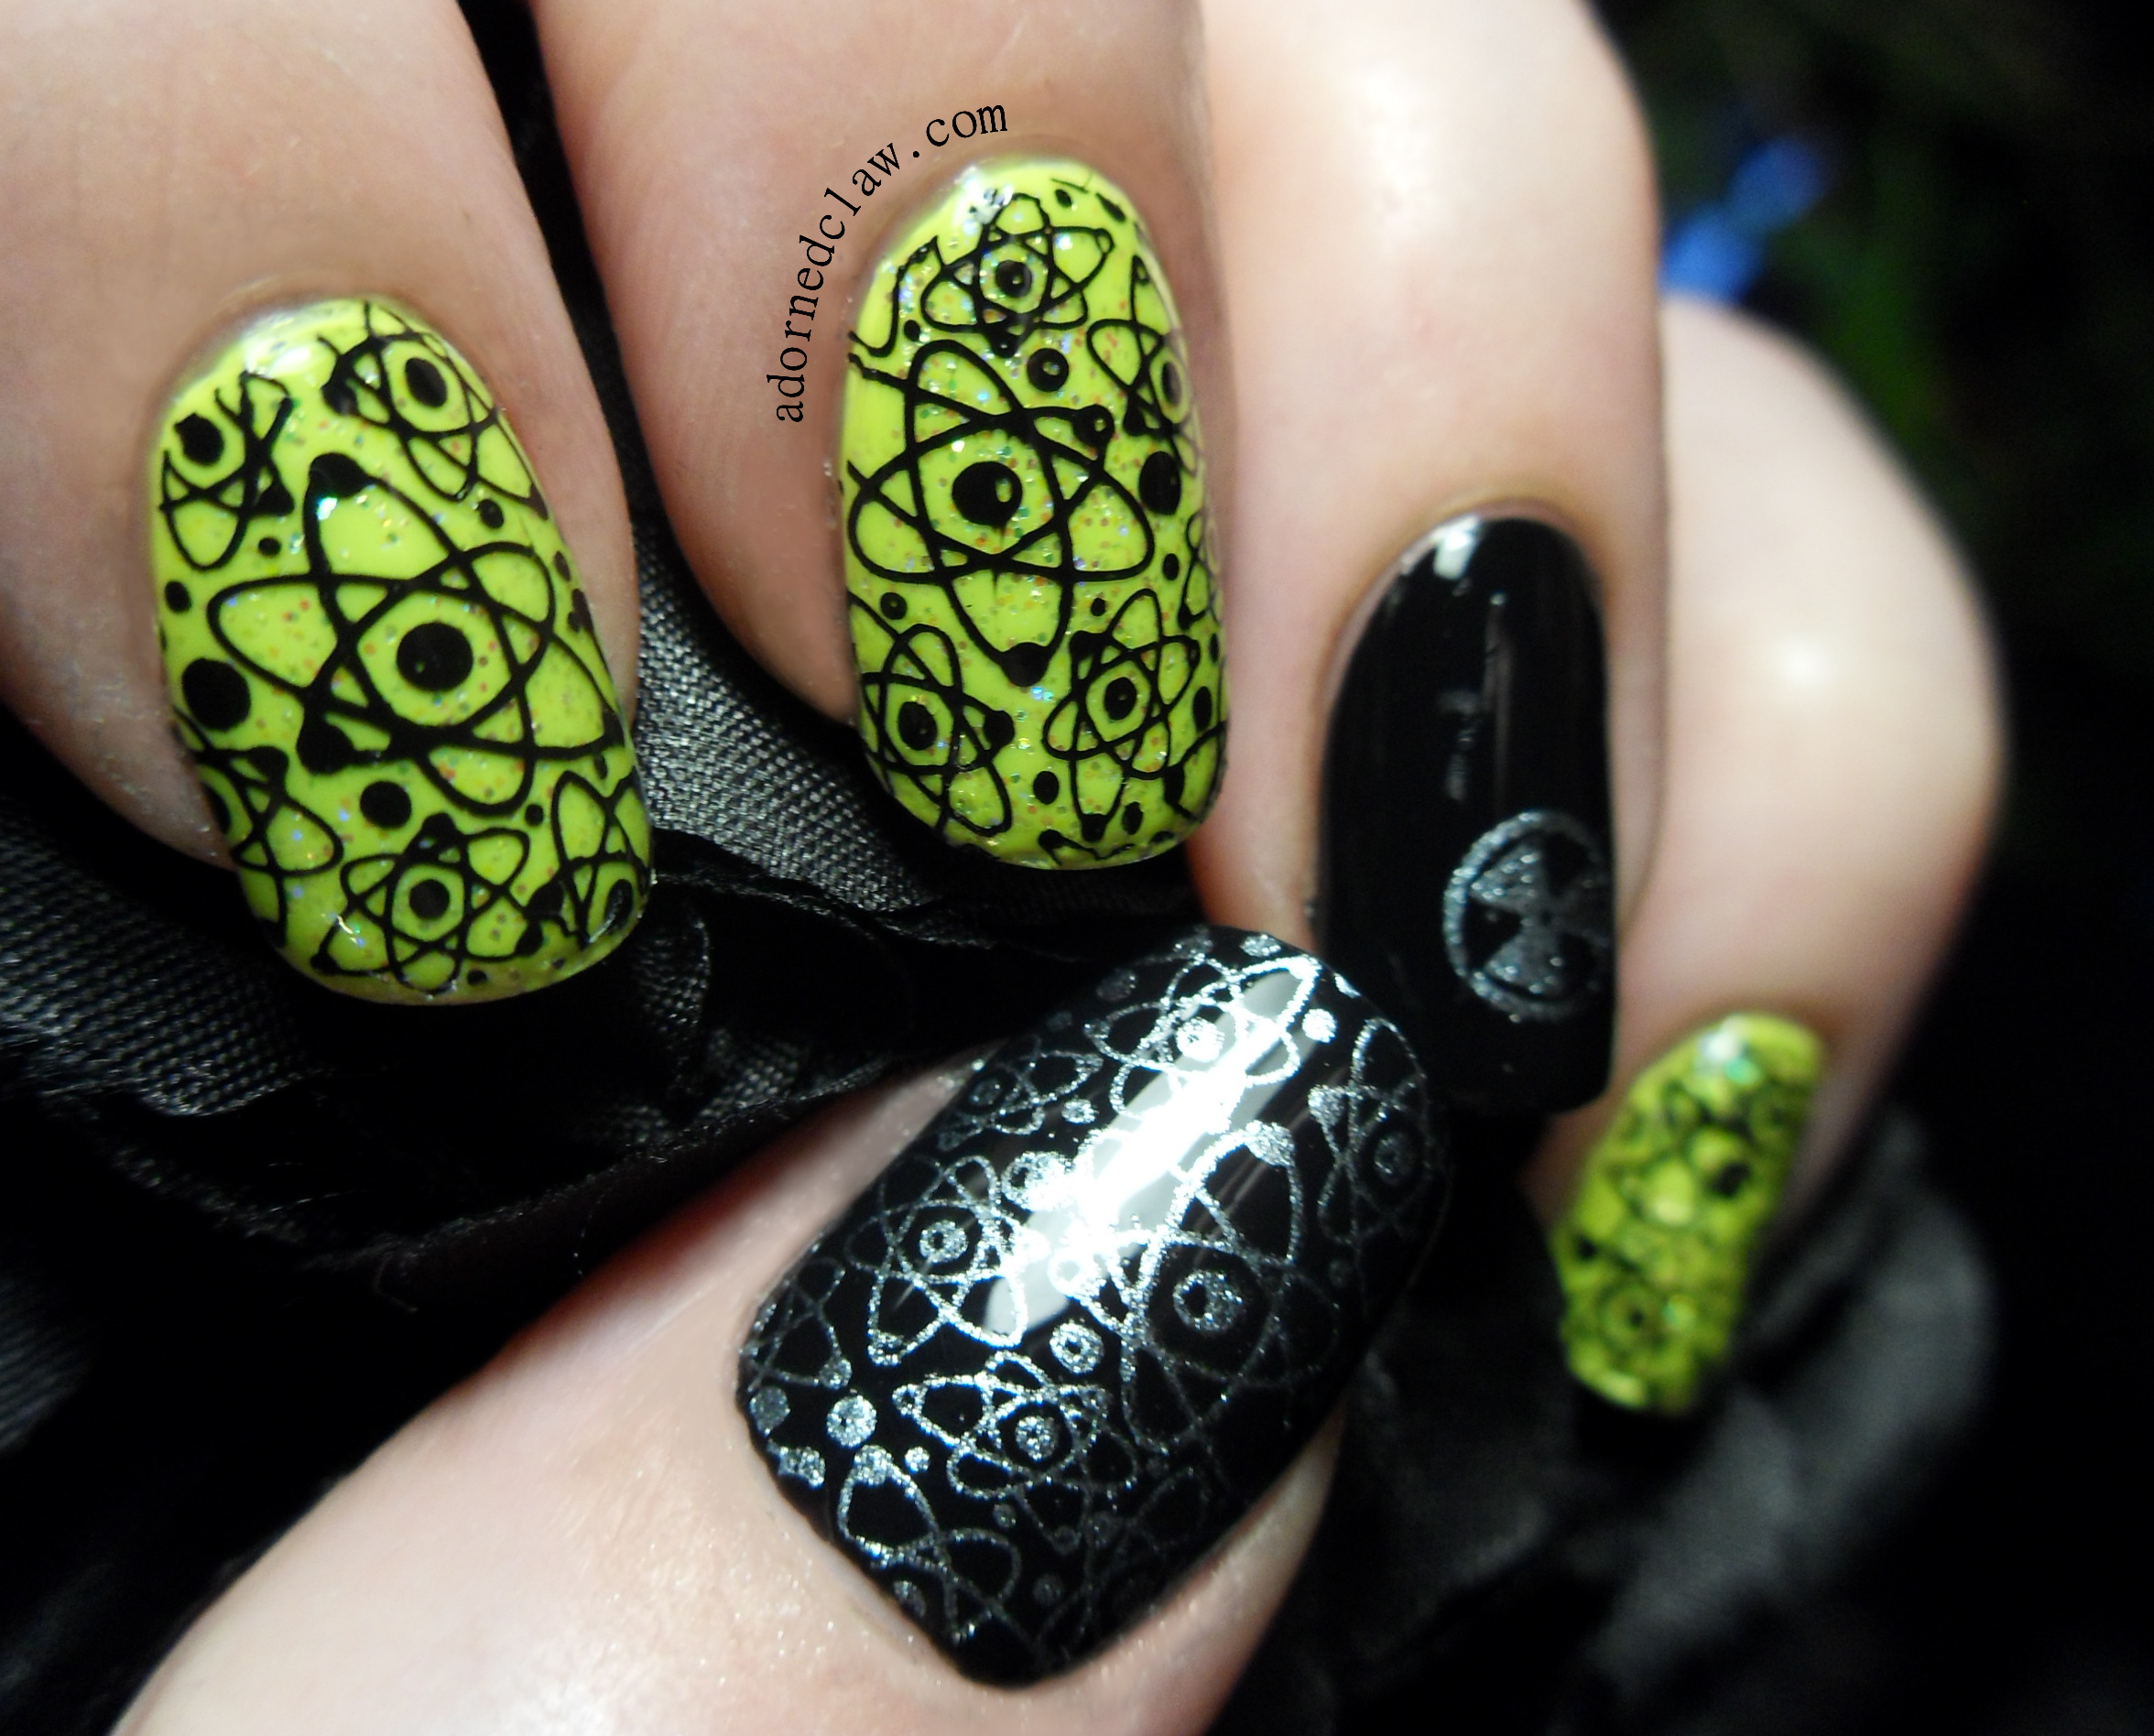
 

Science Nails

Science!

For the stamping I used Barielle Shades night moves for the silver and Konad Special Stamping Polish in Black for the images over the yellow.

Then a coat of color club topcoat to seal in the design, there was a tiny bit of streaking form the konad polish :/

I didn’t really like this when I had finished it :/ I think it was because of the colour and that I ended up using a lot of polish it felt very thick :/

But now that I’m looking at the photographs I really like it! 🙂


Christmas Tree Nail Art

I got a bit carried away with the filing and now I have rather stubby nails! But I have to say it is great to be able to type, use my phone properly and do everything else! 😀

Cute Christmas Nail Art

Christmas Nails

For the Background colour I used a gradient of Sally Hansen – Dive Deeper, Nina Ultra Pro – French White and Revlon – Calla lily.

For the winter trees I used Revlon – Black Magic and a thin nail art brush.

I used Revlon Matte Suede – Emerald City For the Christmas tree with a little bit of the french white for the snow, the little ornaments I used  Barry M – Red Glitter and China Glaze – Glitter Goblin, along with my smallest dotting tool.

The snowflakes are a small dotting tool and some more french white.

For the reindeer I used stamping plate HD05 and Konad SP In Black, with a tiny bit of red glitter for his nose, I finished it off with a coat of Seche Vite.

Christmas Tree Close up

Christmas Tree Close up

I don’t do much free hand nail art, I should probably practice a bit 🙂


Crackle Polish Experiment!

I’m not really the biggest fan of crackle polishes and somehow I have collected 11 bottles of the stuff!

So I decided that I should actually have a play with them rather than leaving them to gather dust! I chose Nina Ultra Pro in French White for the base colour and Black Shatter from OPI.

OPI Black Shatter over Nina Ultra Pro French White

OPI Black Shatter over Nina Ultra Pro French White

This is one coat of shatter polish, The OPI seems a lot more ‘crackly’ than some of my other shatter polishes, it shows more of the base colour, and it dries to be rather textured, this took two coats of top coat to smooth it out!

Braid Brush Strokes

Braid Brush Strokes

With brush strokes in different directions, (like braided nails but with one colour) the crackle effect is more controllable, and gives a much more even effect!

Black crackle sponged gradient.

Black Shatter sponged gradient.

I was really surprised at actually liking this, 🙂 I think it will look much better in different colours, perhaps silver and black or red with gold crackle polish for something a bit mote festive! But in black and white it looks like lightning!

Half crackle Mani

I taped off half of my nail before applying the shatter polish, The silver stripe is Night Moves from Barielle Shades, it’s just to hide the edge of the crackle polish as it was rather messy! 🙂


Little Silver Owls

After a busy day yesterday I now have a Facebook Page and a page on Google+ 😀 Setting those up took rather a lot longer than I thought, so I ended up not having enough time to write anything after doing these cute silver owls!

Silver Little owls

Silver Little owls

For this I started with a sponged gradient of Revlon – Black Magic, Maybelline – Couture Grey, Sally Hansen – Pumice and Nina Ultra Pro – French White.

For the stamping I used Moyou Suki Collection 01 with Barielle shades Night Moves and finished it off with a coat of Color Club 60 second topcoat.

Silver Little owles over grey graident

I used the same part of the Moyou plate for the Glitter owls in my first post!

Little silver Owls

This was a nightmare to photograph, my poor camera was absolutely hating it, unfortunately the photographs don’t show all of the detail 😦 so you’ll have to take my word on how amazing this looks lol!


Ombre Nails Tutorial (only using black and white polish)

Ombre Nails

Ombre Nails

An Ombre Manicure Is a really easy! It is a gradient from nail to nail with five nail polishes which are applied each on one full nail (rather than a gradient over one nail, which is a gradient manicure).

I have been wanting to an Ombre tutorial for a little while now but I haven’t found three shades of grey polish that would work… Madness!

So with the polish I already own I decided to mix my own shades!

Ombre Nails Tutorial Equipment

Ombre Nails Tutorial Equipment

This is what I used!

  • one cotton bud (q tip) with one end cut off.
  • a paint brush/nail art brush.
  • Nina Ultra Pro – French White.
  • Sinfulcolors -Black on Black.
  • Acetone.
  • A Dapen Dish or small container. (Just make sure it’s not plastic)
  • An old Plate
  • some paper

Begin by painting two coats of white on your thumb nails and black on your little finger nails. It’s best to wait until they have dried before continuing.

Then pour little acetone into the Dapen dish or small container this is to rinse the brush in later.

To start with put three drops of black polish with one drop of white together on the plate, using the cotton bud (with the end cut off) as a mixing tool, combine the two polishes until it is an even shade, you’ll have to be quite fast with mixing so the polish doesn’t dry to much. Then using the brush apply it to your ring finger nails,  use the paper to wipe the extra polish from the brush before rinsing it in Acetone.

On another part of the plate mix two drops of black with two drops of white. This shade is for the middle finger nails. after you have applied the polish remember to clean the brush to remove the extra polish

And for your pointer finger nails use a ratio of three drops of white to one drop of black.

If you need to apply a second coat, wait until the first coat has dried and follow the steps again! 🙂 Then apply some topcoat.

This technique can be used with lots of different colours, you just have to make sure that the amount of pigment in the individual polishes you choose to use is roughly the same!