Tag Archives: Holographic

Crumpet’s Got Polish Challenge – Valentines Day

Here are my Valentines day nails for todays got polish challenge! I have to say I’m really not into the whole Valentines day thing, I find it all far to commercialized and a bit cheap… But enough of me grumbling lol!

GOT Polish - Valentine's Day

Valentine’s Day Nail Art

I started out by making the little stamped decals using Bundle monster BM-401, for the stamping I used Konad special polish in black.  Then color club ulterior motive for half of the hearts and Maybelline Flash Cosmic with a coat of Barry m shocking pink over the top for the rest.

GOT Polish - Valentine's Day

Valentine’s Day nail art

While I was waiting for my decals to dry I used Sinful Colors Bubbly and Barry m shocking pink to create a sponged gradient, Bubbly is a polish from my unused pile along with the Maybelline glitter polish. Then I stamped with China Glaze Cosmic Dust using Moyou Pro Collection XL plate 04 for the leopard print.  I used topcoat to stick on the decals, and added a few dots of Ulterior motive. then another layer of top coat to even it all out!

GOT polish - Valentine's Day

Valentine’s Day Nails

This didn’t turn out quite how I was expecting! But for pink and girly it’s not that bad….

Remember to have a look at the GOT polish Pinterest page for more Valentine’s Day nail art!


Belle Glamour Swatches And Interview! :D

Today I have a rather long and pic heavy post for you today! There is a little interview with Catriona the creator of the Belle Glamour indie nail polish and four of her lovely polishes to show you. 🙂

Belle Glamour polishes are available Here.

I conducted this informal interview with Catriona via email, and here it is! 🙂

1. Tell us a bit about yourself and where you come from?
I am 20 years old, and going to be 21 in march, I am a stay at home wife and I have a daughter who is almost one. I live in a small town in central Scotland, and have lived in and around this area for my whole life. Recently my mum moved to London, and so we holiday down there, but I’m still a Scottish girl at heart.

2. Why did you decide start making Indie nail polish?
I had needed something to keep myself busy with having anxiety issues etc, and so I began painting false nails and selling them as a small hobby, I then thought about it a lot, and decided I wanted to make my own polish to paint them, having something that I created gives me a real buzz.

3. How did you decide on Belle Glamour as a brand name?
Having self esteem and anxiety issues, I wanted a fresh start, and I knew a lot of other women out there would feel the same, I wanted to make something to let the user feel beautiful, glamorous and worth it. Then I thought about naming it Beautifully Glamorous, and thought of the ‘language of love’ – French. The Word Belle is French for Beautiful, hence, Belle Glamour.

4. How long have you loved nail polish for?
I haven’t adored nail polish for long at all, I was a nail biter up until last summer, and then I wore a lot of false nails to cover this, but gave that up and I am now in recovery!

5. Where do you get your inspiration for new shades?
This, I do not have an answer for exactly, because I don’t really know, it comes from this and that really, one collection I have came from my favourite book/film series, Harry Potter.

6. Tell us about your polish production and how you find time to do it all?
I buy all of my ingredients and test these if they come from a new supplier etc, I then get to the making and documenting stage. My husband works shifts, and so when he is off his work, he looks after our daughter so I can get creative and work.

7. What is the best part about making your own line of polishes?
Definitely being able to see a polish you want, and making a dupe for personal use. I now find myself thinking ‘can I make that myself?’ and if the answer is yes, I wont buy!

8. And the worst?
Glitter everywhere. And I seriously mean EVERYWHERE. I sneeze glitter.

9. And finally If you could have a superpower what would it be?
Hmmm.. tough one. To read minds? Then I could see what everyone would buy 😜

So a big thank you to Catriona for taking the time to do this and for your very brave and honest answers to my questions! 🙂

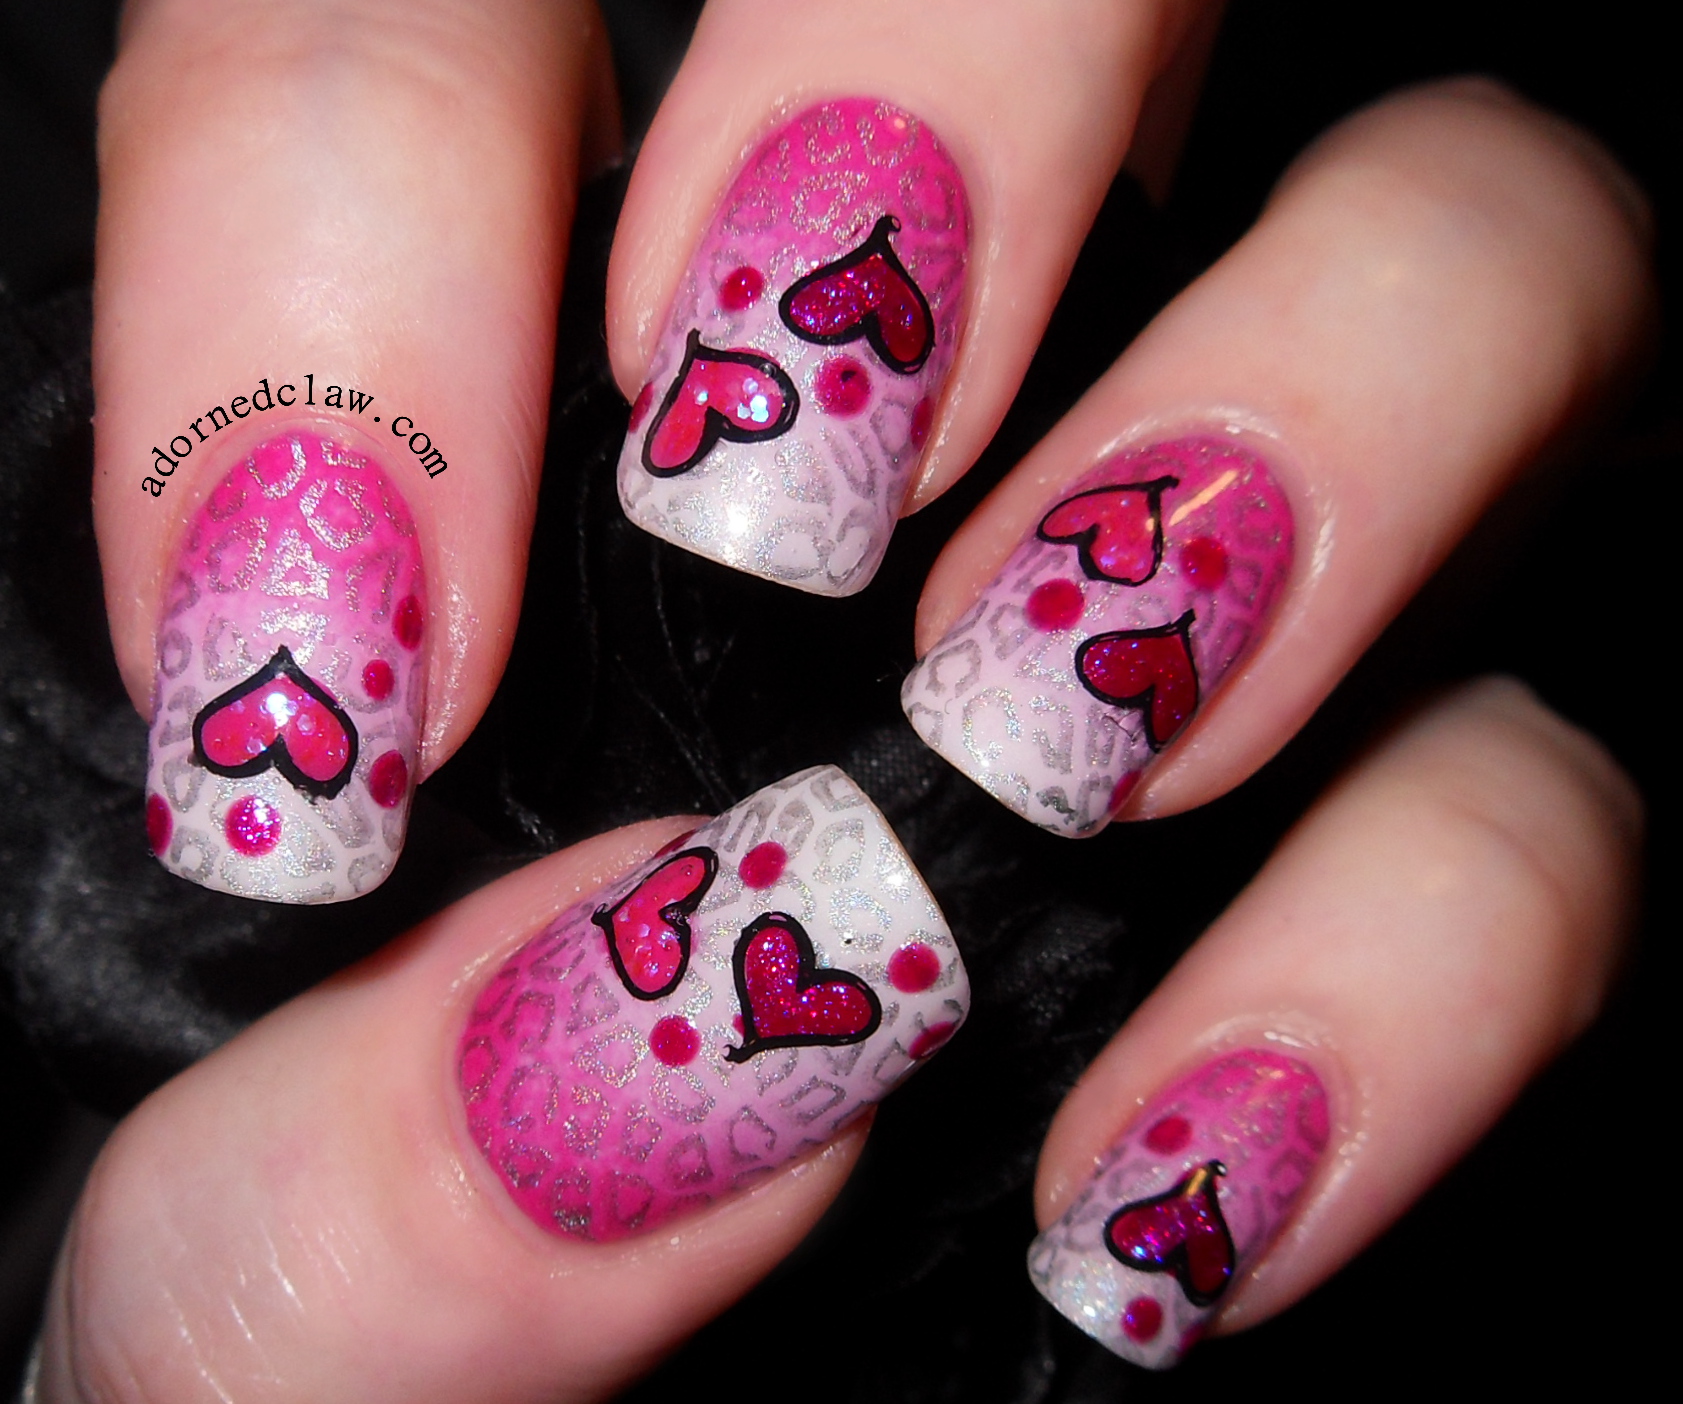
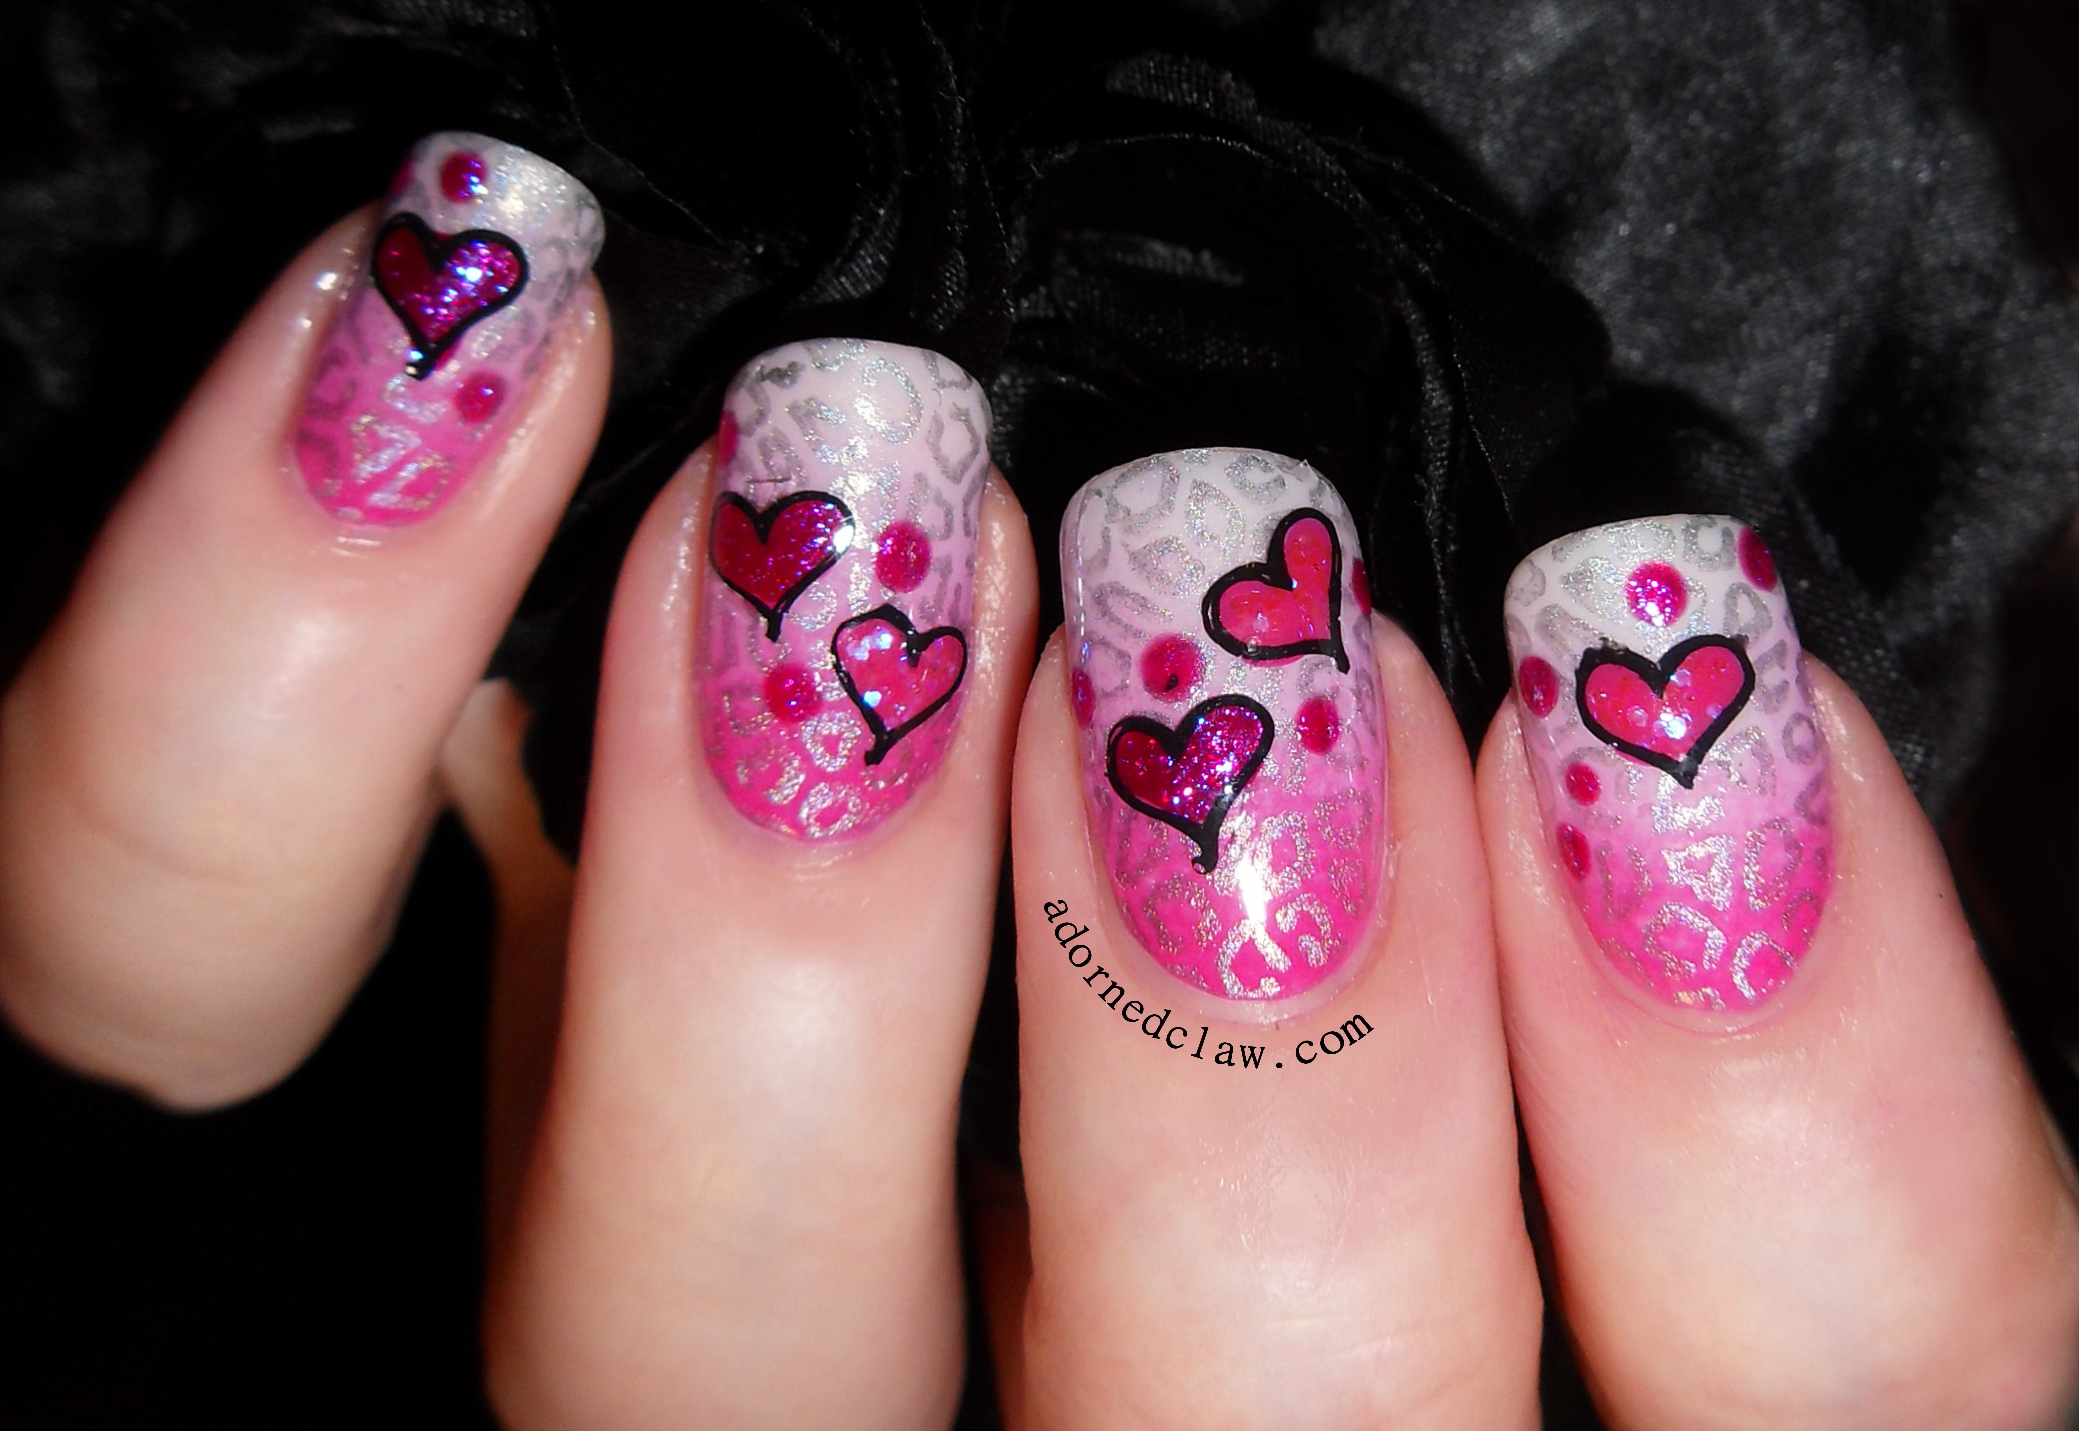
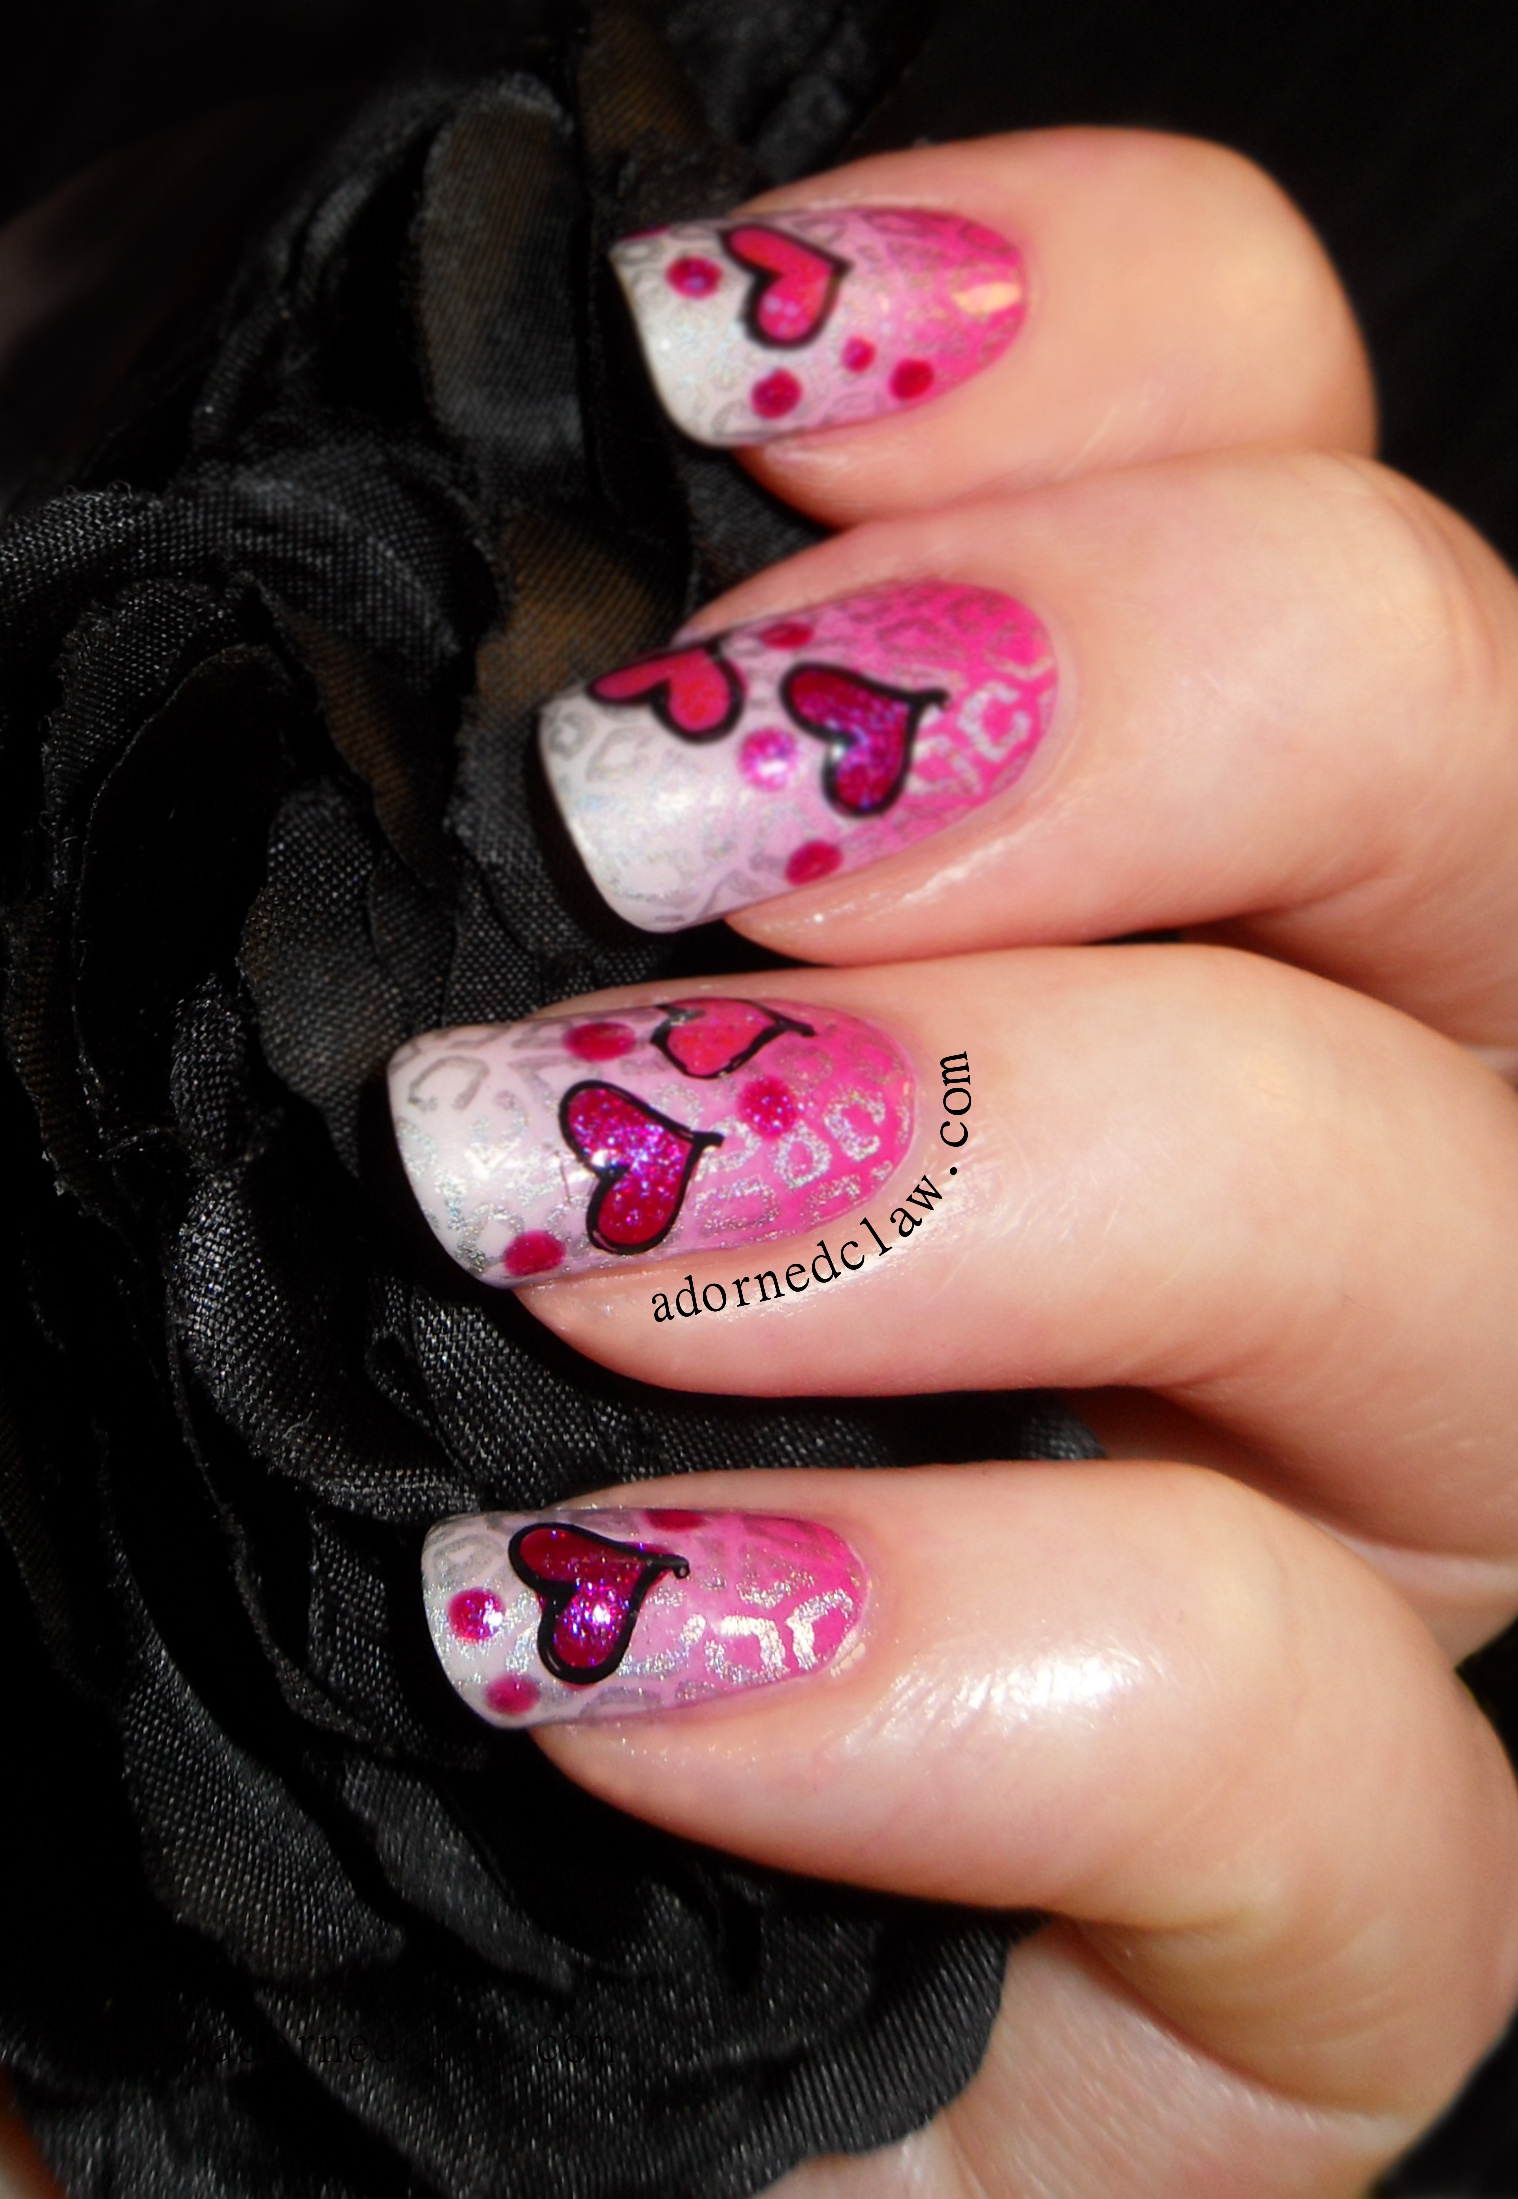
And now on to the four Belle Glamour polishes I have to show you today, they are Pretty In, Pumpkin Pie, Green Eyed Monster and Silver Arrow.
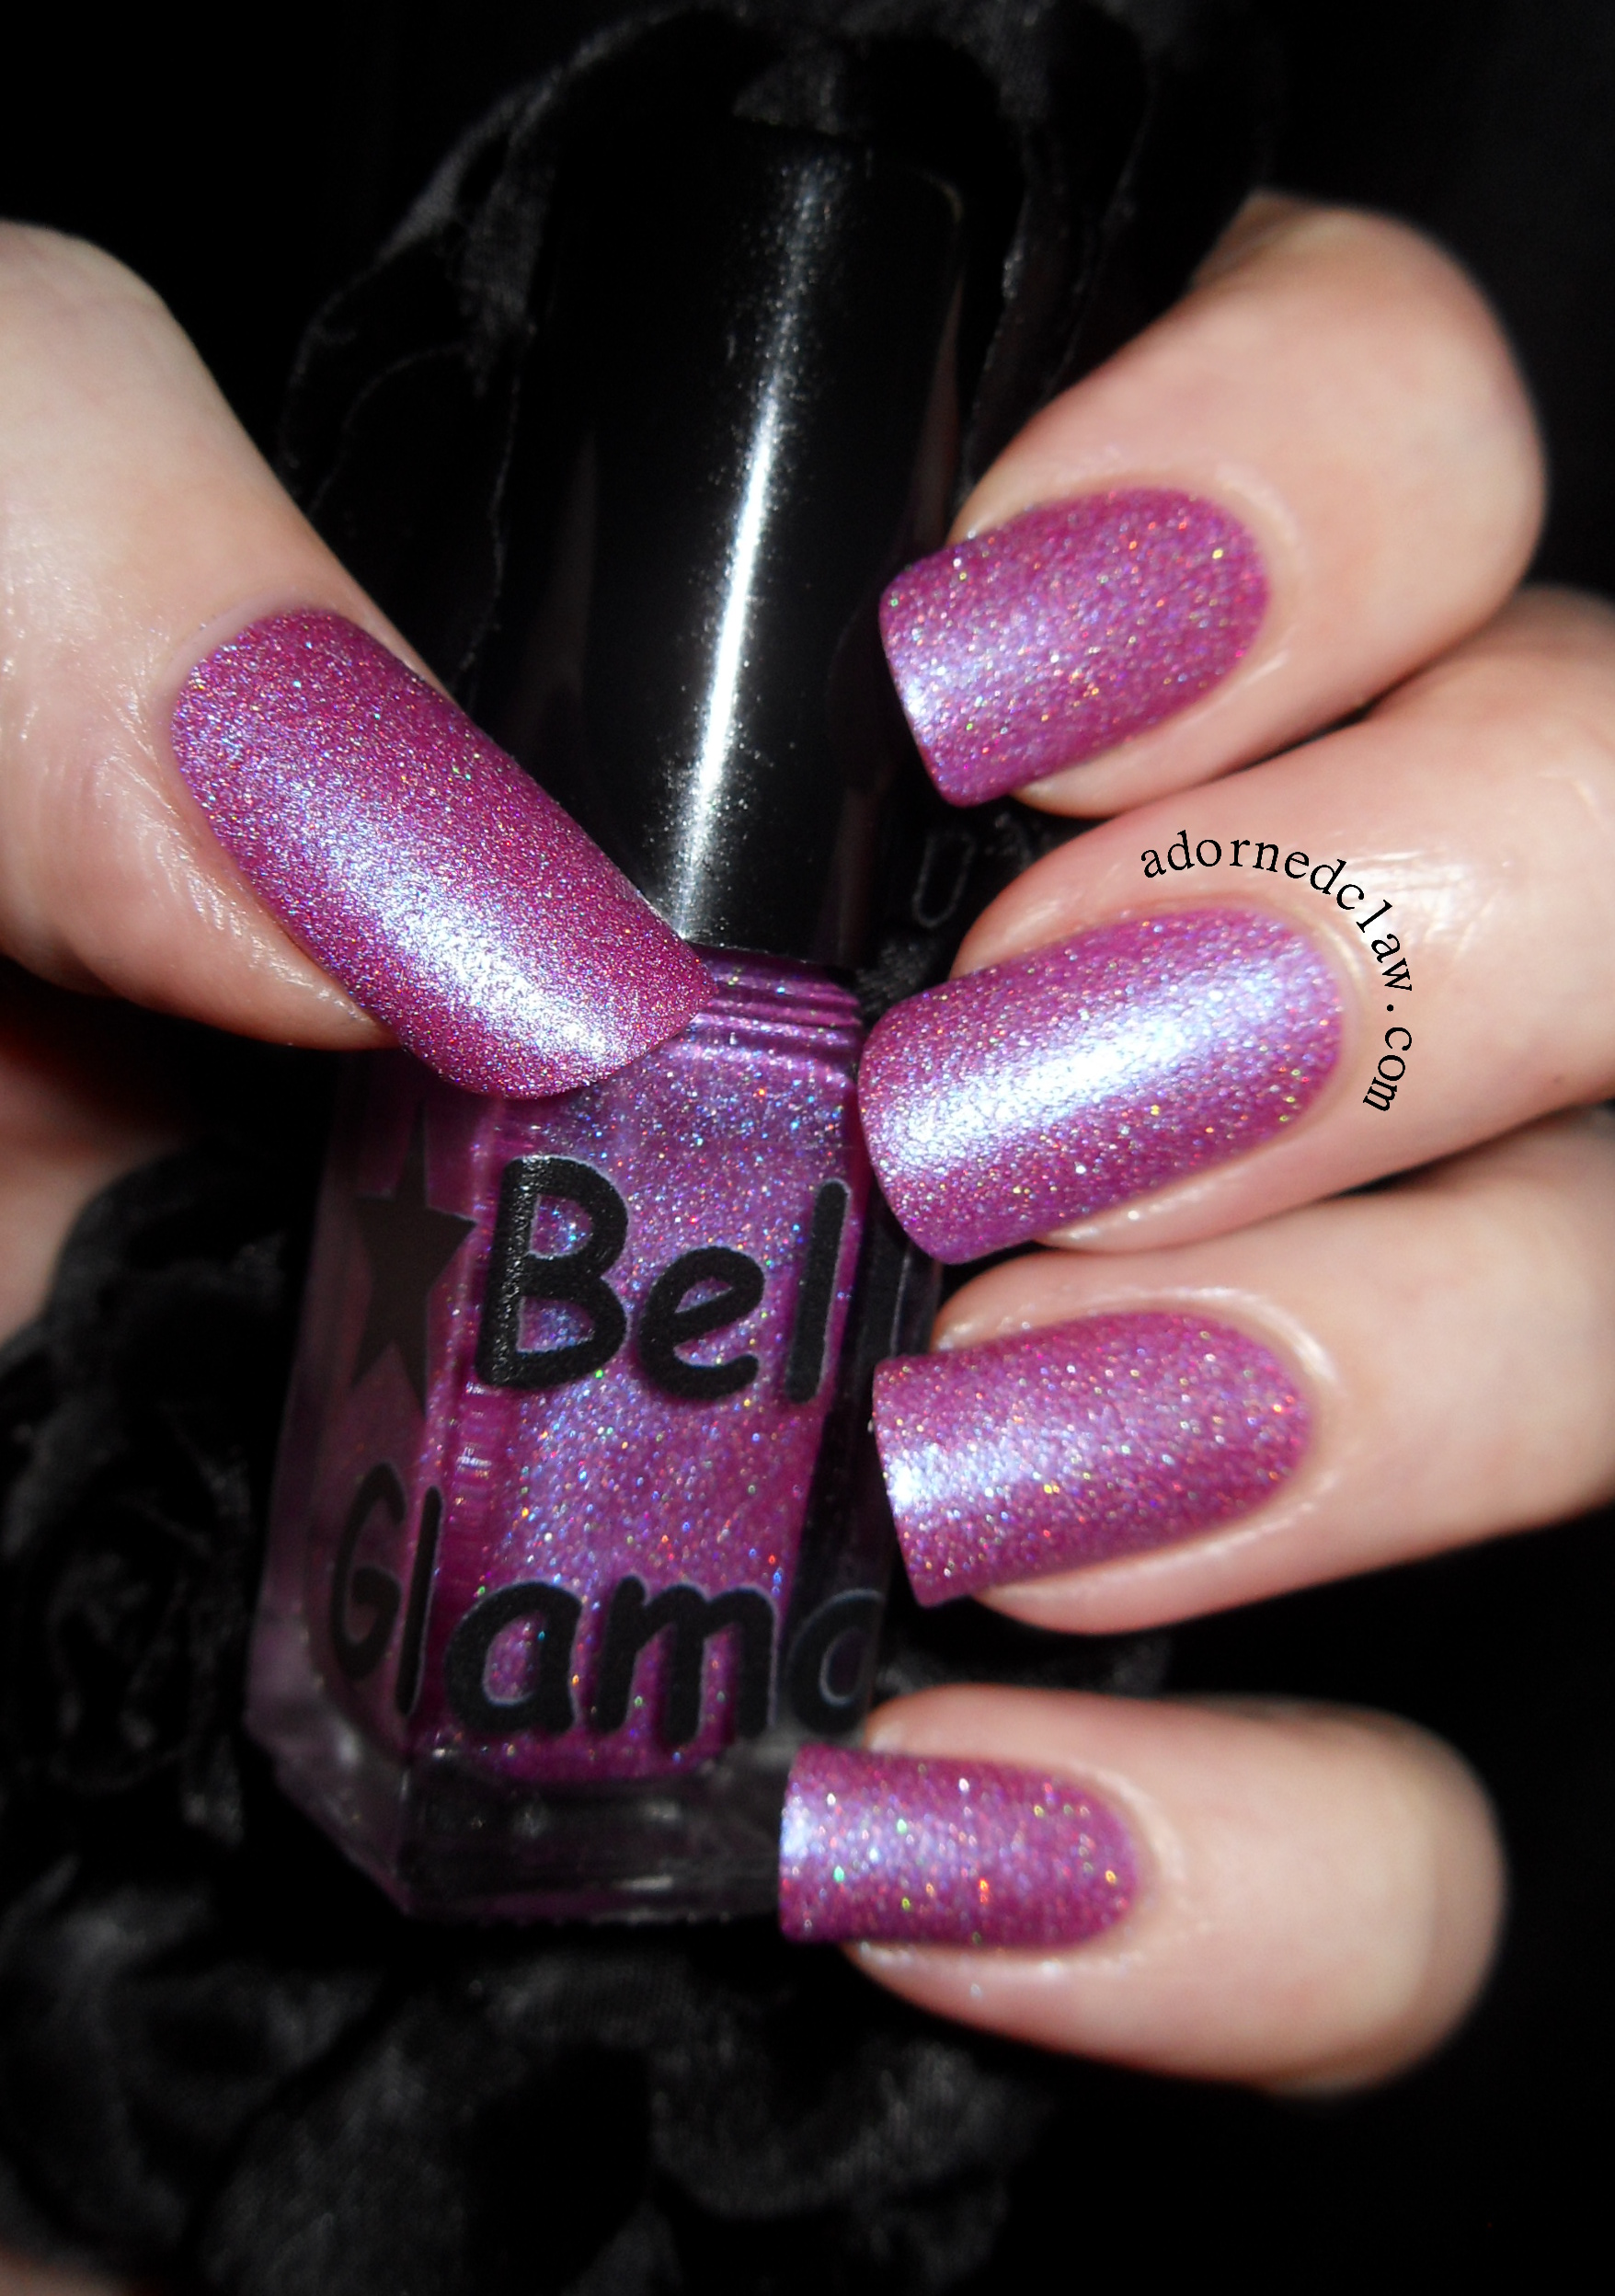
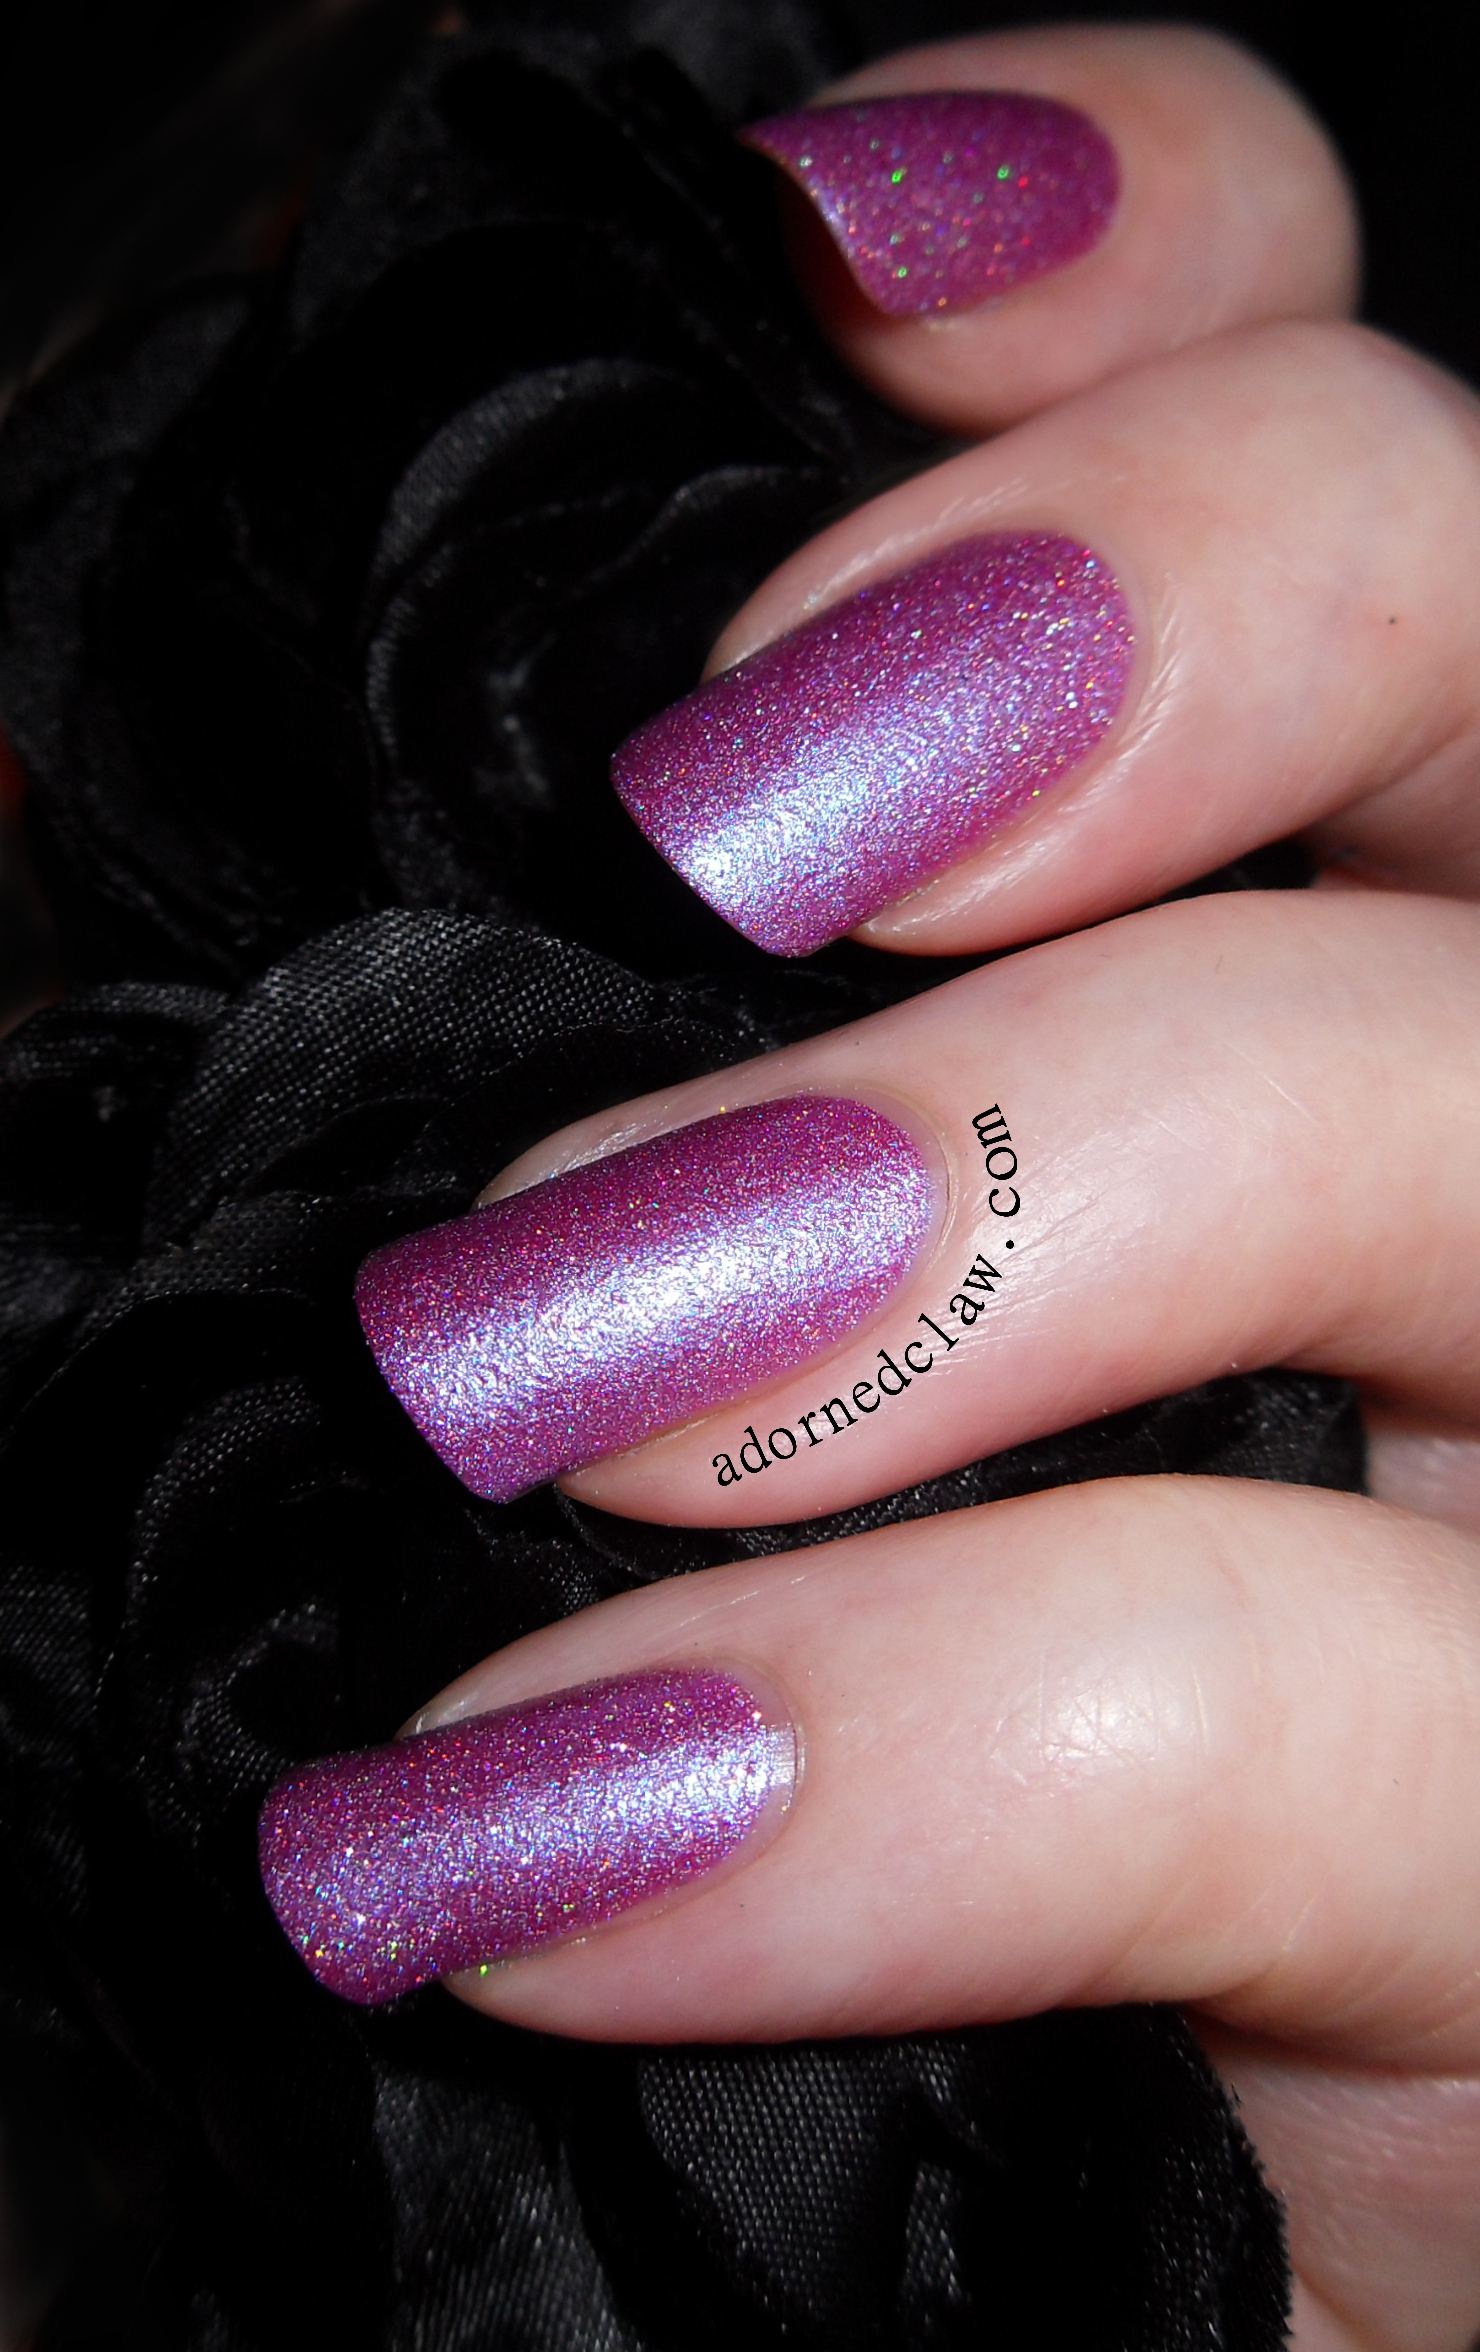
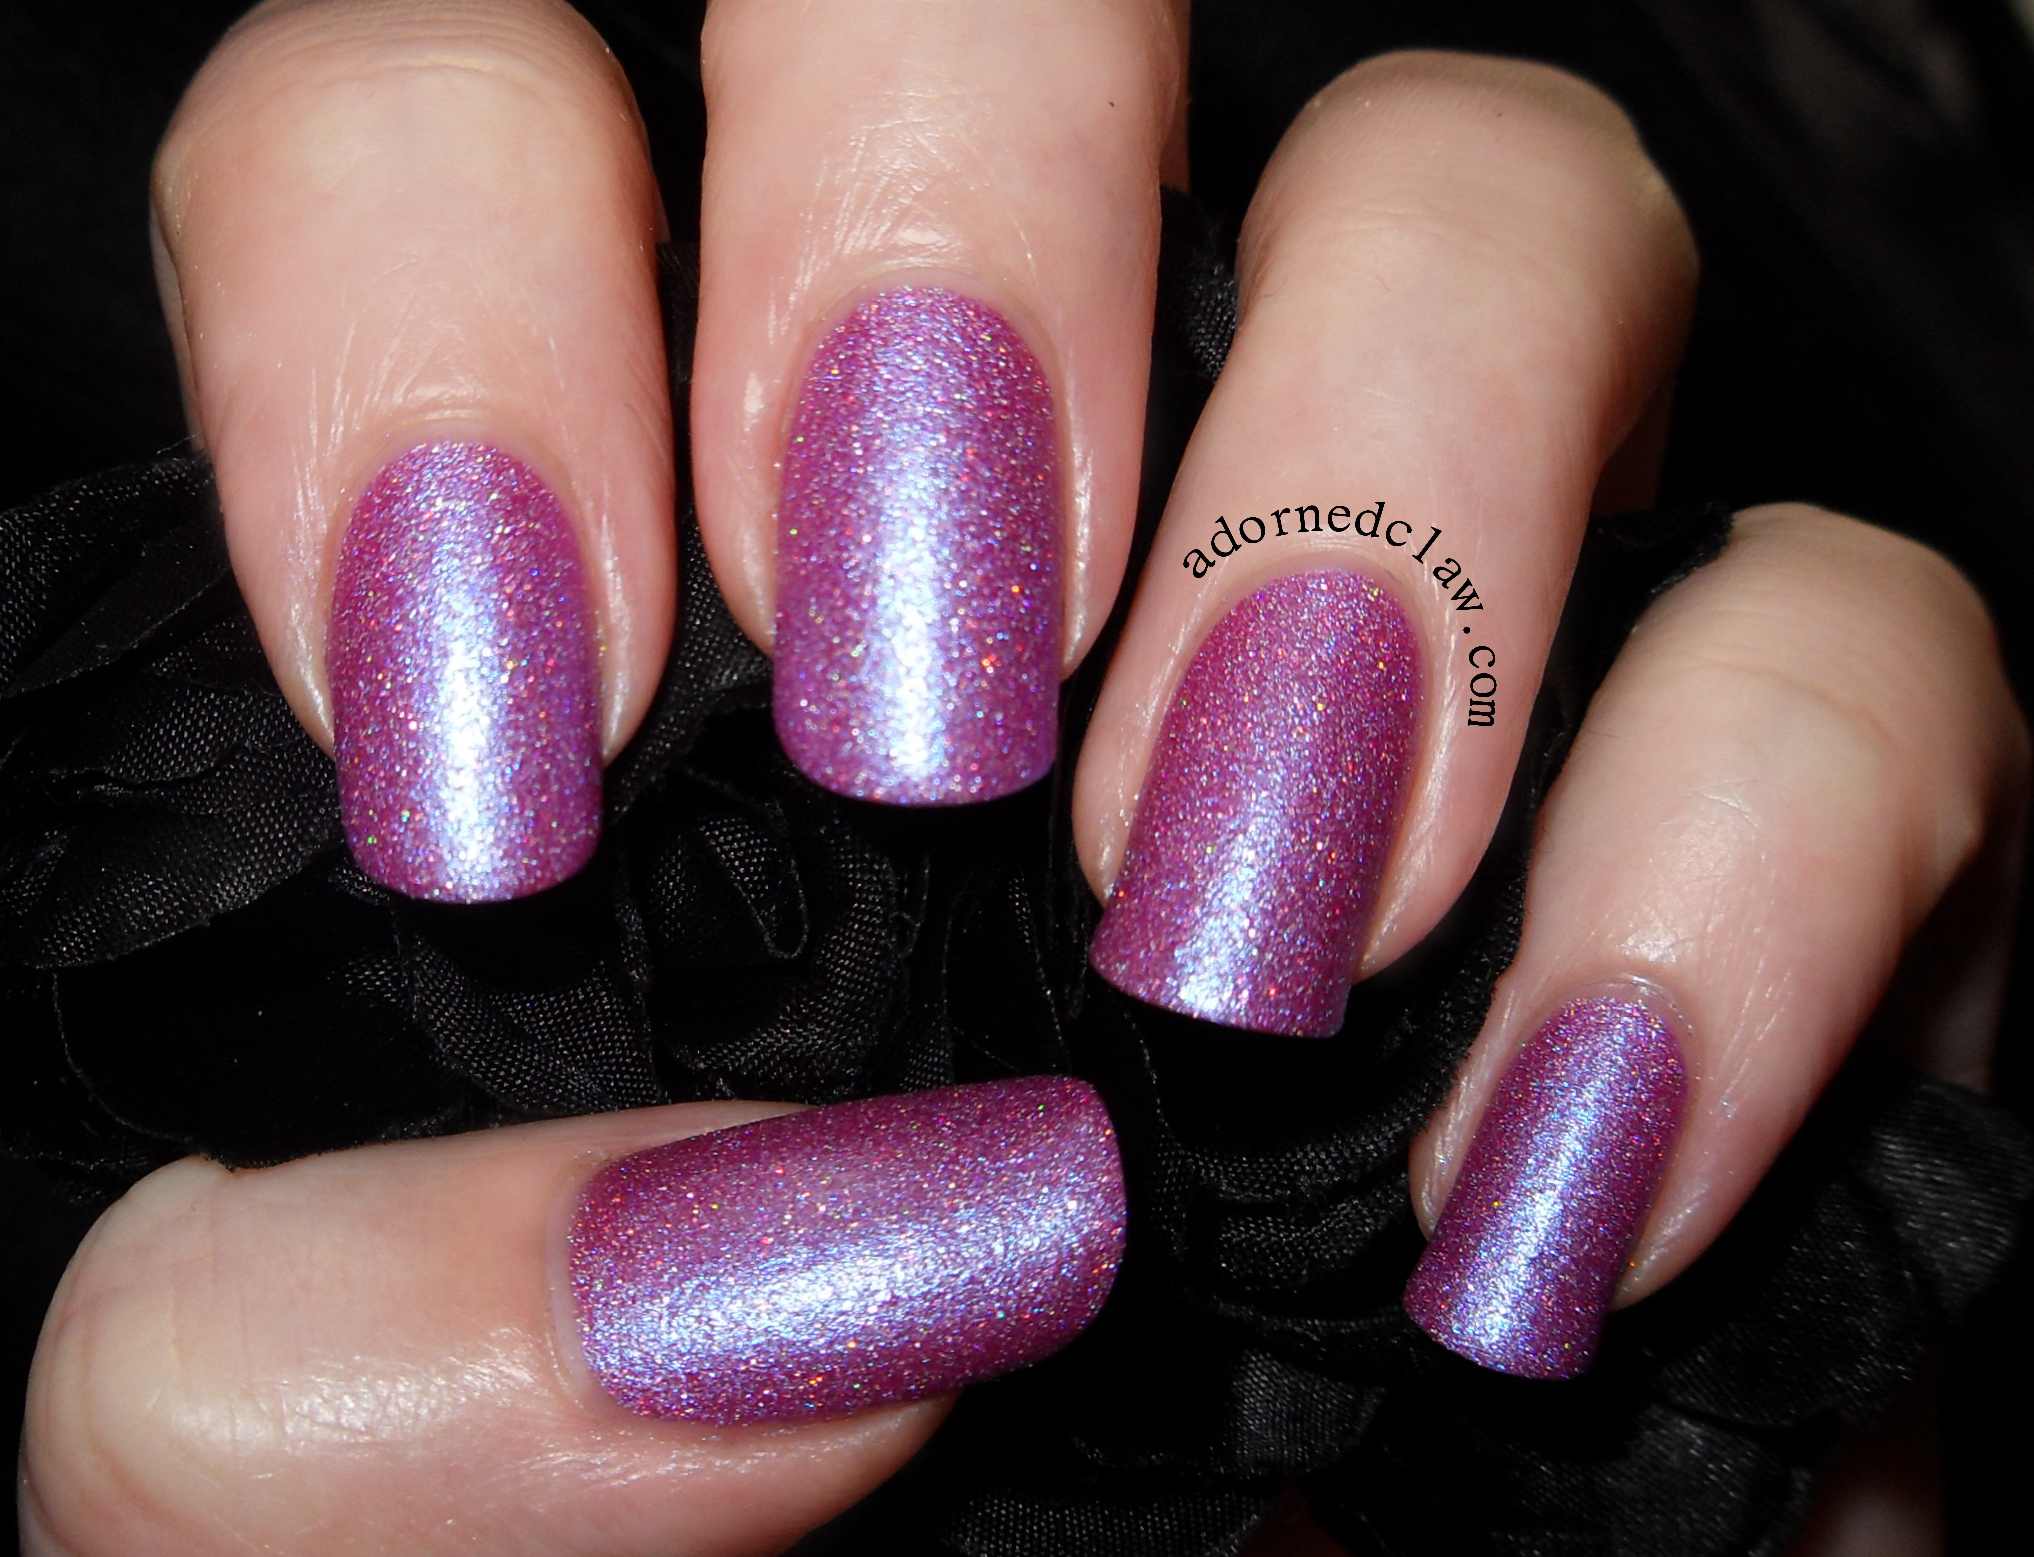
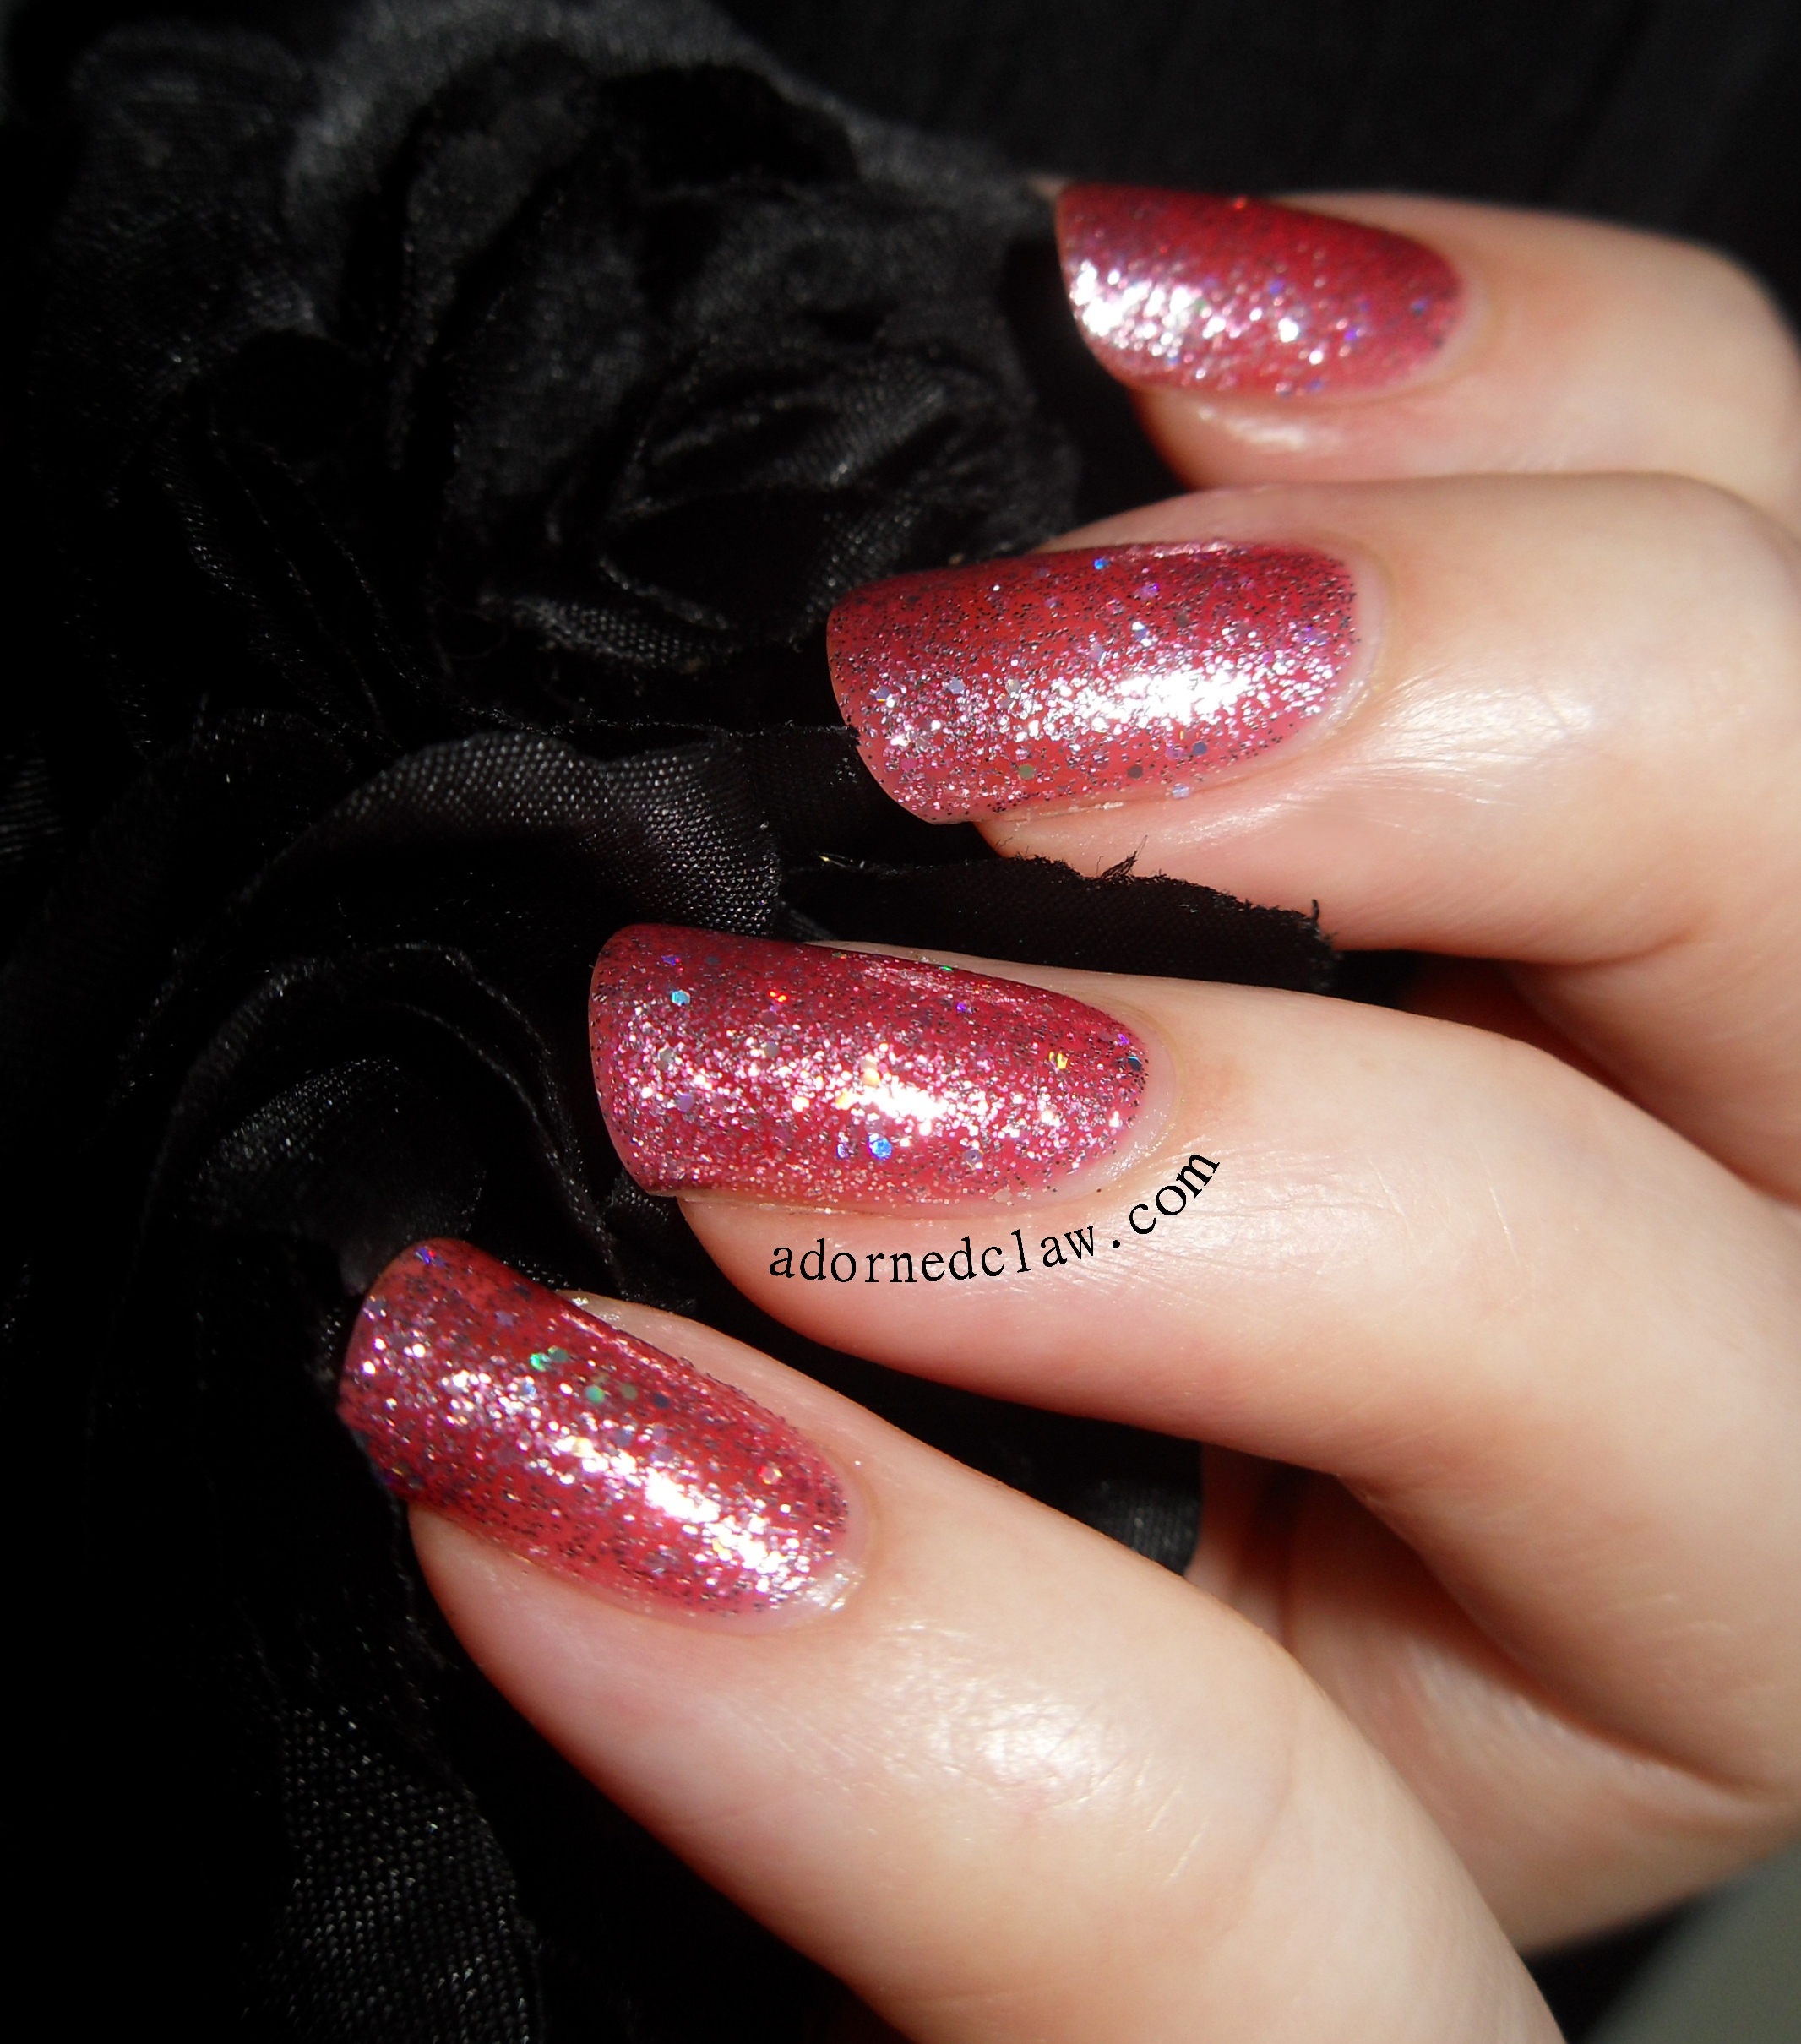
Belle Glamour Pretty In

Pretty In

The first polish is Pretty In. This is a lovely pink with a blue shimmer, and loads of holographic sparkles!

Belle Glamour Pretty In

Pretty In

Pretty In has a lovely satin finish and applied really smoothly, this is three thin coats over base coat, I think it could be opaque in two coats if I had made them a little thicker.

For me the blue shimmer really made this polish stand out, it gives it a lovely lilac glow and tones down the overall pinkness and really complements the wonderful holographic glitter.

Belle Glamour Pretty In

Pretty In

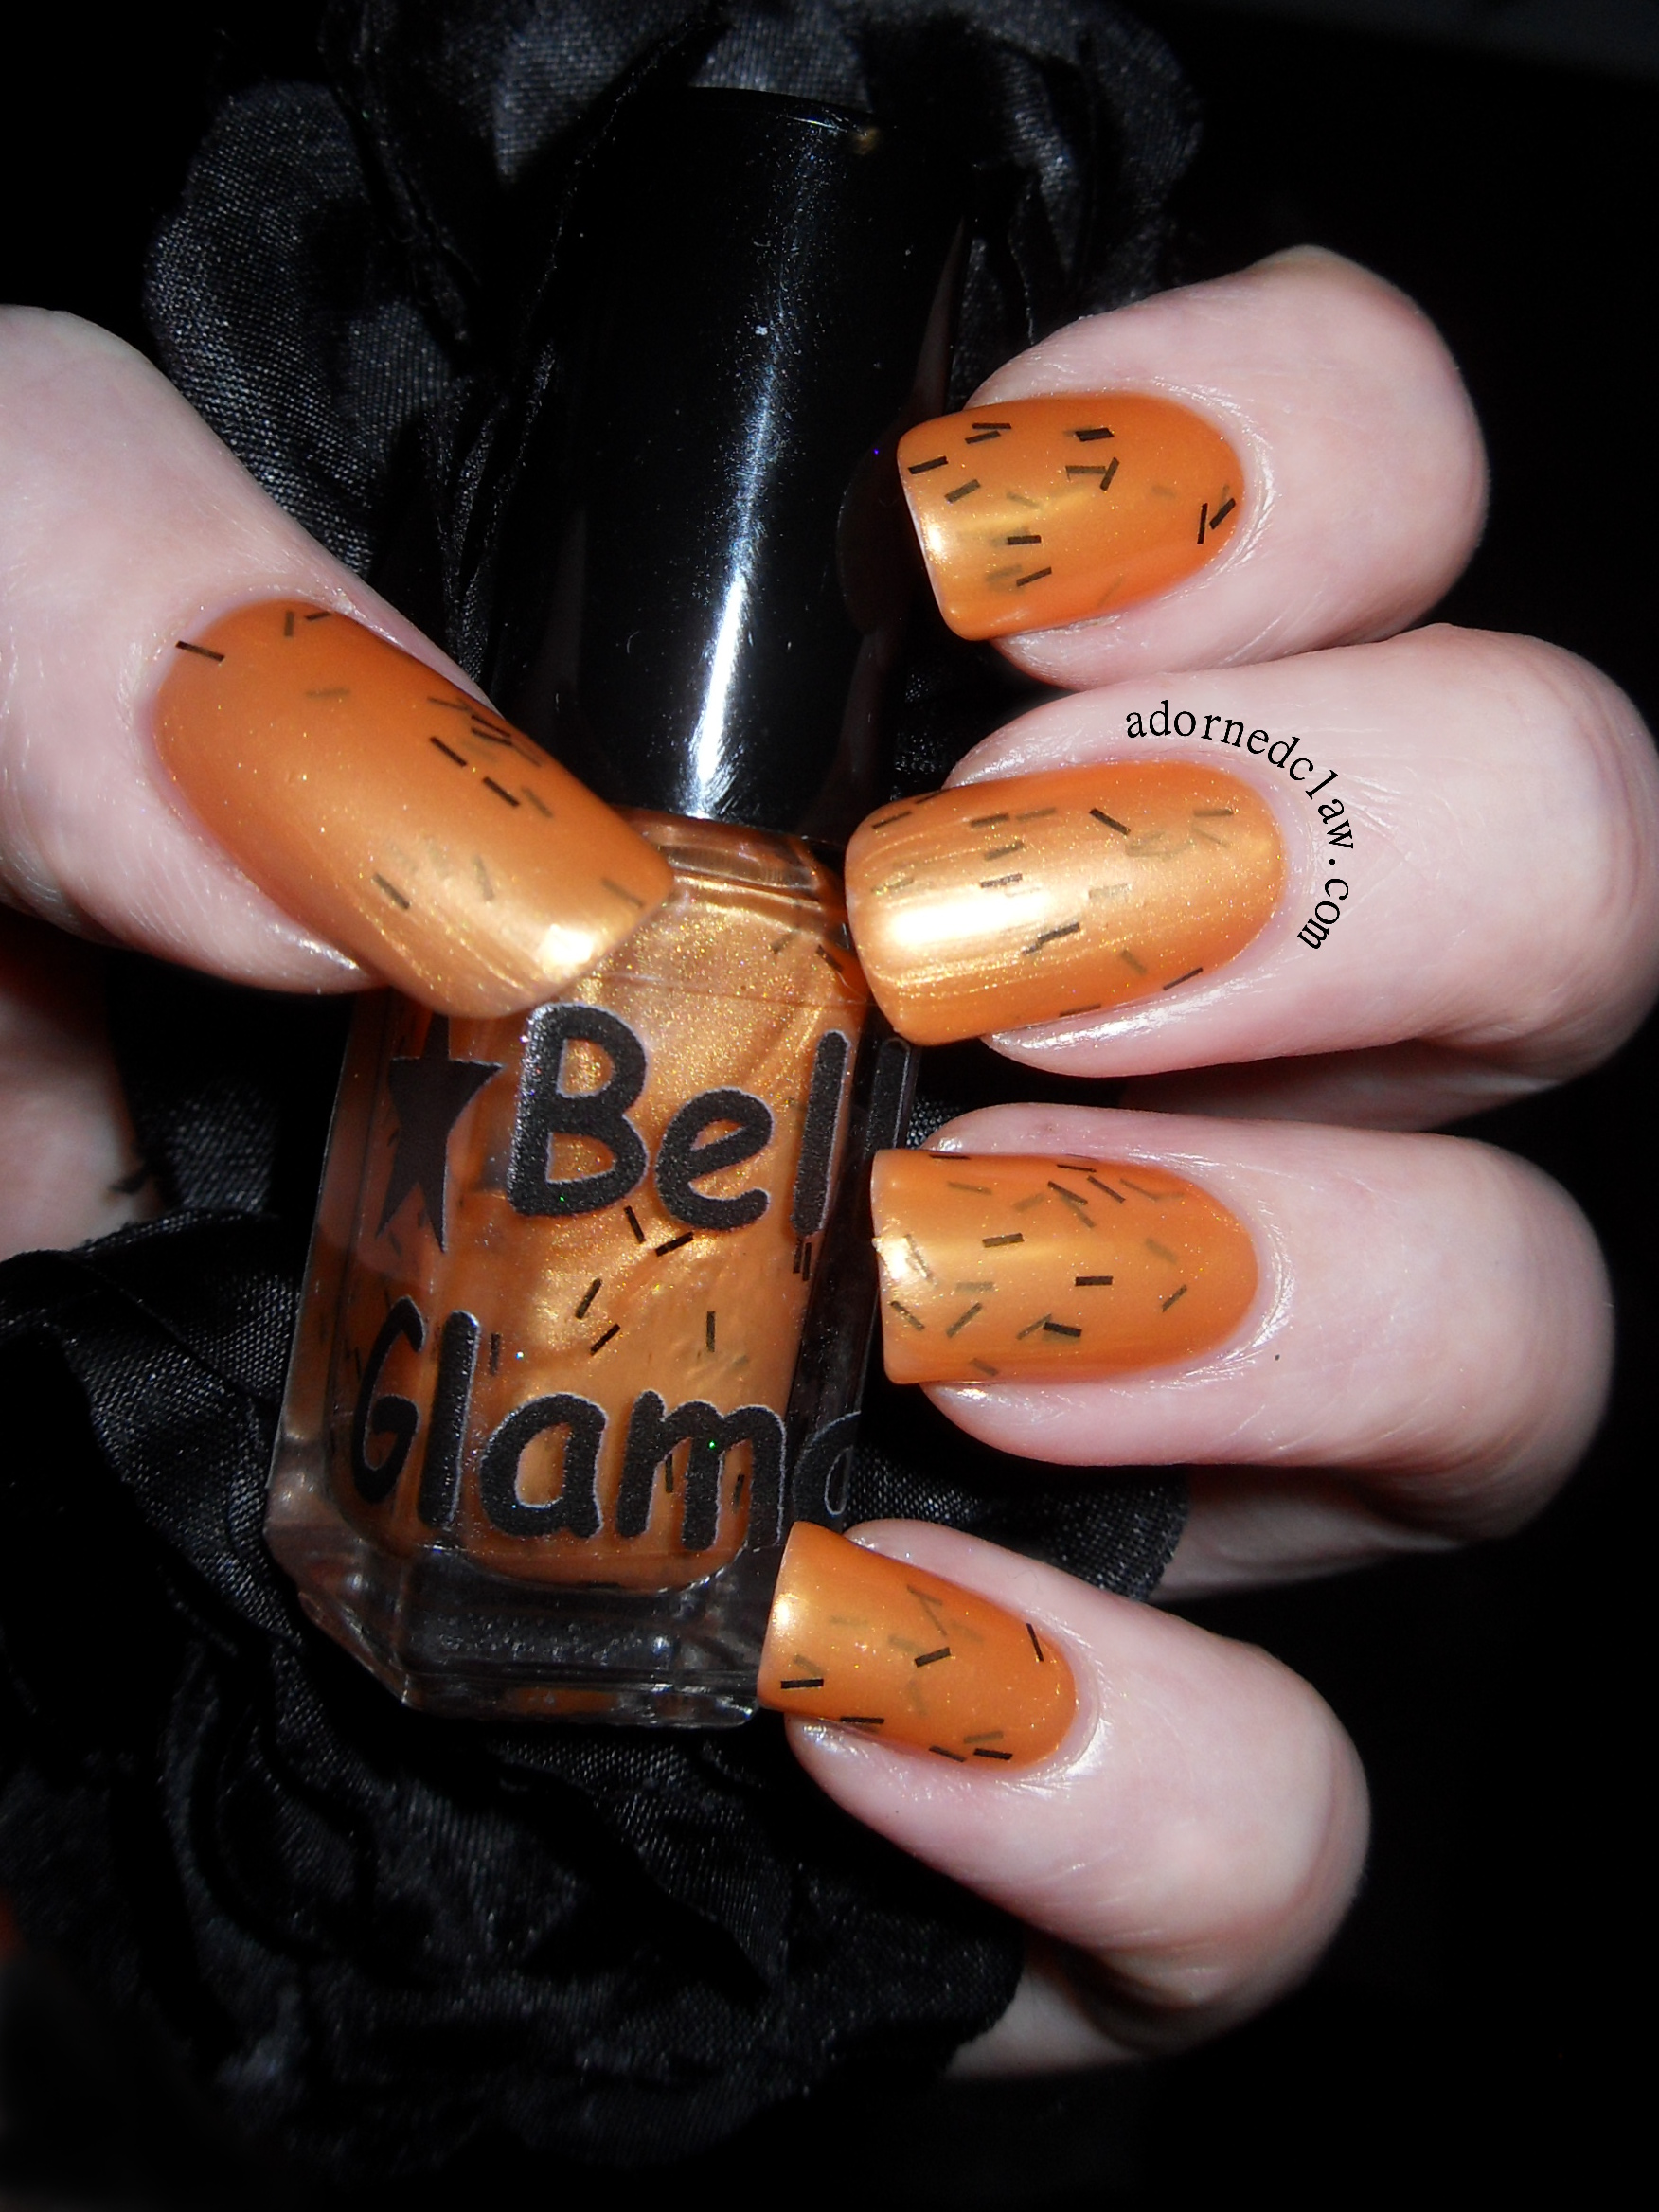
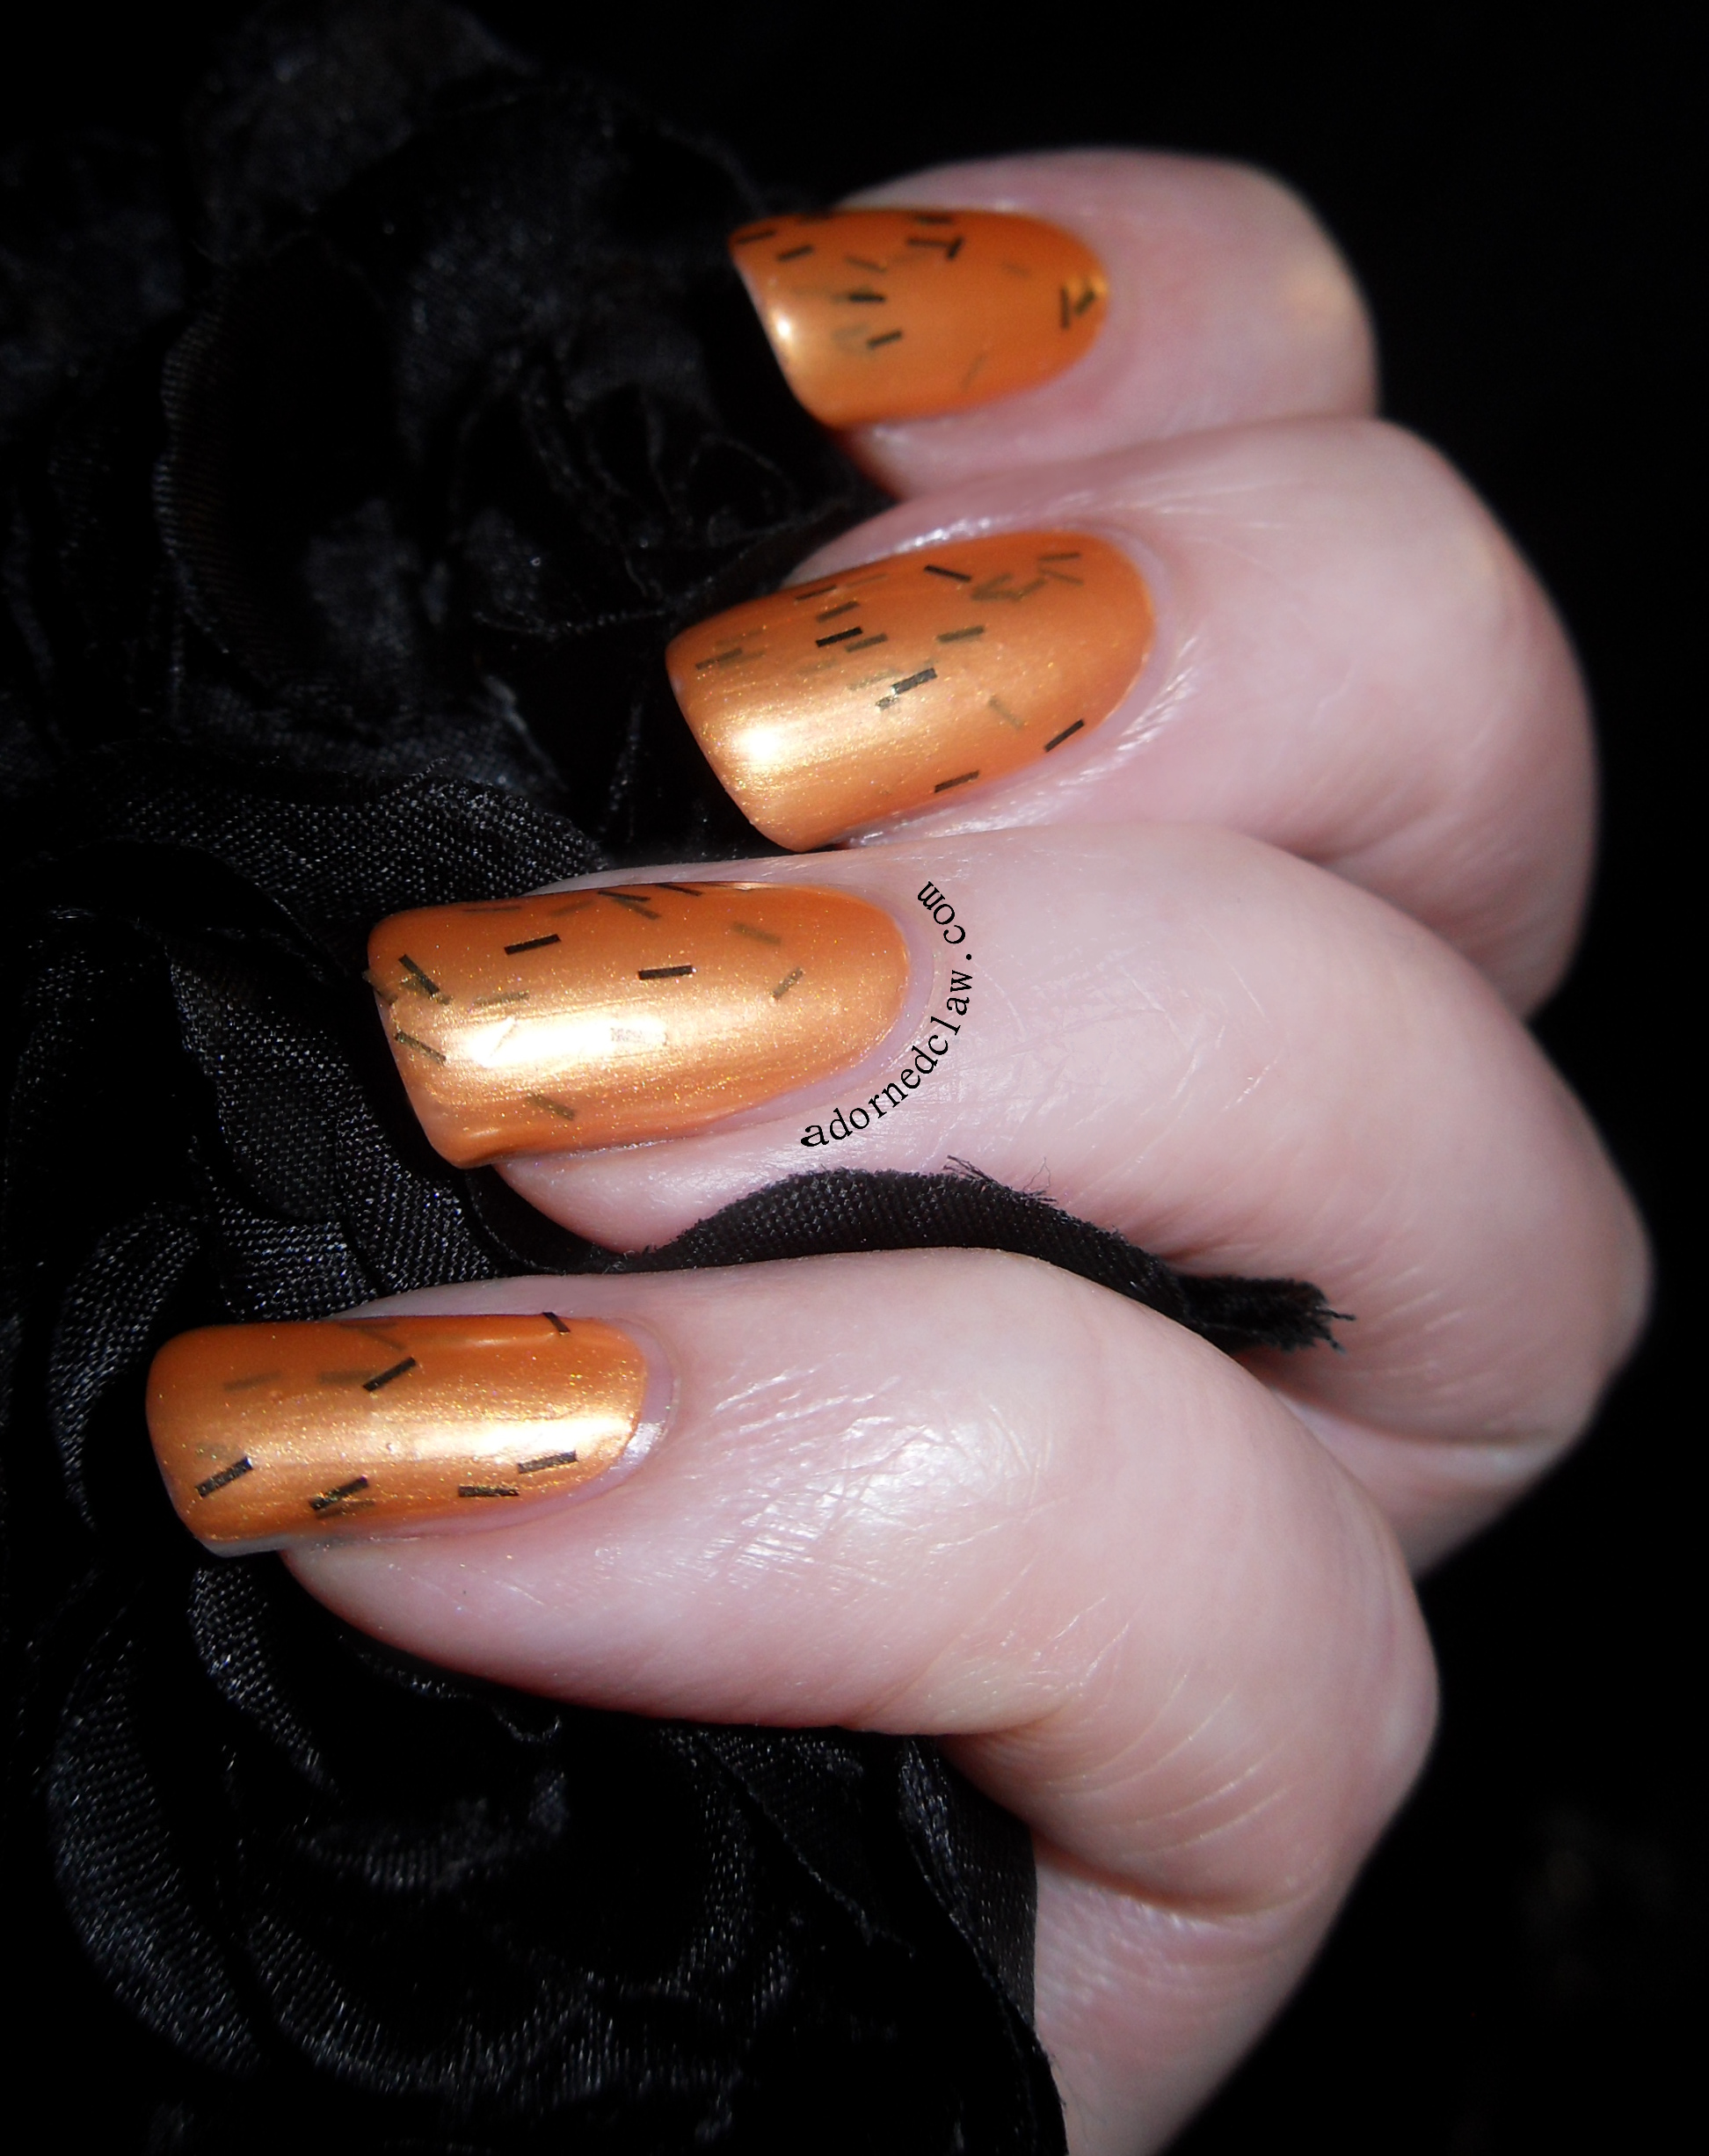
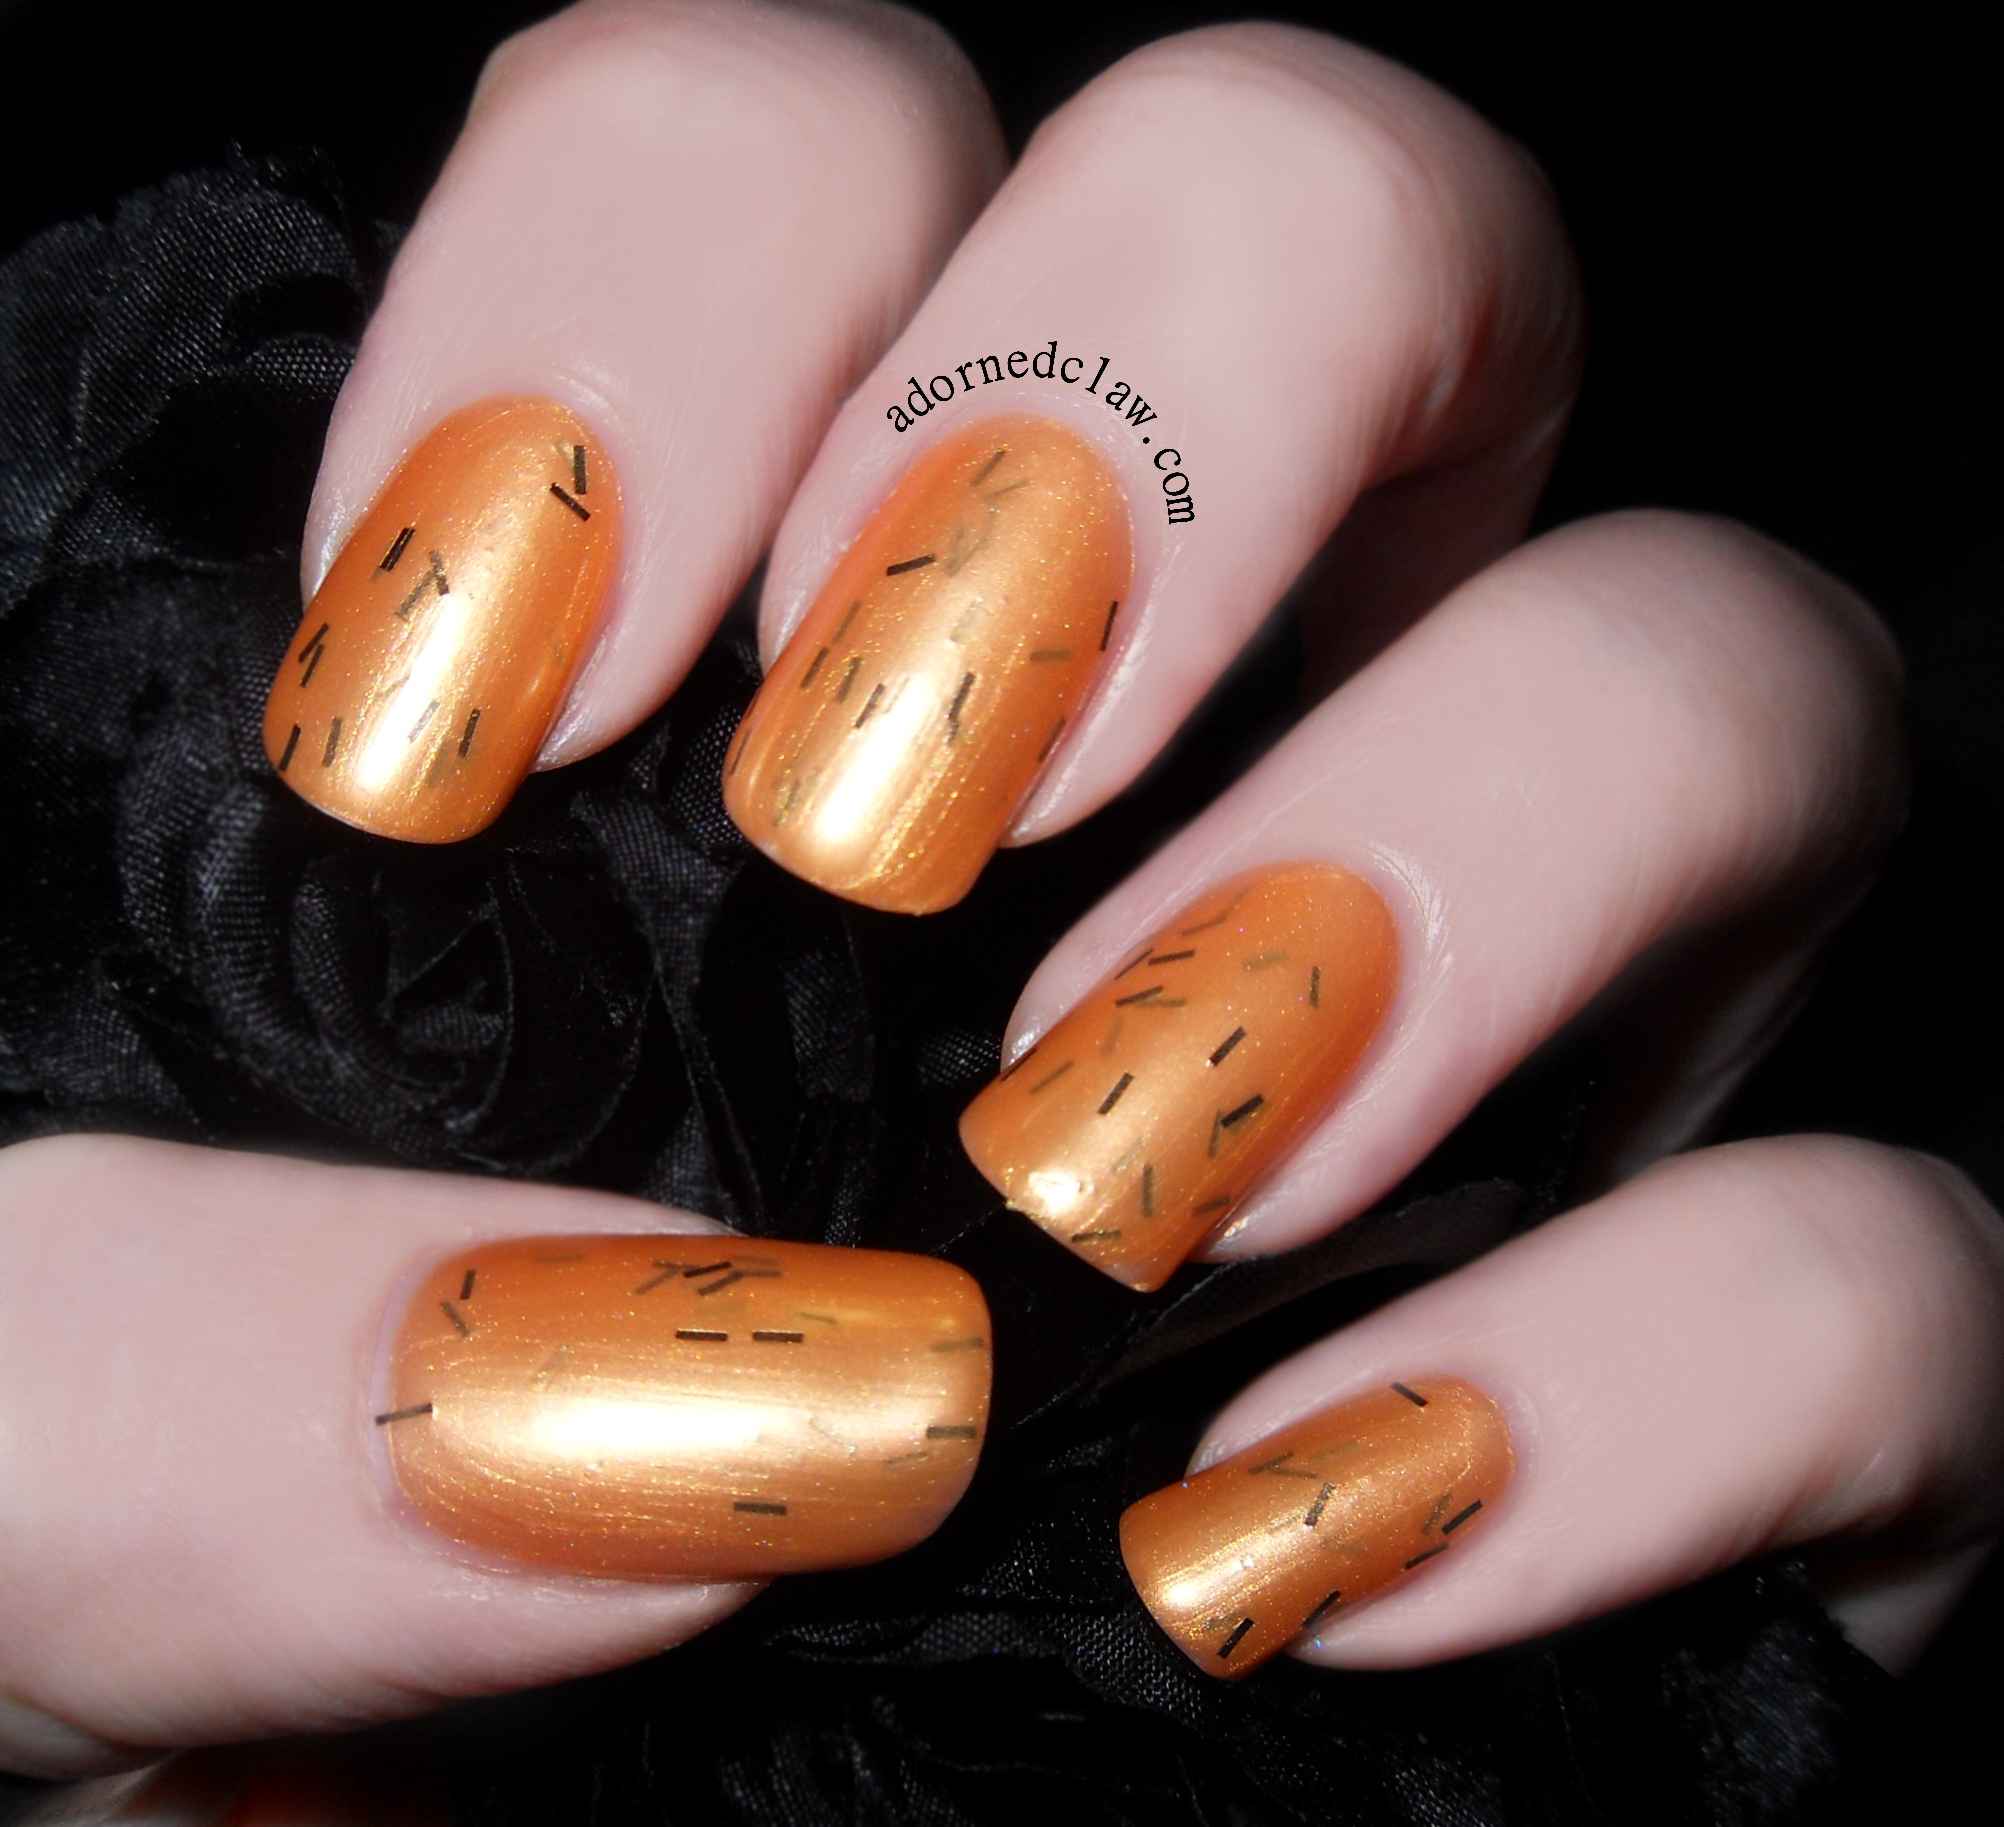
Here is Pumpkin Pie, this is an orange shimmer with a sprinkling of matte black glitter bars.

Belle Glamour Pumpkin Pie

Pumpkin Pie

I applied three coats of I found the formula to be really thick, it made it rather difficult to apply, but by the third coat there was good coverage and a nice amount of the glitter bars which didn’t take any fishing for.

Belle Glamour Pumpkin Pie

Pumpkin Pie

Unfortunately orange really doesn’t suit me at all 😦 I’m to pale, and it really highlights my dreadful circulation, lol!  I think that on someone with a darker skin tone this polish would be lovely!

Belle Glamour Pumpkin Pie

Pumpkin Pie

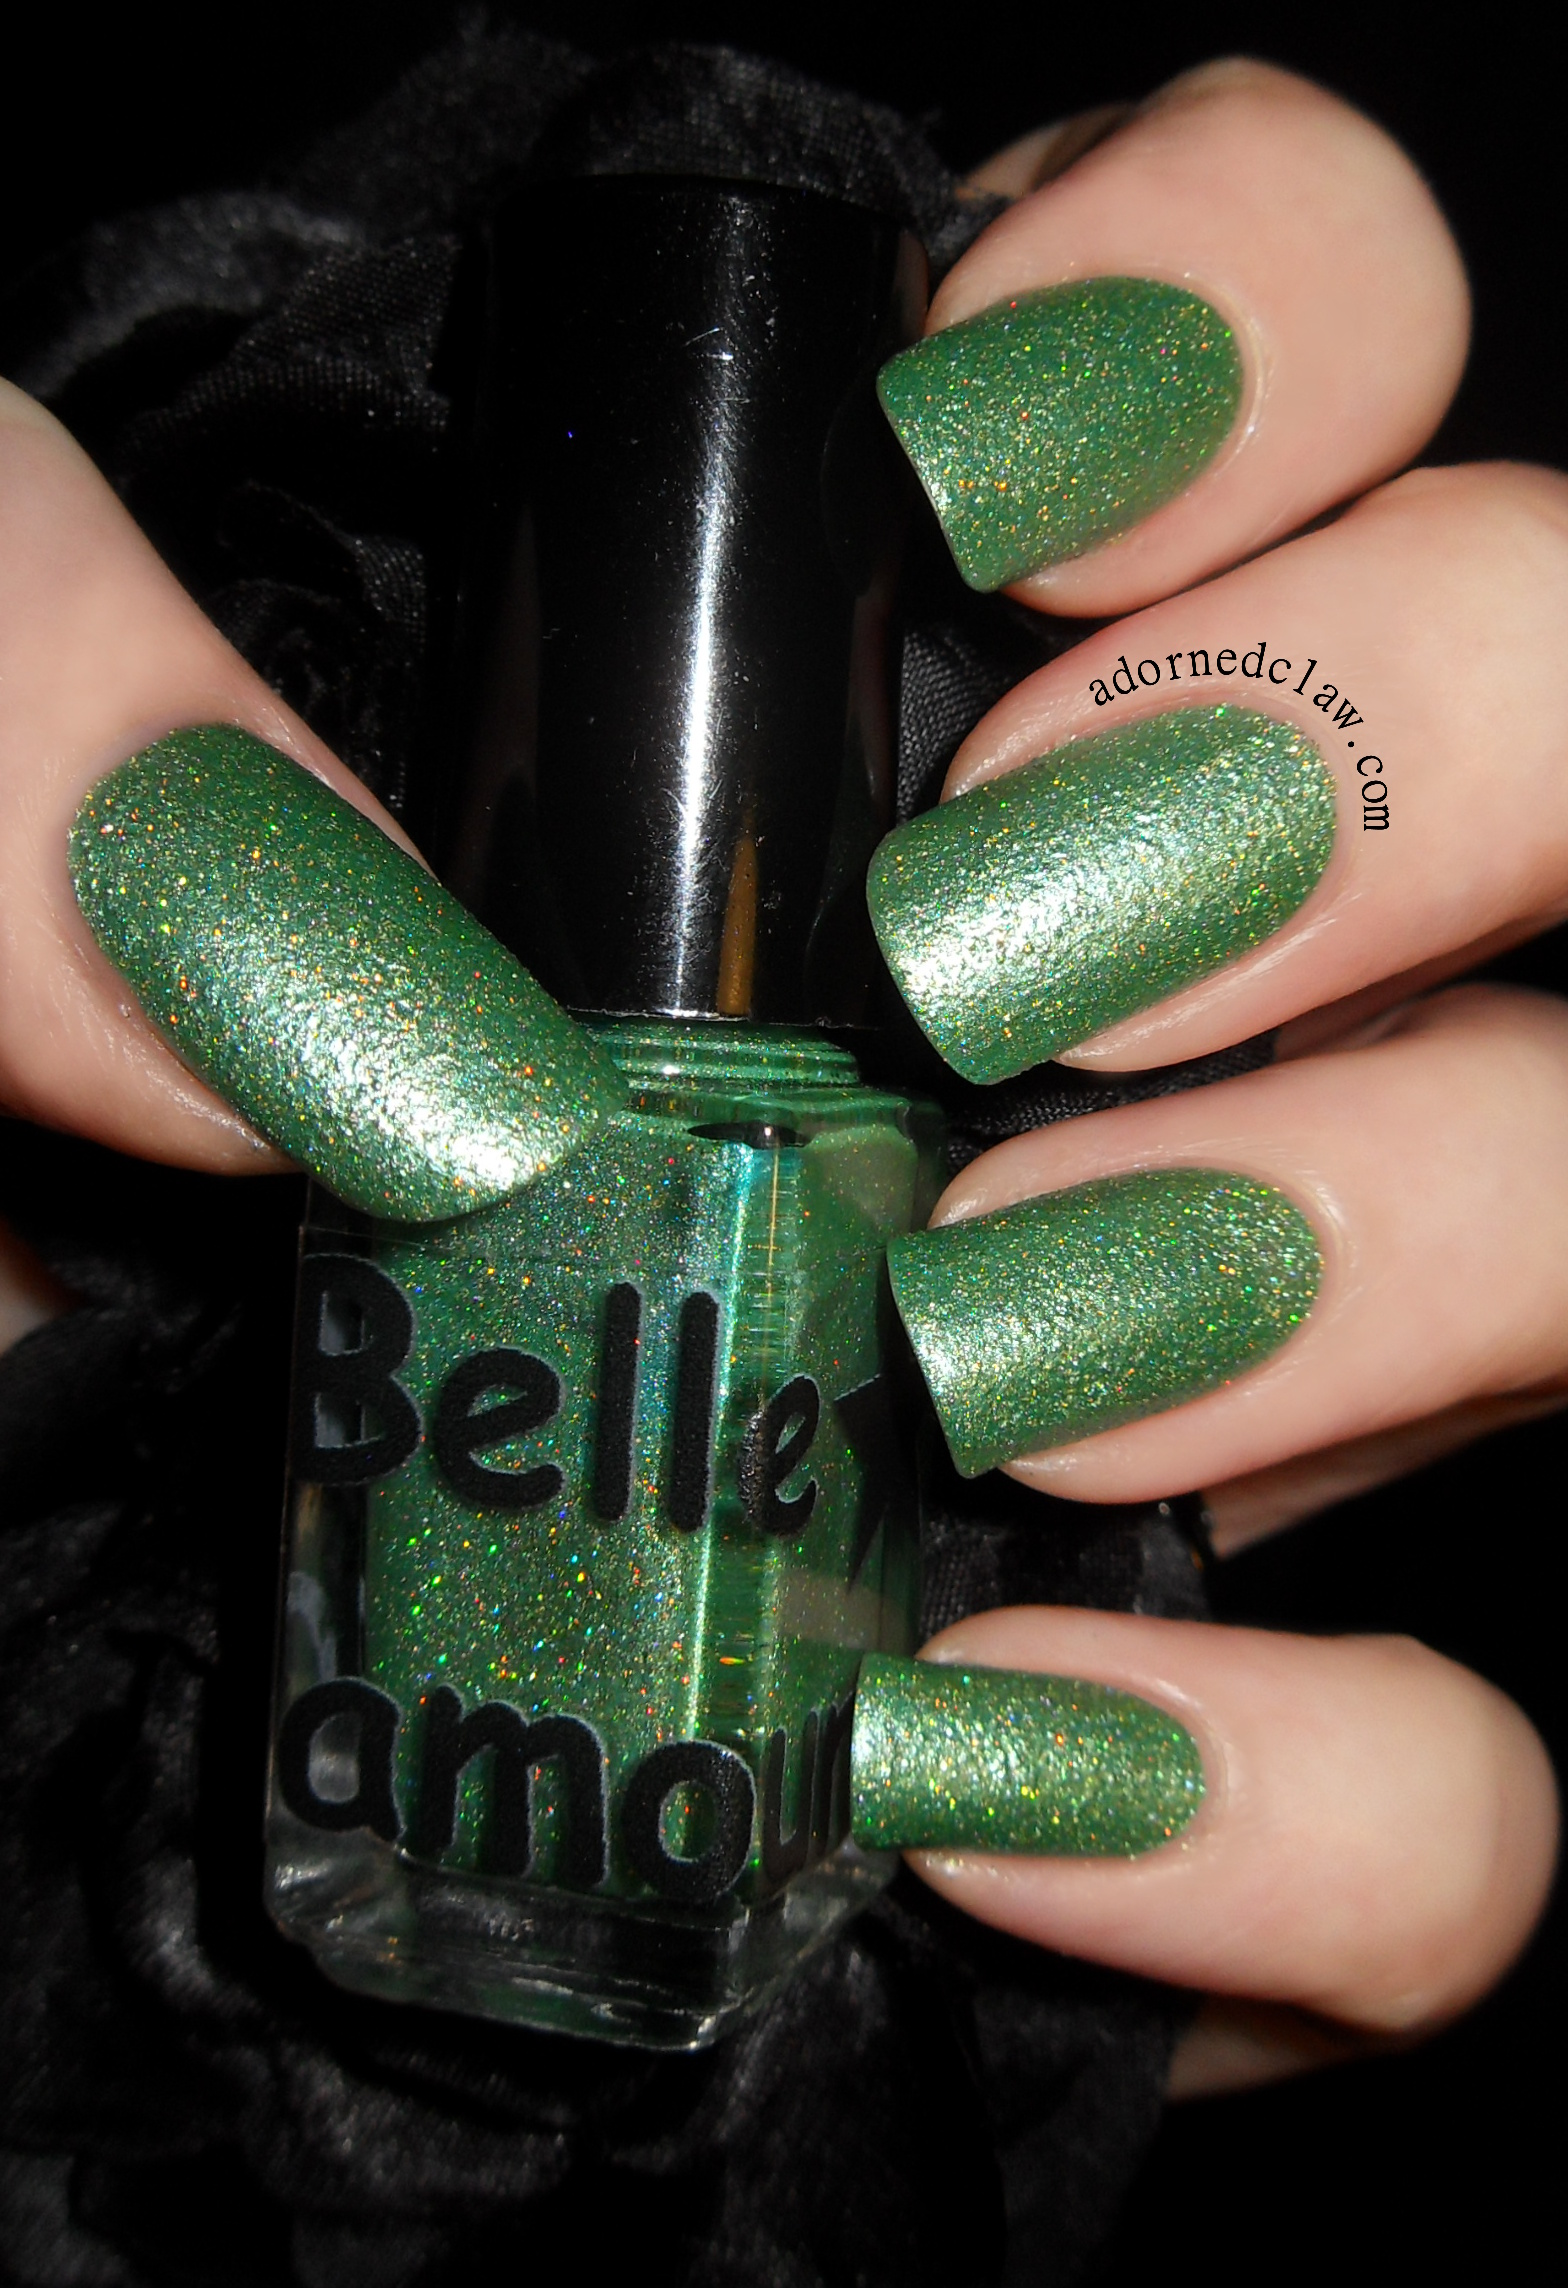
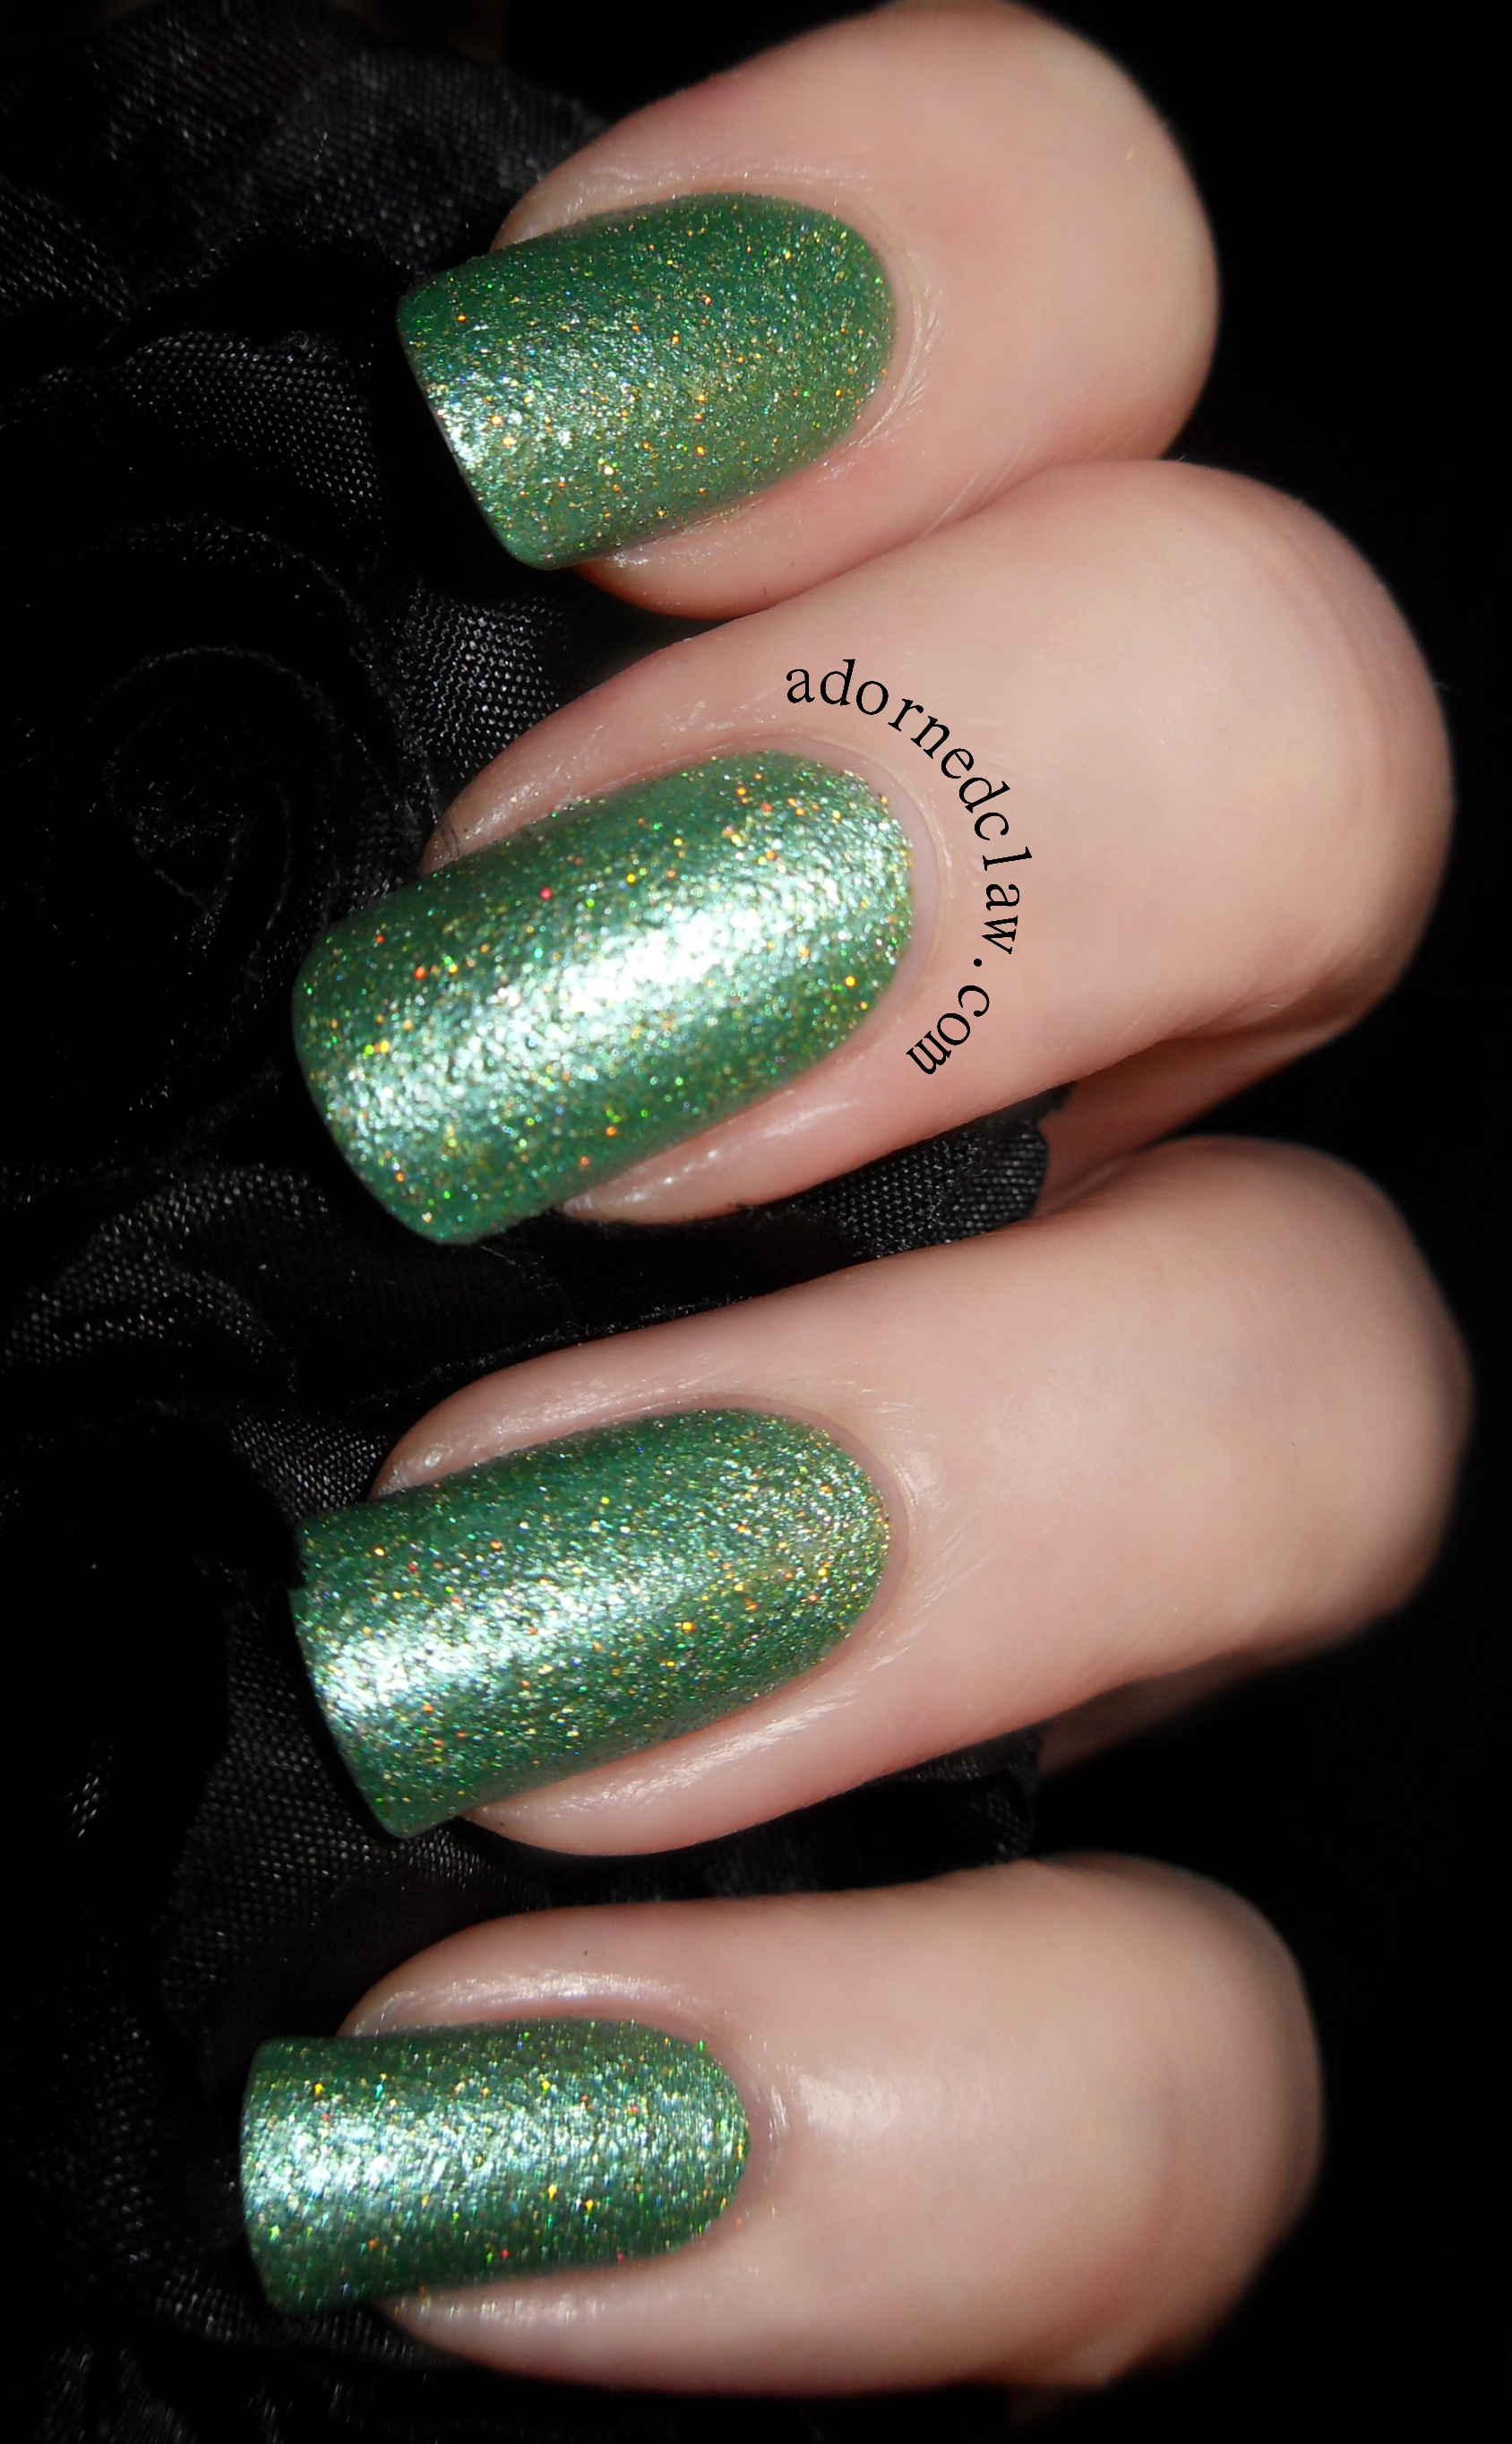
The third polish I’m going to show you is called Green Eyed Monster,

Belle Glamour Green Eyed Monster

Green Eyed Monster

This polish is a lovely mid toned green shimmer, with loads of holographic glitter. On the first coat I found the application to be a bit odd, it was a little bit clumpy and difficult to get an even layer, but as the first coat dried it revealed the texture! Which was a wonderful surprise! 🙂

Belle Glamour Green Eyed Monster

Green Eyed Monster

I applied the second coat and the coverage was perfect! It’s not an overly textured polish, but it really adds an extra dimension to this already lovely polish, It makes the Holographic glitter really sparkle too!

Belle Glamour Green Eyed Monster

Green Eyed Monster

And last of all this is Silver Arrow.

Belle Glamour Silver Arrow

Silver Arrow

When I first removed this polish from the packaging, it looked like a very average mid toned silver metallic, but the moment I moved it into the light the holographic shine was revealed!

Belle Glamour Silver Arrow

Silver Arrow

I applied three coats of Silver Arrow, the coverage was wonderful. I have found that with some holographic polishes there can be a lot of creasing up and dragging, but that is really not the case with this one! The application was perfect even with my normal base coat!

Also there where no brush marks and it was wonderfully self leveling!

Belle Glamour Silver Arrow

Silver Arrow

Silver Arrow is definitely my favourite out of the four polishes 🙂

I brought these four polishes at a discounted price and the review of them is my honest opinion 😀


Canmake – Nail Polish From Japan!

Here is the fourth bottle of my Japanese nail polish stash that my wonderful friend brought back for me! :D

Canmake Nail Color Pink Glitter

Canmake Nail Color Pink Glitter

How adorable is the little bottle!?! It holds 8ml of polish, this is shade number 34 and it’s called Pink Jelly!

Here is the English language version of the Canmake website.

Canmake Japanese Nail Polish Pink Glitter

Canmake Japanese Nail Polish Pink Glitter with flash

The formula for this polish is really nice, it has a huge amount of glitter that flowed from the brush really nicely. The glitter is a mixture of silver micro and circular silver holographic.

I applied two coats over base coat. The drying time was a bit longer than I would have liked, it was still a bit squishy after 15 minutes and the finish was a little bit grainy when it was dry, but a good fastdry topcoat would fix that!

with Flash

with Flash

The base colour looks so much darker with the flash… Luckily we had about 5 minutes of actual sunlight today!

Canmake Colorful Nails

Canmake Colorful Nails

This polish is definitely much prettier in ‘real’ light lol!

Canmake Colorful Nails

Canmake Pink Jelly In sunlight

This is a really cute polish! I really love the glitter combination with the pink base colour 😀


Filthy Gorgeous With Black Holographic Accent!

I have shiny purple nails to show you today! As well as my first attempt at individual glitter placement! 😀

The purple creme polish is from a brand called Filthy Gorgeous, the shade is called Pulp!

Black Holographic Glitter is so shiny!

Black Holographic Glitter is so shiny!

Pulp is a really nice dark plum, I found the formula to be a quite thin and sheer, but the coverage was ok after three coats.  It’s very glossy and dried reasonably quickly but it could probably have done with a fourth coat.

Filthy Gorgeous Pulp

Filthy Gorgeous Pulp

The bottle is really cute! (sorry about the terrible picture)

shiny shiny shiny!

shiny shiny shiny!

For my accent nail I used two thick coats of Black Magic from Revlon, while it was still wet I used a damp toothpick to place individual bits of the black holographic glitter onto the wet polish. It really didn’t take as long as I thought it would, it was only about 5 minutes! I think that if I had done all of my nails like this it would have taken ages, especially on my right hand lol!

After the polish was dry I applied a coat of Seche Vite, then I carefully filed away the scratchy bits of glitter that where poking over the edge of my nail and added some more topcoat to seal the filled edge!

😀


Art Deco Inspired Taped Nails!

Art Deco Taped Nails

Art Deco Taped Nails

I used a lot of sticky stuff for this look! Ring reinforcements, french tip guides and striping tape! In hindsight I really should have completed one nail at a time, I ended up covered in bits of striping tape, I even found some in my hair!

The base colour is Strap On Your Moon Boots from China Glaze, and I used Black Magic from Revlon for the detail.

I used topcoat to stick on the studs! and another coat to finish it of, The color Club topcoat did dull the Holo effect of the polish a little, But other than that I really love how this turned out!

Art Deco Taped Nails

Art Deco Taped Nails


Subtle Silver and Grey Nail Art

I have some subtle grey and silver nails today, they actually turned out to be a lot more subtle than I was expecting!

I started out with three coats of Pelican Grey from China Glaze, It’s a lovely pale grey with a slight silver shimmer, then I used Cosmic Dust which is also from China Glaze, to create the gradient and stamp the accent nail.

Subtle Silver

My camera was actually behaving today! so here is a bonus close up of the stamping 🙂

subtle silver close up

The plate I used is from Messy Mansion MM16 it is available here.

subtle silver

I finished it off with a coat of Seche Vite.

I’m so not used to not having bright colours and black on my nails that my hands don’t look like my own oO I’m not sure that I like it lol